

I learned the hard way that rushing a floating floor is a recipe for gaps and buckling, so give those planks a full 48-hour acclimate. Spread the boxes flat, away from vents and sun, like I didn’t do that one time.
Next, roll out your underlayment, seal those seams tight, and snap a center line so you’re not chasing crooked walls.
Build 3-5 solid foundation rows straight through your hallway, transfer those lines into adjoining rooms, then finish with transitions tucked under door casings.
The final click confirms proper installation when each plank seats correctly.
Let Your Floating Floor Acclimate for 48 Hours

Before installing, haul every box into the room where you’ll lay the floor and let it acclimate for a full 48 hours minimum. Engineered wood requires this adjustment period to perform properly.
Spread the boxes flat and unstacked in the center of the room, away from direct sunlight through windows and away from heating or cooling vents. Each box needs its own acclimation time, not just the room, or you’ll develop wavy, warped flooring.
Monitor humidity levels carefully to prevent expansion gaps. Temperature fluctuations also affect installation results. Avoid installing during extreme temperature swings, such as an 80-degree day followed by frost. Proper acclimation produces better results than rushing the installation process.

For use with wood subfloors only, to reduce vapor flow without trapping moisture

For use as a vapor barrier when installing Vinyl, laminate, SPC and engineered wood flooring

Roll Out Underlayment and Find Your Center Line

Once your floor has settled in, I’m rolling up my sleeves and getting down to laying that underlayment. This is the cushion between your planks and subfloor, and it matters. I unroll it like I’m unfurling a red carpet, right side up (yes, there’s a right side; check the label, as I’ve learned the hard way), overlapping those seams so nothing sneaks through.
I find my center line by measuring from each wall to nail that perfect starting point. It keeps everything balanced, with nothing wonky sneaking up on us later. I’m trimming around corners with my utility knife, leaving that expansion gap of about a quarter inch, just enough to breathe. Flat, smooth, no bubbles. We’re building something beautiful here, together.

🔨【1/4 Inch& 1/2 Inch】Different from other triangular spacers, our gaskets are available in 2 sizes, 1/4 inch and 1/2 inch, Meet your needs for larger gaps. and the quantity is 20pc, which is enough for you to use. Let you install your laminate wood flooring more conveniently and easier.

1/4 INCH & 1/2 INCH DESIGN: The flooring spacers include 1/4 inch and 1/2 inch gaps from the wall, can provide an appropriate expansion gap between the floor and the wall, to avoid damage.

ONE SET FITS MOST FLOORS: These floor spacers fit laminate, LVP, vinyl plank, engineered hardwood, tile, bamboo and floating floors, so one kit covers the floor types you actually lay—no need to match a different spacer to each floor
Build Straight Foundation Rows in the Hallway

With the underlayment smooth and that center line snapped, I’m ready to get my hands on some actual planks. I’m building 3 to 5 solid foundation rows of laminate running lengthwise down this hallway.
I measured wall-to-wall, split that number in half, and found my alignment. I extend these first rows wall-to-wall, keeping everything straight as an arrow, because wonky foundation rows mean nightmare end cuts later. I learned this from previous projects where poor foundation rows created alignment issues throughout the installation.
I use my cheat sheet from 10 boards, marking 6 to 8 iterations to guide positioning. Once these rows sit perfect, I secure them so nothing shifts.

Seam Tape for Underlayment

Premium Materials: You will receive 1 roll of vapor barrier tape, each measuring 4 inches × 180 feet with a thickness of 9 mils. It offers extensive coverage and exceptional physical strength, featuring tear resistance, abrasion resistance, and long-lasting durability

Ealyder Tape Premium Heavy-Duty Vapor Barrier TapeThis 4 inch x 180 ft vapor barrier tape features 9mil thickness, outstanding durability, insulation and UV resistance. It defends against harsh weather, and works great for crawlspace encapsulation, floating floor underlayment, marine maintenance, outdoor protection and various repair tasks.
Transfer Lines and Cut Planks for Adjoining Rooms

How do I keep that hallway magic from fizzling out the second I step into the next room. I transfer lines, that’s how. I snap chalk from my perfectly straight hallway foundation right through the doorways into adjoining rooms, because wonky transitions are the fastest way to spot a rookie.
I use those hallway reference lines to pinpoint exactly where my first row starts in each adjacent space. No guessing, no eyeballing it. I’ve tried that approach, and the results were poor. Following my cheat-sheet from the 10-board layout, I mark cuts so end joints stay staggered and gorgeous, not clustered like a bad haircut. I pause, check my video notes, and verify my transferred lines match reality before I slice that laminate flooring.

Premium PVC Material - Lightweight, durable, and water-resistant. Not wood, ensuring long-lasting quality and performance.

SEAMLESS TRANSITIONS - Effortlessly bridge the gap between different flooring types with our advanced adhesive technology. No more tripping hazards or unsightly gaps. Achieve a professional finish.

【Premium Material】Transition strip is made of high-quality PVC material. The surface is scratch-resistant, wear-resistant, dirt-resistant, easy to clean and is not prone to staining. Gentle slope design significantly reduce the risk of tripping. (Tips: Due to rolled packaging, the strip may arrive curled. Please gently roll it in the opposite direction to flatten it)
Install Transitions and Complete the Floor

Planks are down, lines held true through every doorway, and now I’m staring at the finish line. Those raw edges where my engineered floor meets tile, carpet, or maybe some vintage linoleum you couldn’t bear to tear up require transitions. I’m tackling transitions first, undercutting casings with my flush-cut saw so flooring slides underneath without awkward gaps or wonky lifts. I leave that crucial 5/16-inch expansion gap on both sides of transition strips because this floating floor needs room to breathe with seasonal changes. Three pilot holes and 4d finish nails secure transitions flush to the subfloor, not the planks themselves. Baseboards and quarter-round hide the perimeter gap, nailed to walls and never flooring. Tap those final joints locked with scrap wood and step back. The floor is complete.

✔ Self sealing adhesive tape for ease of installation
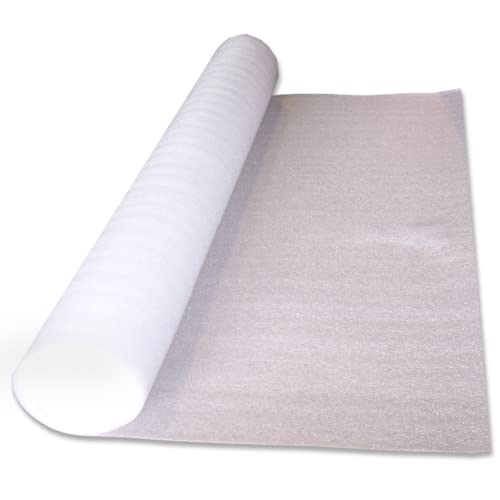
Multipurpose Foam Underlayment – Ideal for laminate and engineered wood flooring; bridges minor subfloor imperfections for a smoother surface.

COVERS LARGE AREAS – Each roll of this flooring underlayment covers 200 sq ft and is 3 mm thick, providing a thick underlayment layer with an integrated moisture barrier for enhanced floor protection.




