

I’ve fixed squeaky floors in my 1920s bungalow twice, first time I ignored seasonal swelling, a rookie mistake. Start by walking slow, feeling where the floor gives, then mark it with painter’s tape. For carpet, I drive scored screws straight through the pile; they snap flush and vanish. Hardwood requires pilot holes, then snap-off screws dabbed with wood filler. Pull carpet back if you need to hit joists directly, or grab a Squeak-No-More kit for plush shag that fights back. Powdered graphite works in a pinch, but it’s a temporary solution, not a permanent one. Control moisture year-round with a dehumidifier in July and a humidifier in January, or you’ll be back here like I was, cursing your own shortcuts. If the whole room bounces like a trampoline, call a pro; that indicates a structural problem, not a stubborn one. I’ve learned which fixes last months versus decades.
Understand Why Floors Squeak and Recur
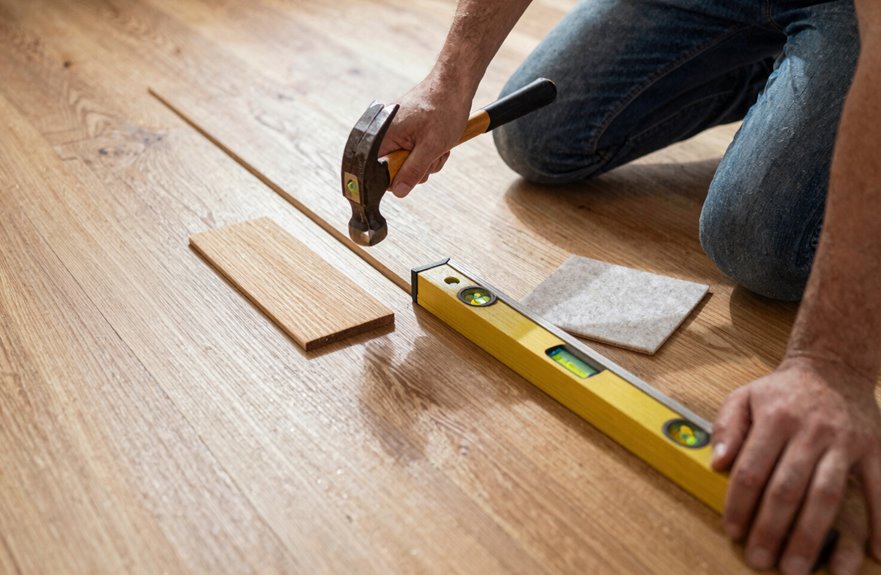
Why do our floors seem to have opinions about every step we take? Wood rubbing against wood, boards separating from subfloors, and fasteners loosening create that maddening chorus of squeaks that follows us room to room.
Seasonal humidity causes significant movement in flooring materials. In summer, boards swell and push against each other; come winter, they shrink back, leaving gaps where friction generates noise. Without proper expansion gap planning during installation, this problem becomes inevitable.
Age compounds the issue through drying, shrinkage, and loose fasteners. Beautiful hardwood, carpeted upstairs spaces, and even tile floors can all develop unexpected noise over time. Understanding these patterns allows homeowners to address the root causes and eliminate squeaking effectively.
Locate the Exact Squeak Without Damaging Carpet

I always start by zeroing in on the culprit without tearing up my carpet. Nobody wants a renovation project when they’re just trying to fix a squeak. First, I pull back the carpet just enough to peek underneath and check for loose subfloor movement instead of blaming innocent nail heads. Then I press down hard while my partner watches from below to pinpoint whether the squeaky floor source lives at the joist, board edge, or somewhere else. I grab my flashlight, hunt for gaps or lifted edges, and feel around for soft spots in the padding that can create false indicators about where the problem actually is. Finally, I mark the exact spot with painter’s tape. No guesswork, no extra holes, just precision.
Fix Carpeted Floors With Scored Screws (Minimal Damage)

The scored-screw trick is an effective fix because it lets you repair floors without extensive damage. Squeaky floors can be silenced through plush beige carpet without landlords noticing.
Grab scored screws, the kind designed to snap off flush. Pull back the carpet just enough to spot the exact squeak zone, then drive the screw straight through the fibers into solid subfloor or joist. Use screws, not nails, because this repair will hold permanently. The scored head snaps off and disappears into the pile. Fluff the carpet fibers and the job is complete. No patching or visible repairs remain. Your vintage rug stays in place and the squeaking stops.
Pull Back Carpet to Anchor Subfloor and Stop Squeaks

I’ve wrestled with more squeaky floors than I care to admit. You’ve got to pull that carpet back like you’re revealing a secret, pressing down with your palm until you feel the subfloor bounce or shift under your weight. That movement indicates the problem location. Once you spot the movement, grab your drill and sink pilot holes through the plywood, which is the subfloor, the flat wooden layer under your carpet. Drive screws deep into the joists, those sturdy horizontal beams hiding underneath like floor bones. Scored screws are the best choice, the kind that snap off flush so your carpet lies smooth. Without them, a lumpy patch becomes a new problem wearing an old disguise.
Locating Squeak Sources
Where exactly is that squeak coming from? I’ve spent way too many nights tiptoeing around my own house like a cartoon burglar.
First, I pull back the carpet at the suspected spot, just enough to peek, not a full redecorating situation. I’m hunting for subfloor movement; that tiny betrayal between the subfloor and joist when I step. I look for gaps, nail dimples, or screws that have loosened. I walk, listen, walk again with different angles and different pressure until that creak sings its exact location. It’s the equivalent of floor detective work. I mark only the true culprits, keeping carpet disturbance minimal. No point fixing what isn’t broken.
Securing Subfloor Properly
Once I’ve marked exactly where the floor betrays me, it’s time to get my hands dirty. I pull back the carpet, just enough to access the problem area, and there it is: the subfloor movement. Loose panel, gap between joists, classic stuff.
I grab screws, never nails, and drive them flush into the joists below. Scored screws snap clean and hide beneath the carpet. Then I stretch that carpet back, seat it proper, and walk across the area to test. Still squeaking? I hunt again, find that stubborn subfloor movement, and repeat. This process systematically eliminates creaks by securing every loose section of subfloor to its joists.
Squeak-No-More Kits or DIY Screws: Which to Choose

I’ve wrestled with squeaky floors under plush beige carpet and thin office-grade stuff alike, so this kit versus screw debate isn’t one-size-fits-all. Squeak-No-More kits hand you breakaway screws and a depth guide, functioning as a squeak-stopping meal kit, while DIY scored screws let me pick my own length and drive angle. I once snapped three heads before finding the joist. Your carpet pile, how much you’re willing to fuss, and whether you trust your stud-finding skills will determine whether you choose boxed convenience or hardware-store freestyle.
Kit Components Explained
When I’m staring down a squeaky floor at 2 AM because the dog’s pacing woke me up again, I reach for my kit first every single time. Squeak-No-More kits come with everything pre-assembled: snap-off screws, a depth guide that looks like a tiny spaceship, and those clever breakaway heads that shear off clean below the carpet surface. No guessing needed. The quick-tension components grab your subfloor like a firm handshake, anchoring the movement that causes that maddening squeak. I don’t rip up my bedroom carpet, just drill through, tighten until it snaps, and finish. For thick plush carpets or tight spots where lifting isn’t happening, these kits work effectively. I’ve tried the hard way, and this approach is more efficient.
DIY Screw Methods
Those kit components sound slick, sure, but maybe you’re staring at a hardware store bucket of plain scored screws and thinking, “Can I just do this myself?”
Scored screws work by snapping flush with your subfloor, hiding beneath carpet pile. You drill through the carpet, yes, straight through, find that squeaky spot where the subfloor moves, and anchor it down tight.
Skip the joists though. Hit the subfloor between them, where the real movement lives. This method saves around forty dollars compared to kit alternatives.
Selecting Best Option
So here’s the million-dollar question, or actually the forty-dollar question: how do you actually pick between that slick kit with its breakaway screws and my bucket-of-bolts DIY approach?
I’ve wrestled with both, friends. Start by pulling back that carpet. Find your squeak points, feel the movement, then decide. Thick plush? That Squeak-No-More kit saves your carpet integrity without ugly punctures. Low-pile or accessible edges? My DIY scored screws grab subfloor like a dependable connection, snap flush, and finish the job.
Your room layout matters too. Tight corners work well with the kit’s angled gadgets, while open spaces let me drill with abandon. We’re all just eliminating that midnight creak, one smart choice at a time.
Fix Exposed Wood Floors With Nails and Adhesive
Why do those floorboards keep betraying us at 2 AM? We’ve all tiptoed across our own homes like burglars, right?
I grab screws first, always screws, because nails wiggle loose over time. I drill pilot holes to prevent splitting, then drive those fasteners straight through the squeak hotspot into the joist below. Scored screws work particularly well. Snap them flush and hide the evidence.
For extra reinforcement, I run adhesive along the subfloor and tongue-and-groove joints, but only when everything’s bone dry and aligned. Press, fasten, and wait. Then I stomp-test that spot to verify the repair. If movement persists, add more fasteners. This methodical approach eliminates squeaks without leaving visible damage.
Quick Squeak Fixes: Lubricants and Shims That Work
With squeaks that refuse to quit, I reach for the powder first: graphite or talcum, nothing fancy. Sometimes the simplest fix is the smartest one. I grab my thin applicator, the one that looks like a weird straw, and puff powdered graphite deep between those tongue-and-groove joints. No carpet removal needed.
Here’s my battle-tested combo:
| Fix | Best For |
|---|---|
| Powdered graphite | Wood-on-wood friction, quick silence |
| Talcum powder | Same deal, grab what’s handy |
| Thin applicator nozzle | Sneaking under carpet without lifting |
| Wood shims | Gaps between subfloor and joist |
| Finishing nails (tapped low) | Keeping shims snug, hidden beneath |
I shim where boards meet joists; tap gently and stay below carpet level. Carpeted spots require temporary fixes. Temporary solutions extend the time between squeaks returning, and permanent elimination depends on the underlying cause of movement.
Stop Seasonal Squeaks From Coming Back
Those quick fixes I just showed you are effective, but you’ll want lasting results. I learned the hard way. My hardwood floor squeaked every winter like a horror movie soundtrack because I ignored humidity control. Here’s how to prevent seasonal squeaks:
- Run a dehumidifier in summer and a humidifier in winter. This keeps wood stable with minimal movement.
- Acclimate flooring before installation by letting boards adjust to the room’s conditions first.
- Leave 1/8-inch expansion gaps at edges, since crowded boards squeak when they shift against each other.
- Tighten loose boards seasonally by checking nails and screws before they loosen further.
Your floors will remain silent year-round with this maintenance approach.
Fix Squeaky Hardwood Floors Without Carpet
Because I’ve spent too many nights tiptoeing across my own hallway like a cartoon burglar, I’m focused on silencing squeaky hardwood floors.
Wood floor squeaks happen when boards rub against loose subfloor fasteners or shifting joists, especially after decades of humidity changes warping everything slightly out of alignment. My favorite approach involves driving scored screws through pilot holes. These screws snap off flush beneath the surface so you avoid staring at metal polka dots afterward. I countersink them, dab wood filler, and the repair becomes invisible.
Stabilizing indoor moisture also reduces squeaking. Running dehumidifiers in swampy summers and humidifiers when winter heat turns your house into a desert prevents wood movement that causes noise. These adjustments work effectively and allow you to walk silently at midnight without disturbing others.
When to Call a Pro for Persistent Squeaks
I’ve tried every trick in the book—shims, screws, baby powder—and that floor still sounds like a haunted house soundtrack every time I walk to the fridge. When squeaks spread across rooms or the whole surface feels like it’s breathing and shifting underfoot, that’s not a quick fix anymore. Your house is signaling a structural problem underneath. At that point, I’m calling a pro because sistering joists or replacing subflooring isn’t a weekend project. It’s a serious structural repair that requires professional expertise. The cost of hiring a contractor is far less than the cost of repairing water damage, pest infiltration, or actual structural failure that can result from ignoring persistent movement in your floor system.
Signs of Structural Damage
While I’ve chased down more squeaks than I care to admit, there comes a point when even my stubborn DIY pride has to accept that structural damage requires professional help.
Watch for these warning signs that require calling a professional:
- Squeaks that keep coming back after nailing, screwing, and attempting DIY fixes
- Visible gaps between floorboards and subfloor, indicating separation issues
- A bouncy, trampoline-like feel when walking, especially near joist ends
- Musty smells, stains, or warping that indicate water damage and possible rot
When your floor flexes like a diving board or cracks appear in the subfloor, professional assessment is necessary. A fixed-location squeak indicates something is seriously wrong beneath your feet and requires expert evaluation.
Professional Repair Options
Sometimes you need to call a professional, and that’s a practical decision. If your floor sags, shifts, or groans beyond simple board tightening, a pro should assess it because subfloor damage requires expertise. They’ll sister joists, add supports, and spot rot behind walls that you might miss. When squeaks spread across multiple rooms after humidity changes, start with a professional evaluation. Engineered versus solid hardwood requires different solutions. If DIY efforts have failed, they’ll determine if partial replacement is necessary. Structural issues cannot be concealed with rugs, and attempting repairs beyond your skill level creates unnecessary stress.
How Long Different Floor Fixes Actually Last
How long do these fixes actually hold up when you’re walking across them every single day?
Every single day, every single step—how long before that silence under your feet starts to crack?
I’ve been through this, friends. Screws are your heavy hitters here. When I drive scored screws into joists, those suckers grab tight and stay hidden, quietly doing their job for years while pilot-hole nails slowly back out and betray you. What actually holds up:
- Screws into joists: 5–15+ years of silence, even through carpet
- Shim and joist support repairs: 10–20 years if you’re willing to crawl down there
- Glue spots or lubricants: Months, maybe? Not my favorite gamble
- Regular humidity control and quick retightening: extends everything
That snap-off flush design on carpet screws delivers strong performance. I’ve seen them outlast two dogs and a teenager’s growth spurt.




