
I’ve learned the hard way that veneer punishes impatience. I sanded straight through a ’70s nightstand once, revealing particleboard underneath. Now I clean with warm soapy water and dry thoroughly, then barely kiss the surface with 220-grit sandpaper, following the grain carefully. I glue down any peeling edges, fill chips with wood filler, and always apply a bonding primer because skipping it means watching your paint peel in six months. Two thin coats of chalk or latex paint with proper dry time between them, then seal with polyurethane for moisture protection. Your thrifted dresser deserves a finish that lasts rather than a cover-up that fails prematurely.
Start Here: What Makes Veneer Hard to Paint

Why does veneer furniture make so many DIYers break into a cold sweat? I’ve been there, staring at that paper-thin layer, less than 1/8 inch, glued to MDF, wondering if I’ll sand straight through to the core.
Veneer fights back when it’s glossy or worn, and adhesion becomes your biggest headache. Aggressive sanding destroys everything, so light sanding with the grain is essential, applied gently. Peeling edges occur when moisture sneaks underneath, lifting more surface and creating chaos.
Bonding primer is the critical step, not whatever’s cheapest. Skip it, and watch your paint flake within weeks. Apply multiple thin coats, watching coating thickness carefully to build durability slowly. Patience here separates furniture you’ll keep from furniture you’ll trash.
Choose Your Veneer Paint: Latex, Acrylic, or Chalk

Now that I’ve got my primer locked and loaded, I’m standing in the paint aisle, feeling overwhelmed by the options.
Latex and acrylic are water-based options that offer easier cleanup, flexible adhesion, and won’t suffocate delicate veneer like thick, gloopy oil-based paints. I’ve made that mistake before, never again.
Oil-based paints suffocate delicate veneer—I’ve learned that lesson the hard way. Never again.
Chalk paint is the rebel choice. It requires minimal prep, provides killer adhesion, and delivers that dreamy matte finish. I wiped down my thrifted nightstand, applied two thin coats, and achieved farmhouse style results. No primer is needed sometimes, though I still use one for extra protection.
Two thin coats with dry time between applications will deliver the results you want. Pick the paint type that matches your project goals.
Prep the Veneer Surface: Clean and Sand Without Sanding Through
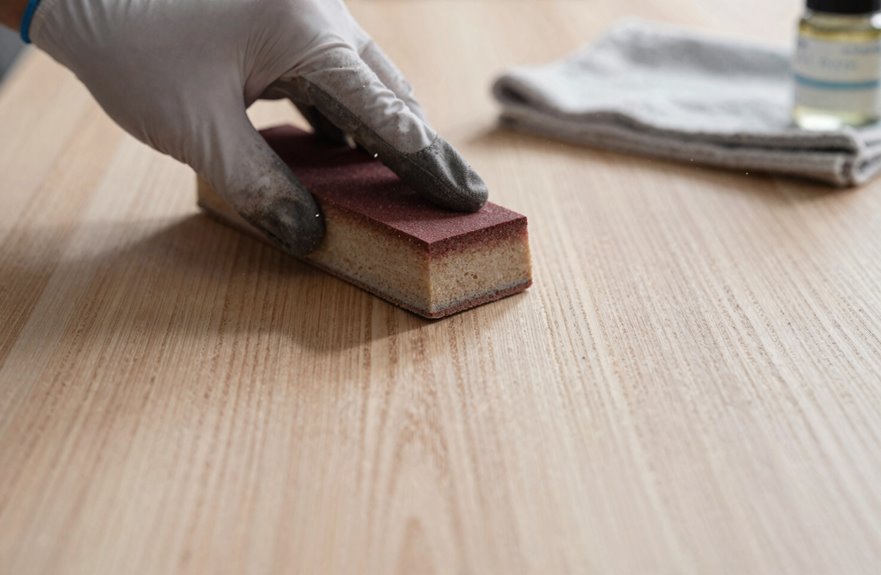
I always start by wiping every inch with warm, soapy water. Think of it like washing a vintage car; you want that surface squeaky-clean, not half-baked. Then I grab my 220-grit paper. Veneer is basically a fancy sticker that will ruin your whole week if you sand through it. I go in soft circles, just enough to knock the shine off, like I’m buffing a cloud, not stripping a floor. This lesson has been learned through experience.
Surface Cleaning Essentials
How do we keep from destroying that paper-thin veneer before we’ve even started? Surface cleaning isn’t glamorous, but it’s essential.
I grab my mild soap or degreaser, the stuff that cuts through mysterious kitchen grease, and wipe every inch. That hidden grime will wreck your paint job. I’m obsessive about this part now after a dresser disaster I’ll never forget.
Once it’s dry, I lightly scuff with fine-grit sandpaper, barely whispering across the surface, not attacking it. We’re talking gentle, even passes, not edge-hunting where the core lurks exposed and sad.
Then comes dust removal. A damp cloth, wrung tight, catches every speck. The surface must be completely dry before primer, or the finish will fail. This prep work is critical for proper paint adhesion and a professional result.
Gentle Sanding Technique
Surface cleaning’s behind us. I’ve sanded through veneer before, and that patchy disaster still haunts me.
Here’s my gentle sanding survival guide: I grab fine-grit paper, around 220, nothing fiercer. This thin veneer layer is basically furniture tissue paper. I’m talking short, soft strokes, always following the wood grain. Never sand across it, unless you want scratch marks visible through your finish like unwanted tattoos.
Edges and corners require the most caution; that’s where I apply minimal pressure, barely moving the paper across the surface. Then comes dust removal, which must be thorough and complete, because trapped grit under primer creates bumpy imperfections. Vacuum, tack cloth, repeat. A glass-smooth surface depends on this step.
Fix Chips and Loose Veneer Before You Prime
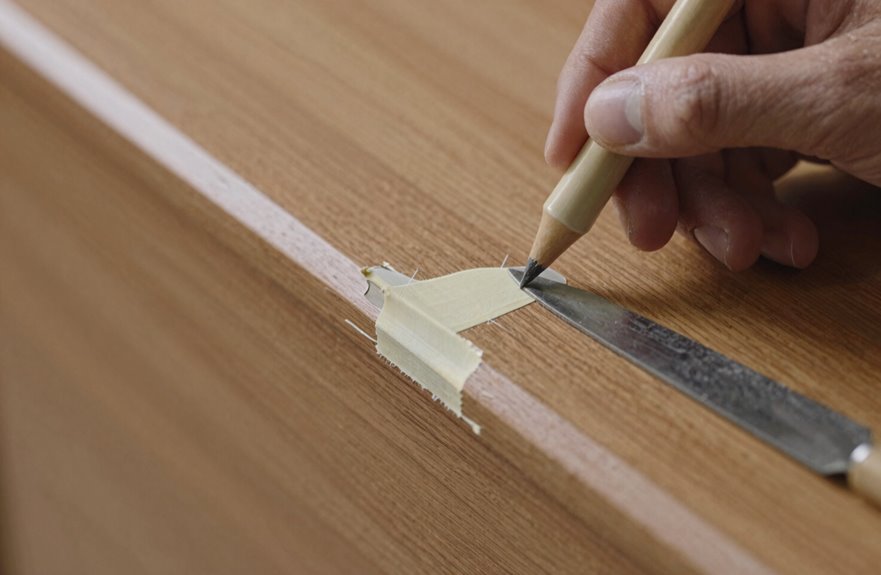
Before I even think about cracking open that primer, I need to address the damage first. My thrifted credenza shows significant wear: chips, cracks, and peeling veneer that needs attention before any finishing work.
I grab my wood filler for the chips, pressing it in like spackle on a rental wall, then sand the veneer until it’s smooth. For loose edges, I glue the veneer with wood glue and clamp it tight. Sometimes I use every clamp I own. If it’s really stubborn, I soak a towel to loosen the old adhesive, pry gently, clean away the residue, and reattach it properly. Then I prime and paint for a finish that lasts.
Prime Veneer So Your Paint Actually Sticks

I always start by wiping down every inch with a tack cloth because dust is the enemy of adhesion. I’ve learned this the hard way when my primer peeled like a bad sunburn. For veneer, I grab a high-quality bonding primer, oil-based or shellac-based, nothing water-based here, and I work in thin, even coats that I can almost see through, building up that grip rather than glopping it on thick like frosting I’d regret. Give each coat time to dry completely. Check the can, set a timer, grab a snack. Rushing this step is how you end up with paint that scratches off faster than a losing lottery ticket.
Clean Surface First
A clean veneer surface is the make-or-break moment most of us rush through. I grab a mild degreaser, maybe soap and water, and scrub every inch of that veneer preparation until my arms ache. Grease, old furniture polish, mysterious sticky spots all sabotage primer adhesion if you let them.
Next comes sanding, using 220-grit like I’m petting a cat, not wrestling a bear. Just enough tooth for the primer to grab, not enough to punch through that thin wood veneer repair zone where someone’s already been sloppy.
Spot peeling requires regluing and clamping tight. Wait for complete drying. Moisture traps create bubbling defects. A clean surface prevents adhesion failure and eliminates substrate contamination issues later.
Choose Bonding Primer
Why skip the good stuff and watch your paint peel like a bad sunburn six months later. I’ve been there, friend, and it stings. Veneer’s sneaky-smooth surface laughs at regular primer, so I grab a bonding primer that actually grips. Oil-based or shellac-based options work best for this application. They seal that slick veneer tight, blocking stain bleed-through from old mystery finishes, because who knows what 1970s shenanigans lurk beneath. I roll on a thin, even coat and let it cure per the label. Patience is required. Then lightly sand for tooth. Kilz spray works in a pinch too. This step separates successful furniture flipping from failed attempts, and you’re already executing it correctly.
Apply Thin Coats
Whisper that bonding primer across every inch like you’re frosting a cake nobody’s allowed to eat yet, because this first coat is the foundation that’ll make or break your finish. Slathering it on thick will cause your chalk paint to peel like a bad sunburn, so apply it in thin layers instead.
Veneer demands respect. After priming, sand lightly with 220-grit, just enough to give that glossy surface some tooth without punching through. Then apply two thin coats of chalk paint without rushing. Let that first layer dry completely before proceeding. Sand between coats, wipe away dust, and watch your furniture transform from forgotten to fabulous. Following this process will produce superior results on veneer surfaces.
Apply Thin Paint Coats for a Durable Veneer Finish
So how do we actually get that dreamy, lasting finish instead of the chipped, peeling nightmare we’ve all seen haunting thrift store flops? I’ve learned the hard way that thick, gloppy paint on veneer fails quickly. It’s an expensive mistake that nobody wants to make.
The solution: two thin coats of chalk paint, nothing more. I apply that first coat, then I wait. Twenty-four hours minimum is required, because adequate drying time prevents adhesion failure and peeling. Between coats, I sand lightly with super fine-grit paper, wipe the dust away, and watch that surface become smooth.
That primer serves a critical function right now. It creates the adhesion layer that holds everything together.
Seal Painted Veneer to Block Water Damage
Those thin coats of chalk paint look gorgeous now, but I’m not stopping there. I made that rookie error before, and one water ring from a sweaty glass turned my “finished” nightstand into a blotchy mess I had to completely redo.
Now I always seal painted veneer because it protects the furniture from water damage. I grab an oil-based polyurethane topcoat, nothing beats that durable, moisture-resistant armor for protecting my hard work. First, I check sealer compatibility with my paint type, whether that’s chalk or latex, because mismatched products peel and weep.
For kitchens or bathrooms, I splurge on epoxy or polyurethane. Standard varnish can’t handle that moisture assault. I wipe my veneer clean, dry, and dust-free, then brush on thin sealant coats, sanding between with super-fine grit. Patience with cure time prevents costly mistakes later. This step makes the difference between a mediocre finish and a professional-looking result.
When to Stain Veneer Instead of Painting
Why stain veneer when I could just slap paint on everything and call it a day? Because sometimes, that grain is gorgeous and deserves the spotlight. I stain veneer when it’s intact, not peeling or delaminating. That thin sheet can’t handle aggressive sanding without wearing through.
If the wood pattern is visually striking, I grab stain. It preserves that natural beauty while giving me finish durability painting can’t match. Sure, painting hides flaws, but priming and sanding for adhesion requires significant effort. Staining skips all that.
I always follow with compatible sealers and top coats. Moisture is the primary enemy. If my veneer looks like it’s been through a war, I replace it first. No exceptions.
Some pieces demand authenticity, not cover-ups. Evaluate each project based on the veneer’s actual condition and the wood’s visual appeal.




