Four lanterns, each built differently: a tissue-covered glass jar, a wax paper cylinder with ironed arborvitae, a $10 store-bought lantern filled with berries and lights, and a folded paper Santa.
Skip a real flame near the paper; the jar and wax paper versions use battery or flameless candles, and the pressed arborvitae softens in color over time.
Cover the Jar in Tissue
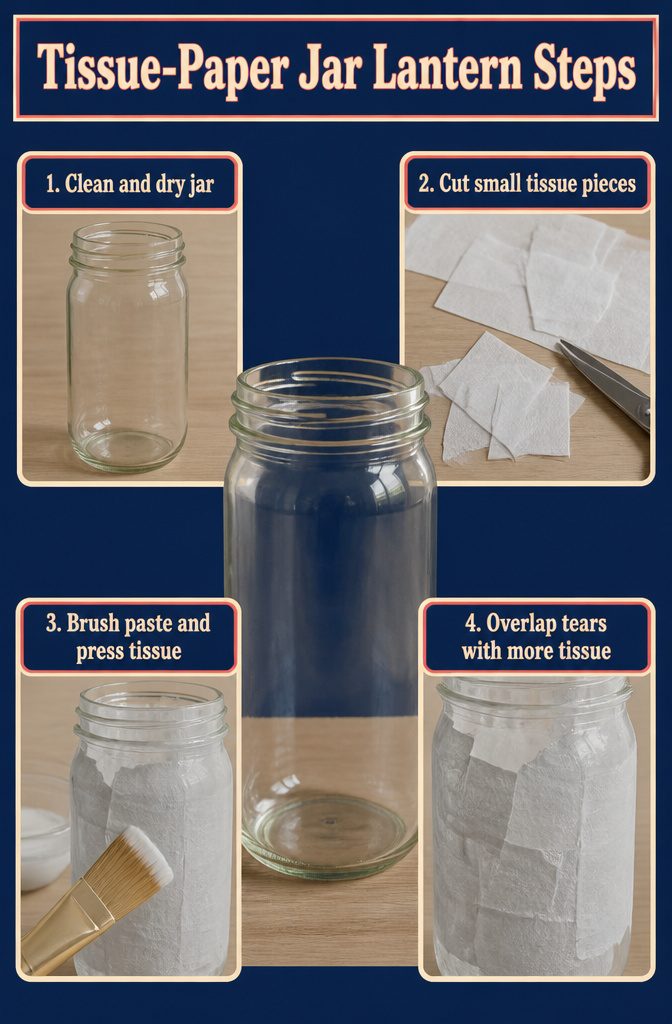
This lantern is rated Easy, with 5 minutes of prep and 45 minutes of active work, for 50 minutes total. It suits children well and makes a handmade gift.
- Start with a clean, dry, wide-mouth glass jar. A mason jar works, but any glass jar will do.
- Cut white tissue paper into strips or squares. Small pieces are easier to lay on a curved jar than a full sheet.
- Brush Mod Podge over the jar and press the tissue on all around it.
- Overlap the pieces freely. Tissue tears while you work, so lay another piece over the tear instead of starting that spot again.
Trees, Snowflakes, and Sealing Coats
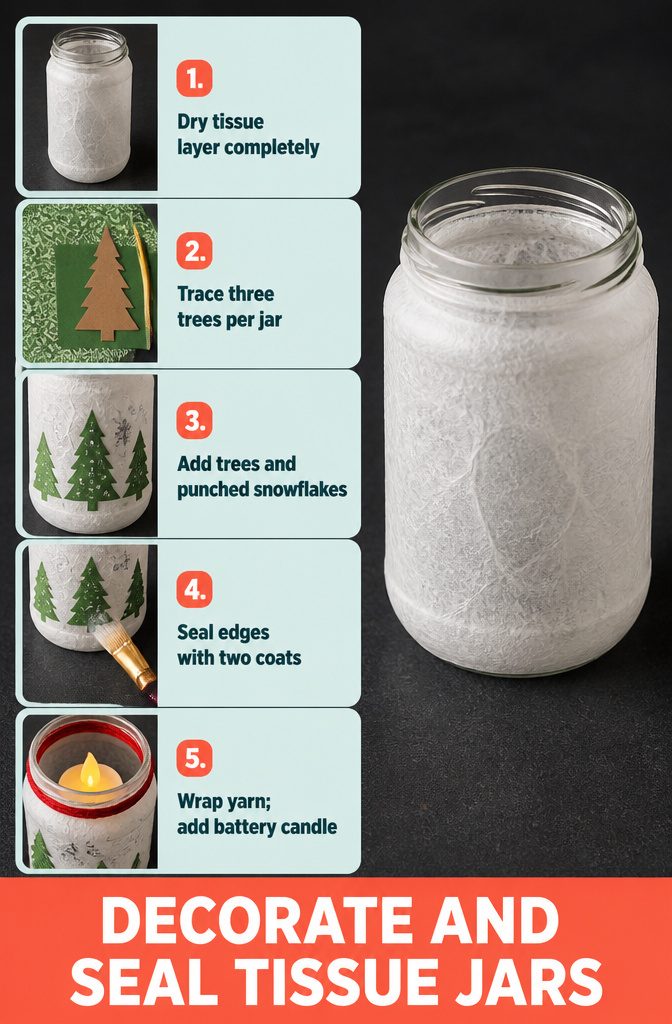
- Let the tissue layer dry completely. Meanwhile, cut a simple tree template from cardboard and trace it onto green or patterned tissue paper. Plan on 3 trees per jar.
- Brush Mod Podge onto the jar wherever a tree will sit, then press each tree on gently so the tissue doesn’t tear.
- Punch snowflakes from silver wrapping paper or silver tissue paper. Use whichever is already in your craft drawer.
- Paint dots of Mod Podge across the jar and set a snowflake on each one.
- Brush on at least 1 final coat over the whole jar; 2 coats seals everything better. Give the paper edges at the top and bottom an extra-thorough layer, then let it dry completely.
- Wrap green or red yarn around the top and set a battery-operated candle inside.
One reader asked about tea lights in baby-food jars. They should fit, though I haven’t tried it, and a battery candle is the safer choice with paper glued to the glass.
Press Greenery Between Wax Paper
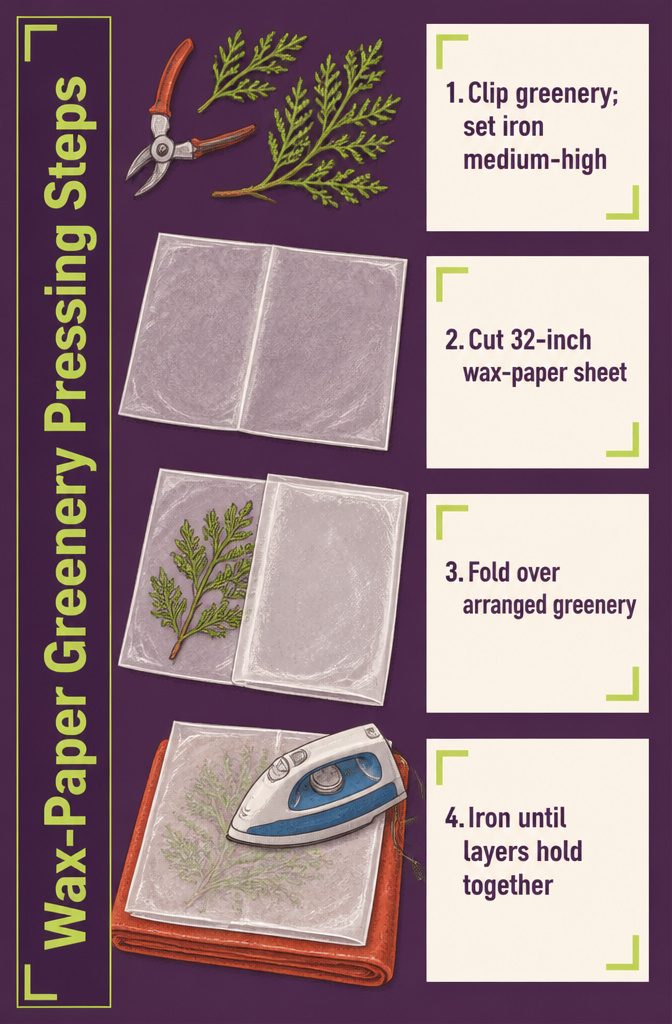
- Clip a few pieces of arborvitae and set the iron to medium high. If the wax paper won’t stick to itself, turn the heat up.
- Cut a sheet of wax paper about 32 inches long, fold it in half to make a crease, and open it flat again.
- Lay the greenery on one half of the sheet, then fold the other half over it.
- Iron both sides several times over a towel or ironing board, until the two layers hold together around the greenery.
Don’t fuss over crisp folds. Bubbles and creases in the wax paper give the finished panel a frosted-candle look, and I’d take that over a flat, perfectly sealed sheet.
Trim, Roll, and Tape
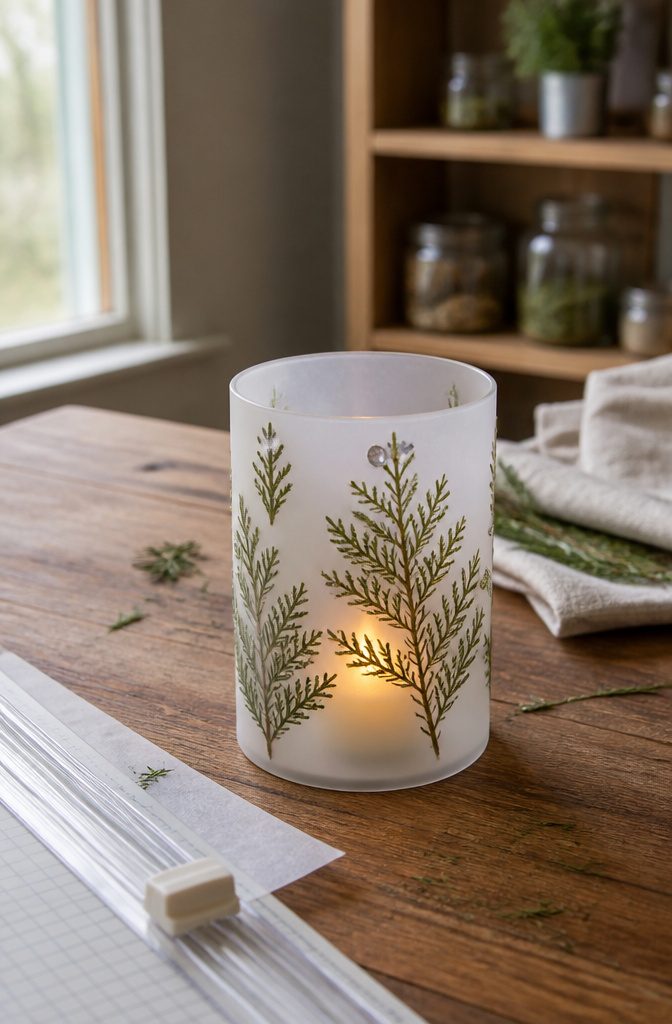
- Trim the sheet to the height and width you want, and clean up any rough edges. A paper trimmer gives straighter cuts than scissors. Taking a generous strip off the top gives you a shorter lantern.
- Expect the greenery to fade. Thick pieces like arborvitae leave an air pocket inside the wax paper, so the layers never seal fully, and the green softens over time.
- Add small gem stickers if you like. They suggest Christmas lights, but they show up better in daylight than with the candle lit.
- Roll the sheet into a cylinder and tape it where the edges meet.
- Set a flameless candle inside. For a lantern you plan to carry, tape the candle to the inside wall and add a string handle.
Fill a Store-Bought Lantern
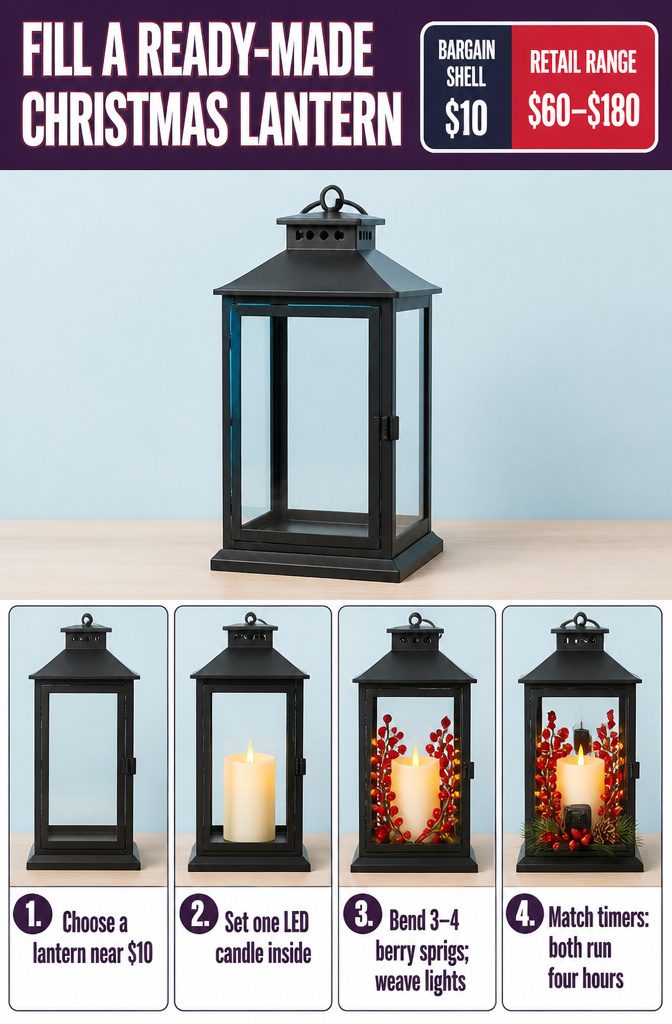
- Buy a ready-made lantern. The one used here cost about $10 at Marshalls, while similar lanterns sell for $60–$180, so I wouldn’t pay more than a bargain-shelf price for the shell.
- Set one LED flickering flameless candle in the bottom. A 3-pack costs $5.
- Bend 3–4 red-berry sprigs around the candle, then weave Firefly battery-powered string lights through them.
- Position the battery pack behind the candle and tuck pine-cone and berry sprigs in front of it so it disappears. Slide the whole arrangement down into the lantern.
Both the candle and the lights have 4-hour timers, so they switch on and off together. Buy a candle and lights that both have the timer, or you’ll be reaching into the lantern every evening.
Add the Handle Bow
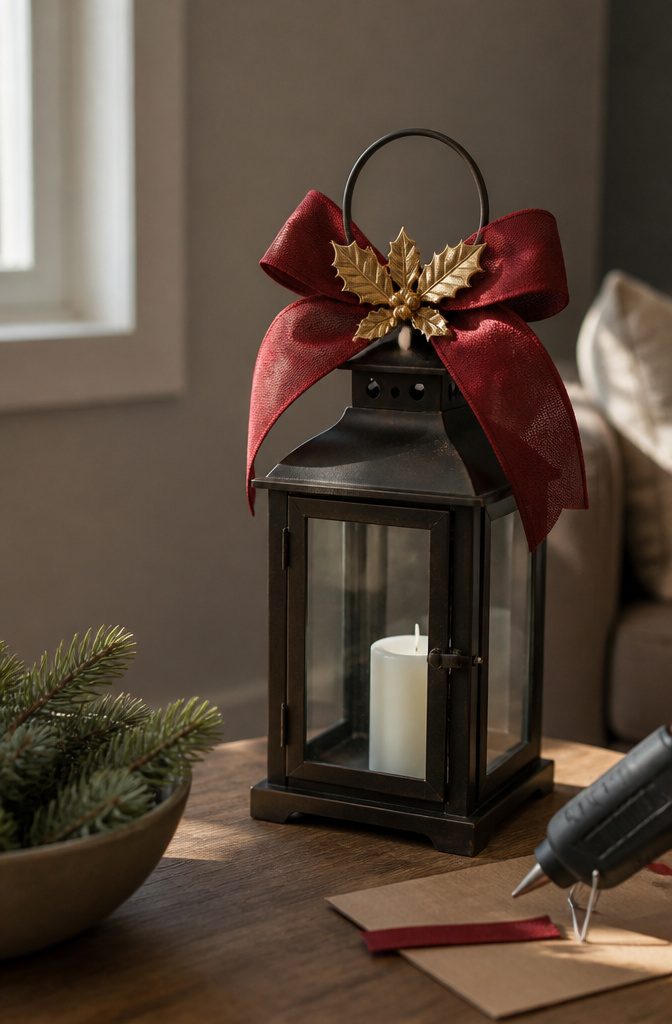
Hot glue suits this step better than craft glue, because a ribbon bow and a heavy ornament need a bond that grabs in seconds.
Plug the gun in a few minutes early, and use low-temp sticks if you can: they’re gentler on skin and less likely to mark the ribbon. Rest the hot gun on its stand or a scrap of cardboard between dabs.
Make the bow from Christmas ribbon, loops first, then pinch the middle. Glue a large ornament into that center; a metal holly ornament covers the pinch point and gives the bow a focal piece.
Run a line of glue along the handle, then press the bow on and hold it until the glue stops stringing and sets.
From outside, the bow is what the eye lands on first. It makes the plain handle look finished.
Fold and Cut the Santa Lantern
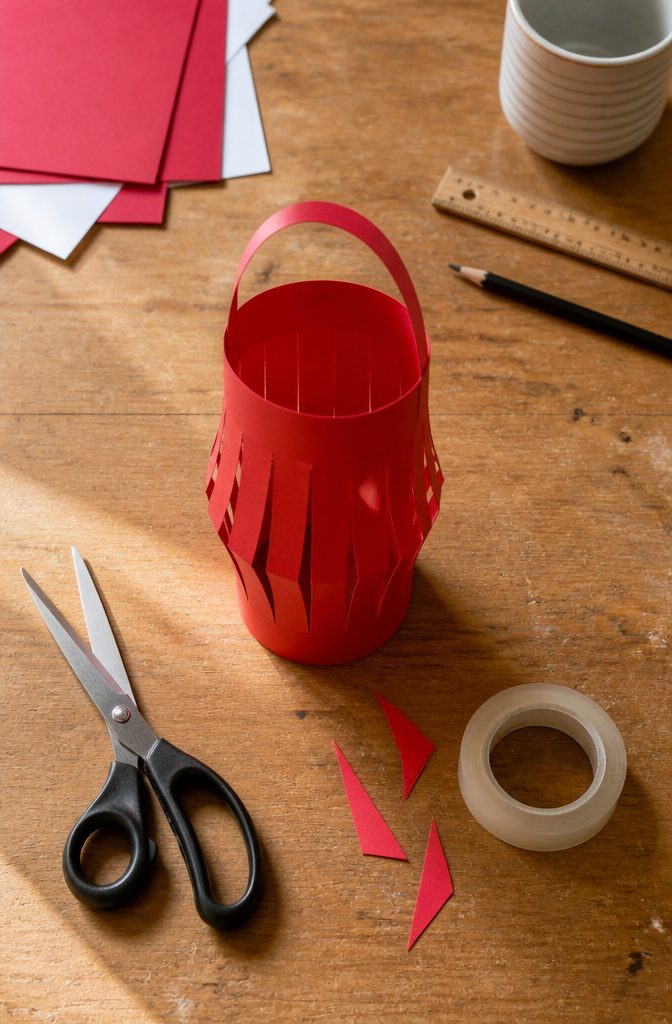
- Fold the red paper lengthwise, then cut a full strip off the top. That strip becomes the handle, so set it aside.
- Draw a line about ½ inch (1–2 cm) from the long edge opposite the fold. This is where every cut stops.
- Cut slits along the folded side, running up to that line. Stopping short is what keeps the lantern in one piece.
- Open the paper and bring the long top and bottom edges together to form the lantern shape. Tape or staple them.
- Staple the handle strip across the top.
This lantern suits preschoolers and older children. For the youngest, I’d choose tape over staples and have an adult draw the line in step 2.
Santa’s Face and Beard
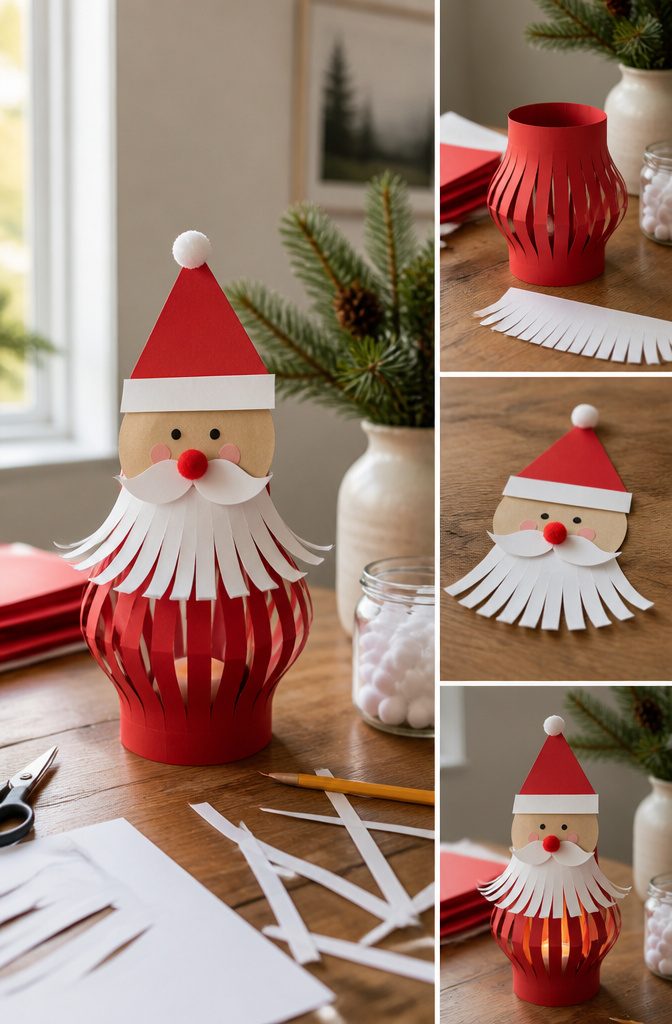
- Trace a coffee cup on skin-colored paper for the face. Trace it on white paper too, draw a mustache and brim, and cut a red triangle hat. The free printable replaces freehand.
- Glue the pieces together, then add a pom-pom nose and bobble plus marker details. Cotton balls or a red paper nose work too.
- Lay the face on white paper and cut a beard that reaches the hat.
- Cut lines from the bottom up to just past the face, curl the strips around a pencil, and glue the beard to the back of the head.
- Once the pom-poms dry, glue the head on, lining up the top of the brim with the top of the lantern.
- Hang it. Yarn, cotton balls, or toddler handprints make a beard too.
Candles, Lights, and Hanging
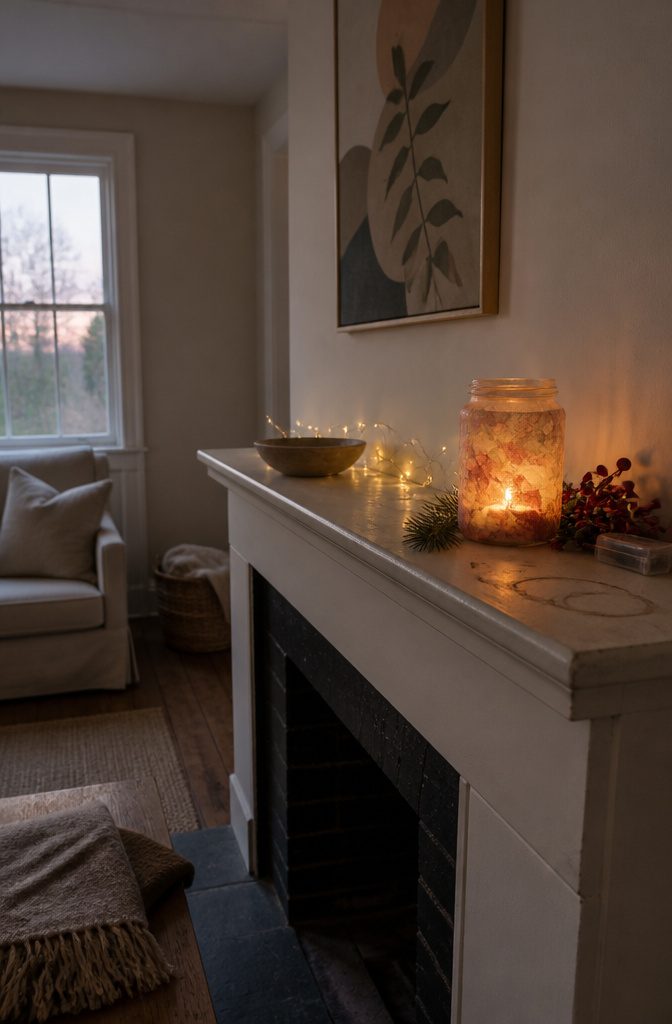
A tissue-covered jar belongs on a table or mantel, with a battery-operated candle set inside the glass. Skip a real flame near paper and tissue.
Wax paper lanterns are the one version I’d hang by choice. Tape a flameless candle to the inside wall before you add the string handle, so the candle travels with the lantern instead of sliding around when you carry it.
The store-bought lantern stays on a table or the floor.
Pair an LED flameless candle with string lights, both on 4-hour timers so they switch on and off together, and hide the battery pack behind the candle and the berry sprigs.
Santa lanterns do either job.
A tea light works for tabletop display. For hanging, string them up as tree ornaments or a garland, and I’d leave the tea light out of those.
Materials for Each Lantern
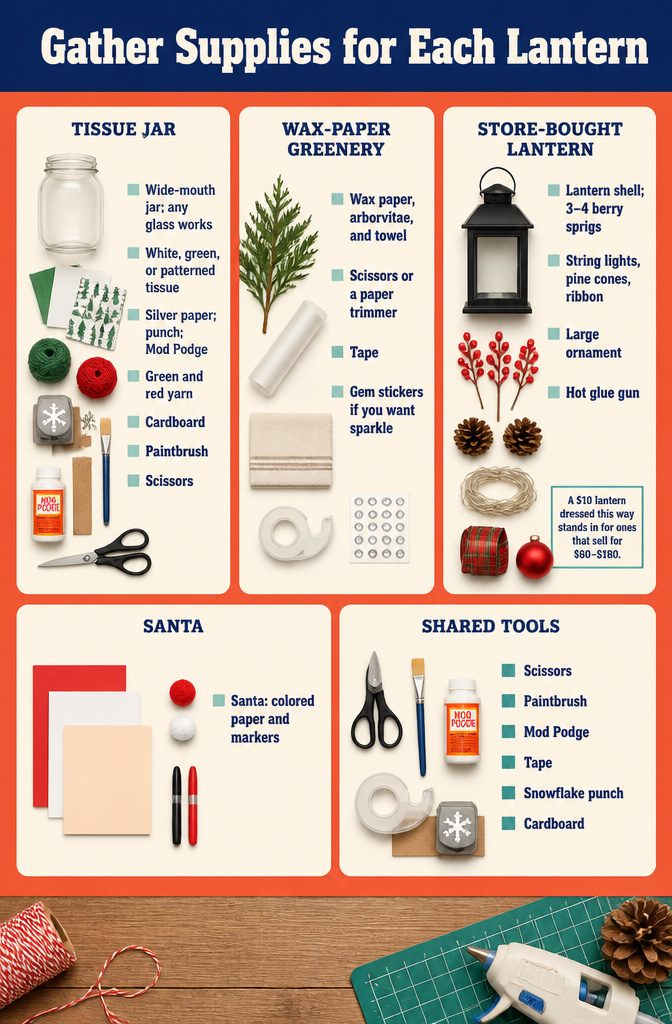
Gather supplies by project, since the four lanterns share almost nothing.
- Tissue jar: wide-mouth glass jars (any glass jar you have works, not just mason jars), tissue paper in white, green, or patterned for the trees, silver tissue or silver wrapping paper for the snowflakes, green and red yarn, a snowflake punch, cardboard, Mod Podge, a paintbrush, and scissors.
- Wax paper: arborvitae, wax paper, a towel or ironing board, scissors or a paper trimmer, tape, and gem stickers if you want sparkle.
- Store-bought: a lantern, 3–4 red berry sprigs, fake pine cones, string lights, ribbon, a large ornament, and a hot glue gun. A $10 lantern dressed this way stands in for ones that sell for $60–$180.
- Santa: red, white, and skin-colored paper, black and red markers, a red pom-pom for the nose, and a white one for the hat. For kids, I’d start here, since it’s paper and markers only.
Frequently Asked Questions
Can I use tea lights in baby-food jars for a Christmas lantern craft?
Tea lights should fit in baby-food jars, but I haven’t tried it myself. A battery-operated candle is the safer pick, since the tissue and paper are glued right onto the glass.
A real flame close to that much paper is a risk, so keep the lit lantern on a table or mantel with a flameless candle inside.