
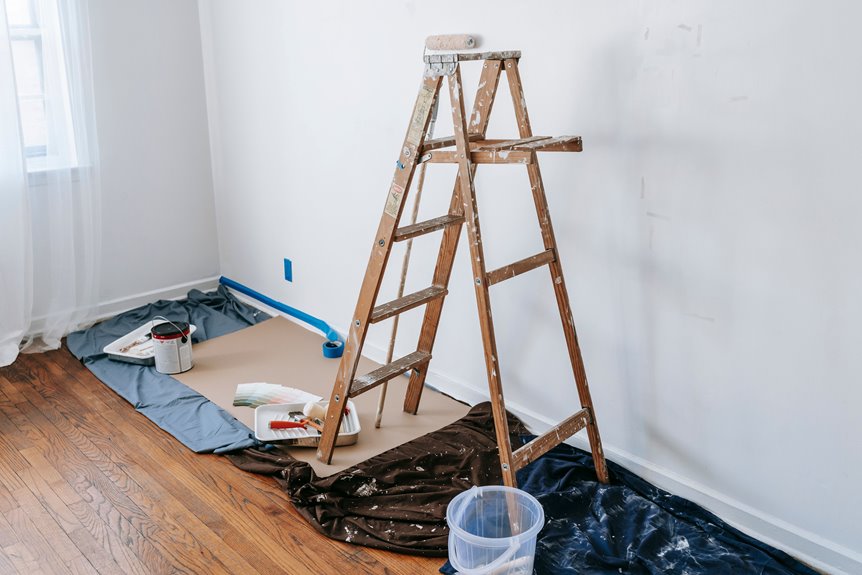
I painted my vinyl floor in a weekend and you can too. First, I scrubbed every inch with TSP until it squeaked, then sanded by hand with 180-grit paper to dull that factory shine. No power tools were needed, just elbow grease and a podcast. I patched nicks with caulk, taped my baseboards carefully, and rolled on Kilz primer specifically made for vinyl. Two thin coats of porch paint went down next. I chose antique white with charcoal stripes that I mapped out with blue tape and measured twice because I cannot eyeball anything straight. I peeled that tape while the paint was tacky for razor-sharp edges, then waited thirty days for full cure, though I used light traffic after three days. Skip extra sealant if your paint has primer built in, but test compatibility first to avoid ghosting. The result is a floor that makes me smile every single morning. I’ll show you exactly how to avoid every mistake I made along the way.
How to Gather Materials and Tools for Painting Vinyl Floors
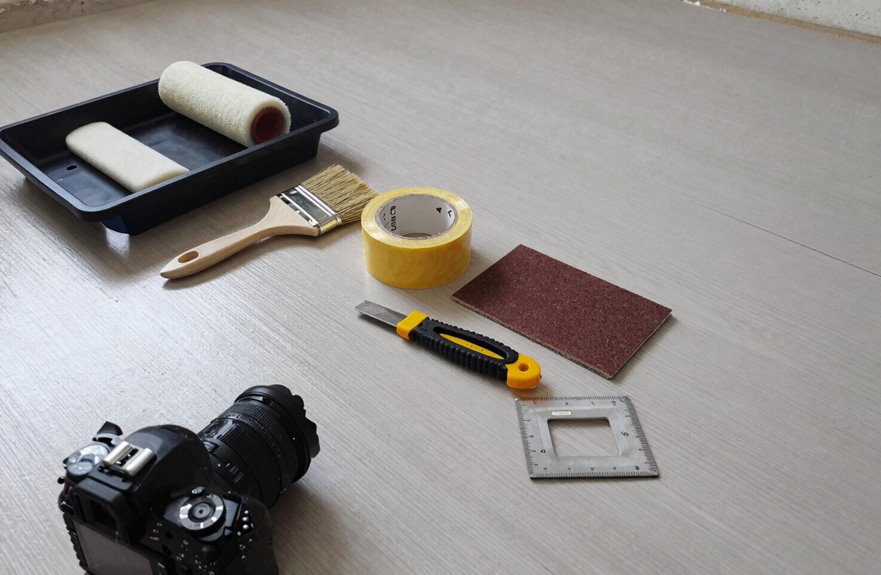
My first attempt at painting vinyl flooring was a disaster because I showed up with half the right stuff and a whole lot of misplaced confidence.
You need porch and floor latex satin enamel paint in two colors, such as antique white base with charcoal stripes. Grab Kilz interior primer because vinyl flooring requires it, plus rollers, angled brushes, and a paint tray. Use blue painter’s tape for crisp lines. Seal edges by brushing base paint over tape first. You’ll also need TSP floor cleaner and a vacuum.
Let the primer dry overnight, then build coats with patience.
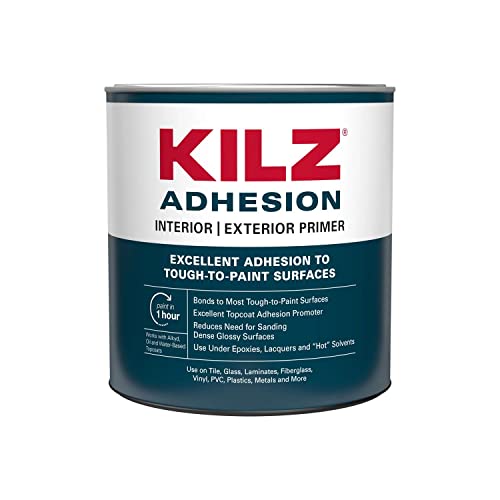
BONDING PRIMER: A high adhesion primer that bonds to a wide range of difficult to adhere to surfaces. It is formulated for situations where a secure bond is critical and use of a traditional water or oil base primer might be questionnable. It increases the possibilities for paintable surfaces.

Superior bonding strength : engineered as a high-performance bonding adhesive, this primer ensures your lvt and vinyl plank flooring are firmly anchored to the subfloor, preventing shifting or lifting over time.

Acrylic latex, solvent-free, pressure-sensitive adhesive for high initial strength and an improved environmental footprint
How to Clean and Sand Vinyl Floors Before Painting

I can’t tell you how many times I’ve skipped the prep work and regretted it. Peeling paint, bubbles, and complete failure result from inadequate preparation. Proper prep work is essential for a successful finish.
Start by clearing everything out and scrubbing the vinyl until it squeaks. Remove every speck of grime and old wax that could compromise the final finish. Then sand off the factory gloss with enough roughness for the paint to adhere properly. This surface preparation allows the paint to bond effectively to the vinyl.

PORCH and PATIO PAINT: KILZ Porch and Patio Floor Paint is a 100% acrylic latex product providing a durable, long-lasting finish that is ideal for both interior and exterior applications.

Use on wood, concrete, floors, primed metal, steps, railings and porches
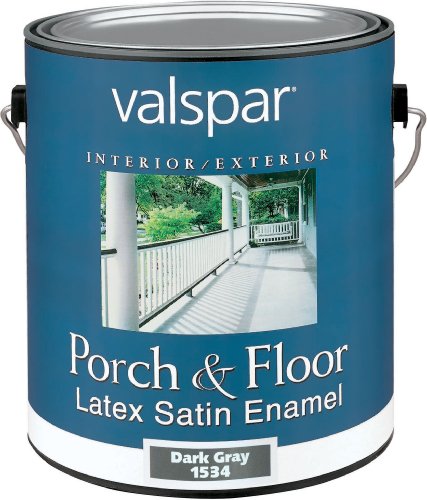
Use on wood, concrete, floors, primed metal, steps, railings and porches
Clearing and Cleaning
Where do you even start with a floor that’s seen better days? I’ve been there, staring at scuffed-up vinyl floors wondering if this makeover will actually work. It does, but only if we prep thoroughly.
First, I clear everything: furniture shoved aside, walls protected with tape (learned that one the hard way). Then comes the real cleaning, because paint won’t stick to mysterious sticky spots from 1987. I scrub with soap and water, attack stubborn grime with a scraper, and for the truly tragic areas, I use TSP. That stuff is serious business, a deep cleaning product that needs thorough rinsing.
Finally, light sanding with 180-grit paper removes the shine. These floors will then be ready for refinishing rather than looking like they belong to the previous decade.
Sanding Surface Prep
Now that the floor’s stripped bare and squeaky clean, it’s time to rough things up a bit. Sanding is where the magic happens for primer and paint preparation. Skip this step and your new finish peels right off.
- Grab fine-grit sandpaper, 180–220 grit, to kiss that factory shine goodbye
- Ditch the power tools. Manual sanding with a pad gives you control and saves your sanity
- Feel for dullness; if it’s still slick anywhere, keep going
- Vacuum every speck of dust before moving forward
Proper surface prep on vinyl flooring ensures your paint adheres correctly. This foundation is essential for a durable finish.
Repair and Patching
Before I even think about primer, I’m staring down every nick and bubble this vinyl’s collected over the years because paint will highlight flaws, not hide them.
For vinyl floor repair, I’m grabbing my utility knife and cutting around swollen spots, then filling holes with caulk. I smooth it flush and wipe excess with a damp cloth before it dries. No power tools for sanding, just me, fine-grit paper (180–220), elbow grease, and a dust mask for safety. I’m roughening that glossy finish so primer actually sticks. I taped off baseboards first, which I learned the messy way. Post-sanding, I’m cleaning thoroughly. Dust ruins everything.
How to Prime Vinyl Floors for Strong Paint Adhesion

A good primer is the essential tool I wish I’d discovered years ago, back when I thought I could just apply paint to any surface and expect it to hold. My first vinyl project peeled within months.
Surface preparation is critical. I scrub my vinyl flooring with TSP, remove every speck of gloss, and wait until it’s bone-dry. Then I use a primer built for vinyl, such as adhesion primers, the gripper or zinc-based kind.
- Clean thoroughly; dirt prevents adhesion
- Pick vinyl-specific primers, not wall primer
- Apply one to two coats, filling crevices as you go
- Let it dry fully before painting

HEAVY-DUTY MULTI-PURPOSE CLEANER - Our powdered trisodium phosphate cleaner is a non-sudsing compound that excels in heavy-duty cleaning. Expertly crafted to conquer the toughest jobs, removing stubborn grease, smoke, soot, and chalked paint from almost any type of walls & floors
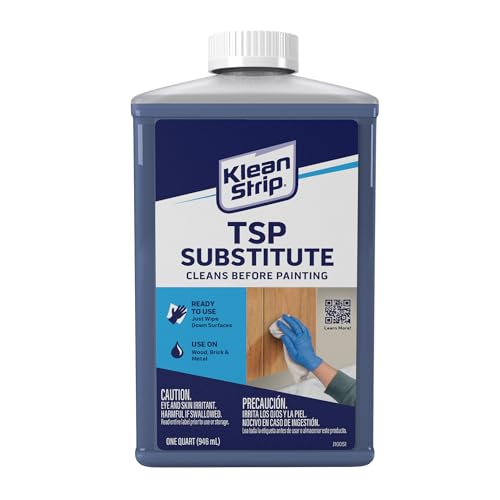
This item is Klean-Strip 0408 TSP Trisodium Phosphate Substitute No-Rinse Quart

Powerful Degreaser for Walls & Floors: Breaks down grease, dirt, and stains on walls, tiles, and concrete surfaces. Ideal for deep-cleaning kitchens, garages, and basements, leaving surfaces fresh and prepped for refinishing or painting.
How to Apply Base Coat With Porch and Floor Paint

I’ve learned that surface prep isn’t just tedious busywork; it’s the difference between a floor that chips in six months and one that lasts for years. After priming, I’m ready to roll on my base coat with two thin layers of antique white porch and floor paint with a fan blasting nearby to speed up drying time. Once that base dries overnight, I’ll grab my blue painter’s tape and start creating stripes.

Versatile hand sanding blocks for flat and irregular surfaces. This pack comes with 180 Grit , ideal for wood furniture polishing, metal deburring, drywall repair, flower pot maintenance, plasterboard sanding and home DIY projects

【VALUE PACK】 Each set contains 8 PCS 180 grit sandpaper block, each measuring 3.9 x 2.76 x 0.9 inches, this set of sandpaper block is perfectly suited for your daily life use.

10 - Precut screens for any 12" x 18" buffer - square buff, Clarke, deva, silver line. For hardwood or concrete
Surface Preparation Essentials
Three critical moves stand between your vinyl floor and that gorgeous, lasting finish you’re dreaming of. Skip even one, and you’ll be staring at chipped paint in six months wondering where it all went wrong.
Here’s what actually works:
- Scrub every inch with TSP or mild cleaner, rinse twice, then wait. Impatience at this stage ruins everything.
- Sand lightly with 180–220 grit paper, just enough to kill that factory shine so primer adhesion actually happens.
- Fill holes with all-purpose caulk, smooth it flush, wipe the mess, and let it cure completely.
- Roll on one to two coats of vinyl-specific primer. This bonding layer is non-negotiable for durability.
Get your vinyl flooring prep right with proper cleaning, sanding, and primer adhesion, and you’re ready for that base coat.
Primer Application Steps
Once you’ve got that vinyl scrubbed and sanded to perfection, you’re at a critical stage in this project. Rushing this step leads to peeling patches that compromise the finish.
Grab a primer built for adhesion, something with real grip. Adhesion primers, zinc-based or water-based, work best because vinyl floors resist ordinary paint. Skip the power tools for sanding; just roughen manually with fine-grit sandpaper if you need extra tooth. Roll on one coat, maybe two, letting each layer dry completely per the label. This patience fills crevices and bonds the primer tight to the surface, preventing premature failure and protecting your finished floor.
Base Coat Technique
Why settle for beige when you can transform that tired vinyl into something spectacular. I’ll show you how to lay down a base coat that makes your vinyl flooring look its best.
Here’s my approach:
- Pour latex satin enamel onto the floor, then roll it smooth without skimping on coverage
- Run two full coats; one coat leaves the job incomplete
- Use a fan between layers to speed up drying time
- Tape edges with blue painter’s tape to protect your baseboards from accidental paint drips
Before you start, ensure your surface is clean, dry, and deglossed. Apply primer if you want additional adhesion and durability. Your floor will be ready for finishing.
How to Paint Stripes and Patterns on Vinyl Floors

Creativity transforms a plain vinyl floor into something that stops people in their tracks. Painted crisp herringbone stripes create an impressive visual impact. When painting vinyl floors with bold stripes, start with a solid base color, then use painter’s tape to map out the pattern by measuring twice and taping once.
For keeping stripes straight, consider these options:
| Stripe Width | Tape Placement | Visual Effect |
|---|---|---|
| 4 inches | Every 8 inches | Classic, clean rhythm |
| 6 inches | Alternating offset | Playful, dynamic energy |
| 12 inches | Symmetrical grid | Bold, modern statement |
| 2 inches | Tight repetition | Retro, quirky charm |
Paint a thin layer of base color over the tape edges first. This seals the lines and prevents paint bleed. Roll on the stripe color in two coats, fan-drying between layers. Pull tape slowly and touch up with an angled brush for crisp, clean edges.

【Complete Package】The set includes 8 rolls of blue pinstripe tape, each measuring 3mm/0.12in in width and 20 meters/65.6 feet in length. This ample quantity supports multiple projects and long-term use in automotive and home improvement applications, ensuring you always have the fine line tape you need.

Professional Mask Tape - Multi-Surface adhesive tape made of high quality blue crepe paper not easy to lift or curl, has sunlight, UV, heat, moisture resistant, sturdy to use. So, blue tape painters tape is very much suitable for indoor and outdoor, office, home decoration, classroom. And, its paper use environment friendly material, harmless to human body, using blue paint tape can reduce the natural burden. Excellent blue masking tape for packaging, closing, and light duty masking and sealing.

READY. SET. PAINT!: 3 rolls of 1.88 inch wide ScotchBlue Original Painter's Tape, a multi-surface solution for preparing to paint your living or working environment
How to Seal Painted Vinyl Floors (Optional)
So you’ve poured your heart into stripes, patterns, maybe even that funky checkerboard I warned you about. Now you’re standing there, brush in hand, wondering if you need to seal the deal, literally.
Here’s what you need to know about sealing:
- Skip it if you primed first. Porch paint paired with primer doesn’t need extra protection, though I apply a topcoat anyway because my dog has claws like Wolverine.
- Rust-Oleum HOME kits? Built-in sealer included, so you can move forward with confidence.
- Test compatibility first. Cheap sealant reacts poorly with latex. I’ve watched paint ghost like bad Tinder dates.
- Respect curing time. Wait a full week minimum because rushing causes bubbles, and nobody wants those.
Choose wisely. Your floor’s counting on you.

NO SANDING OR GRINDING REQUIRED: Coats directly over previously coated or sealed concrete floors without scuffing or sanding

BONDING PRIMER: A high adhesion primer that bonds to a wide range of difficult to adhere to surfaces. It is formulated for situations where a secure bond is critical and use of a traditional water or oil base primer might be questionnable. It increases the possibilities for paintable surfaces.

Ideal for use on ferrous, non-ferrous metal, wood, concrete, masonry and other such surfaces to prepare surfaces for painting, provide rust protection and a tough finish that withstands weathering
How Long Painted Vinyl Floors Take to Cure
I’ve learned the hard way that painted vinyl floors have a mind of their own when it comes to curing. While you might be tempted to drag your fridge back after a weekend of drying, full curing takes a solid 30 days, a whole month, before your gorgeous stenciled border can handle the chaos of daily life without peeling at the edges. Light use can begin before full curing is complete, but rushing the process risks permanent damage like footprints and peeling.

PORCH and PATIO PAINT: KILZ Porch and Patio Floor Paint is a 100% acrylic latex product providing a durable, long-lasting finish that is ideal for both interior and exterior applications.

ENAMEL FLOOR PAINT: Provide your floors with an extremely durable and long-lasting finish using California Paint ALLFLOR Porch, Patio and Floor Enamel Paint.

Use on wood, concrete, floors, primed metal, steps, railings and porches
Cure Time Factors
How long does painted vinyl actually need before you can dance on it in your socks? You’re eager, and that’s understandable. I’ve spent plenty of time staring at gorgeous vinyl flooring, hoping it would dry faster.
What I’ve learned about cure time:
- Humidity affects drying speed. Crank open those windows, because ventilation changes everything.
- Thick paint coats feel dry on top while staying squishy underneath.
- “Dry to touch” doesn’t mean cured. I’ve ruined edges by trusting this too soon.
- Your washer and dryer can return after a few days, but heavy traffic requires more waiting.
Drying happens fast; true curing takes patience. I learned this the hard way when furniture left permanent dents. Give your painted floor adequate curing time, and it will last for years while maintaining its personalized appearance.
Full Curing Duration
When exactly can you stop tiptoeing around your gorgeous new floor like it’s a museum exhibit? The full curing duration for painted vinyl is 30 days, a whole month before that coating becomes diamond-hard and bulletproof.
Dry time hits a usable state after just a few days, so you’re not camping in your kitchen forever. I moved my washer back after day three, threw down a rug for protection, and could resume normal activities. However, foot traffic should remain limited. Avoid sofa-shuffling marathons until full curing is complete.
That weird bubbly look is totally normal and will dry crystal clear. Think of it like waiting for bread to rise; the wait now results in floors that actually last.
Use Before Ready
You’ve got your timeline down, thirty days, got it, but rushing the curing process nearly tanked my whole floor. That vinyl coating looks dry and feels dry, but curing is a whole different thing.
I learned that drying time between layers matters. Rush it, and your base peels like bad sunburn. Here’s what I’m doing now:
- Wait 2–3 days before light foot traffic returns
- Ventilate like crazy so each layer bonds tight
- Slide appliances back only after that initial dry phase, no sooner
- Toss down rugs during curing so I’m not wrecking my work
The floor’s usable after a few days, but treating it like wet paint for the full thirty days prevents damage and ensures a durable finish.
How to Clean and Maintain Painted Vinyl Floors
Why stop at gorgeous when you can keep those painted floors looking freshly done for years. Vinyl transforms beautifully with paint, but cleaning and maintenance determine whether this project succeeds.
Before opening the first can, scrub that vinyl thoroughly with a water-soaked rag, stiff brush, and scraper for stubborn gunk. TSP will get it squeaky clean, then wait until every inch dries completely. Rushing this step ruins the paint.
For ongoing care, use warm soapy water, or Mrs. Meyer’s if preferred. Avoid steam mops as they will melt the paint. Repaint every two to three years when wear becomes visible, though porch and floor latex enamel may not require a topcoat for some time.

Powerful Degreaser for Walls & Floors: Breaks down grease, dirt, and stains on walls, tiles, and concrete surfaces. Ideal for deep-cleaning kitchens, garages, and basements, leaving surfaces fresh and prepped for refinishing or painting.


Country Of Origin: United States
Real-World Durability: How Long Painted Vinyl Floors Last
Picture me five years ago, rolling porch and floor paint across my dated kitchen vinyl with equal parts hope and sheer terror, convinced I’d be ripping it all out by Christmas. That floor? Still kicking seven years later with no chips, no tears, just character.
The durability of painted vinyl floors surprised me, especially when I learned multiple coats matter way more than fancy top coats. Latex porch and floor paint breathes, flexes, and survives. I’ve dragged chairs, dropped pots, and life happened. Only one casualty: a massive old water heater, and that’s on me.
For maintenance, I keep it simple and skip the steam mop, which is too risky. Touch-ups take twenty minutes when needed. You can maintain this finish without frustration.
- Seven years of regular wear without chipping or peeling. Real people, real floors.
- Multiple coats build resilience. Skip extra sealants that fight the paint’s natural flexibility.
- Only major furniture disasters cause damage, not daily foot traffic.
- Quick reapplication every few years keeps everything fresh.

Industry-Standard Size: 10 PCS 9" 180 Grit sanding discs with a Hook-and-Loop backing. These discs are the industry-standard size and are designed to fit most brands of drywall power sanders, making them versatile and convenient for all your sanding needs.

Orbital Sander Pads Set: 5 inch sanding discs hook and loop are available in multiple grades from coarse to fine for almost all sanding requirements.This set includes 50 pieces of 180 grit sandpaper discs.

Great for general purpose sanding on a wide variety of materials including wood, paint, metal, fiberglass, and plastic
Vinyl Floor Painting Mistakes and How to Avoid Them
How badly did I mess up my first painted vinyl floor? Let’s just say my “renovation” became a cautionary tale I’d share at every DIY gathering.
I’d skipped proper preparation, a significant mistake. Vinyl floors fight you every step because their water-repellent surface sabotages adhesion. I learned the hard way: scrub until your arms ache, fix every tear, or that paint peels like sunburned skin.
I rushed between coats, didn’t tape my baseboards (resulting in wobbly edges), and ignored cure times. I walked on it too soon and added furniture too early, creating a total disaster.
My topcoat? Forgot it entirely. Now I rely on Rust-Oleum’s kit with built-in sealer, or I add polyurethane separately. This protective layer prevents peeling and extends the floor’s lifespan by years. Your budget-friendly vision deserves better than rookie mistakes.

BLUE PAINTER'S TAPE: Includes One 1.88 in x 60 yd roll of ScotchBlue Original Painter's Tape, a blue masking tape for painting that helps protect surfaces by preventing paint bleed

8-Size Versatility: Cover any project with this complete set of 8 different widths (1/12", 1/10", 1/8", 1/6", 1/5", 1/4", 1/3", 2/5"). Our thin painters masking tape is perfect for fine line detailing, general masking, and broad coverage—all in one convenient kit
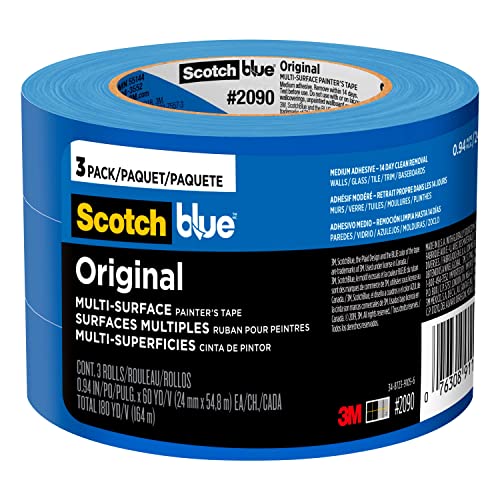
BLUE PAINTER'S TAPE: Includes Three 0.94 in x 60 yd rolls of ScotchBlue Original Painter's Tape, a blue masking tape for painting that helps protect surfaces by preventing paint bleed




