1. Vertical Storage Sheds
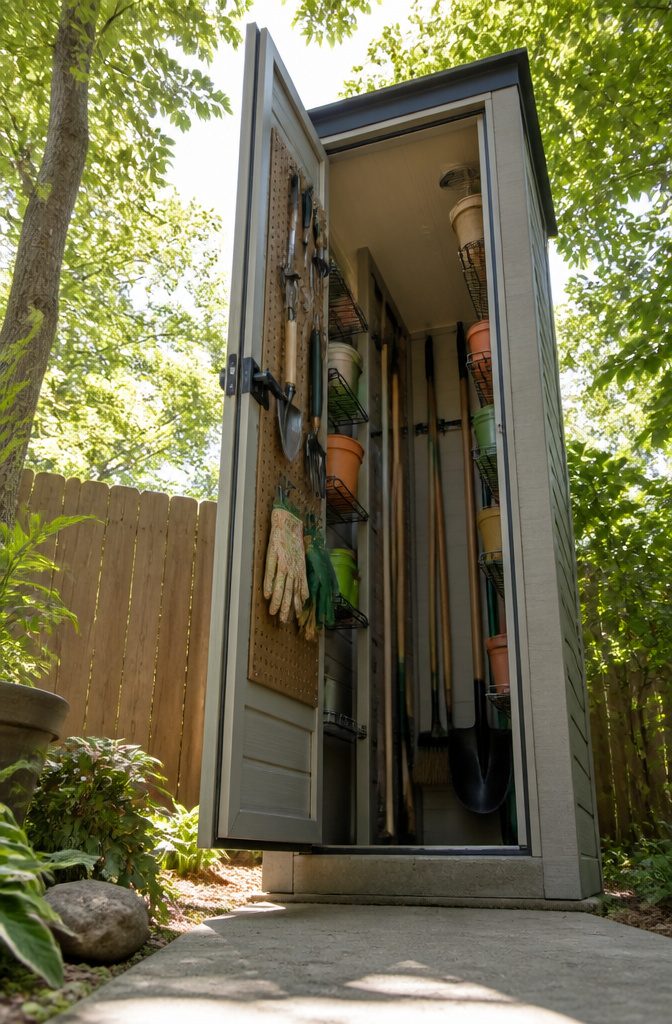
A vertical storage shed turns the narrow footprint into the main event rather than the compromise.
The walls run up to 8 feet or more, which means long-handled tools, ladders, and full extension cords can stand upright instead of lying across the only floor space you have.
The footprint stays tight enough to slide between a fence and the house, but the interior reads like a narrow closet with serious height.
Shelving works differently here than in a wide shed. I would skip deep units that jut into the center and instead run 12-inch wire shelves up both long walls, leaving a slim aisle down the middle.
That aisle is what lets you walk a rake or a shovel straight to its spot without the handle knocking over three other things. Pegboard on the door interior catches the small stuff: gloves, trowels, a folded tarp.
The tradeoff is stability. Anything that tall in a narrow base can feel tippy until you anchor it, and you should, especially on a concrete pad or pavers where wind gets underneath.
I have seen people skip this, then wonder why the shed shifts after the first storm.
A few masonry bolts into the slab, or ground anchors if it sits on dirt, fix the problem for the cost of a Saturday morning and about fifteen dollars in hardware.
Ladders store flat against the back wall on simple L-brackets spaced every 18 inches. The rungs sit between the brackets, the rails carry the weight, and nothing projects into your walking space.
It is the kind of solution that only works because the shed is tall and thin; in a wider building, the same ladder would tempt you to lean it somewhere lazy and block half the room.

KEEP LONG-HANDLED TOOLS UPRIGHT AND EASY TO REACH. This vertical resin storage shed or tall outdoor storage cabinet fits long-handled tools, patio umbrellas, and gardening supplies, so yard gear stays organized and off the ground.

KEEP LONG-HANDLED TOOLS UPRIGHT AND EASY TO REACH. This vertical resin storage shed or tall outdoor storage cabinet fits long-handled tools, patio umbrellas, and gardening supplies, so yard gear stays organized and off the ground.

VERTICAL OUTDOOR STORAGE SHED FOR SMALL SPACES. This vertical storage shed gives patios, porches, and balconies a compact resin outdoor storage cabinet for ladders, long-handled tools, and everyday gear without taking over your layout.
2. Lean-To Sheds
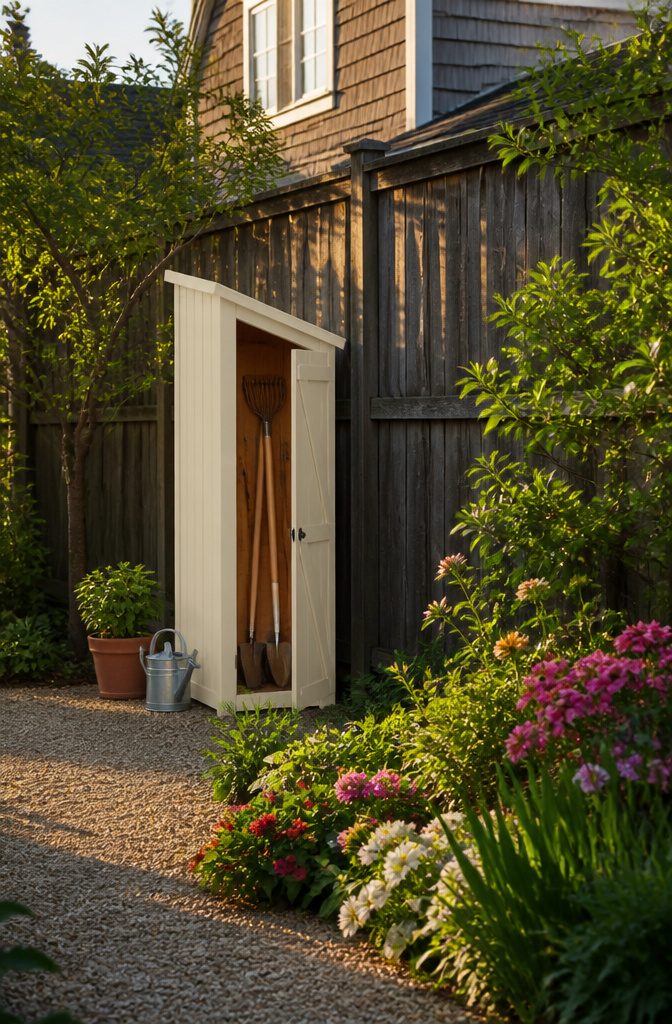
A lean-to shed borrows its back wall from the house or fence line, which drops both the material list and the footprint by roughly a quarter.
The catch is water. Rain that hits the roof has to go somewhere, and if that somewhere is the siding you just screwed into, you are trading storage space for rot repair in three years.
The roof needs a slope away from the wall, a metal flashing tucked under the siding above it, and a gutter if the runoff would otherwise sheet straight down onto your foundation.
I have seen people skip the flashing to save a Saturday, and then spend a fall weekend tearing out water-stained drywall instead.
The minimum three feet of width is workable if you keep the door on the short end and store long-handled tools flat against the back wall. Anything narrower and you are crawling in on your knees.

Shelf Organizer: Adds extra storage inside Suncast Vertical Sheds to increase usable space for gear, tools, and bins

Space-Saving Vertical Design: Standing 62"H with a compact 16.5"L x 16.5"W footprint, this tall storage cabinet fits perfectly into narrow corners and tight spaces. It maximizes vertical storage while taking up minimal ground area

SENSIBLE STORAGE: Preserves essential yard or patio space with extra-small footprint. Ability to easily fit in any outdoor space as well as store long garden tools, brooms and ladders.
3. Garden Sheds
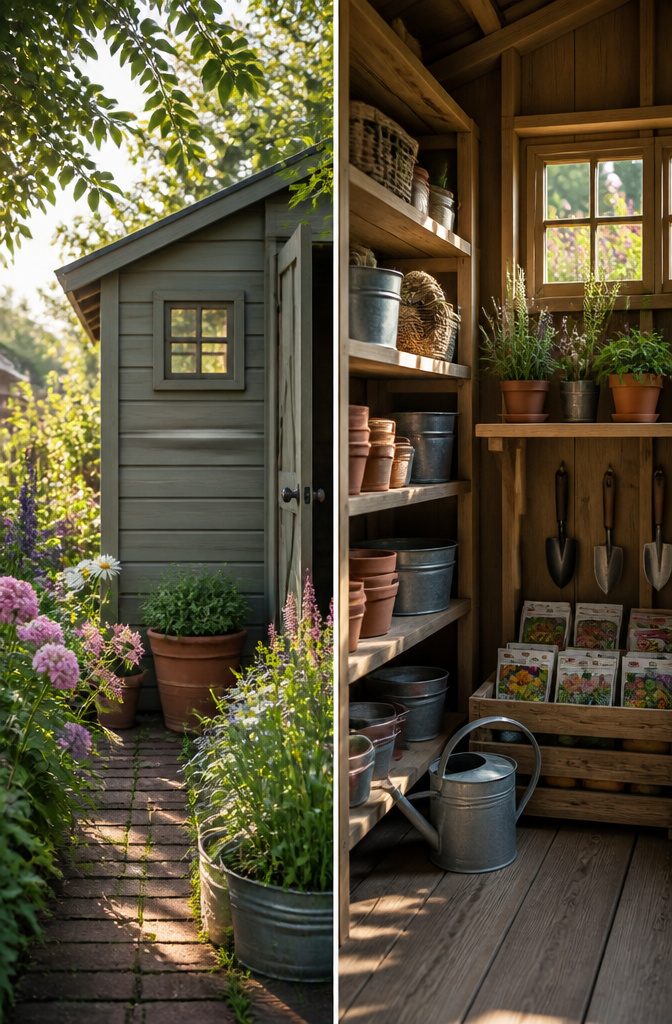
A garden shed squeezed into a narrow strip of yard still needs light inside, or you end up hauling every seed packet and hand tool out into the sun just to read the label.
A single window changes whether the shed works as a workspace or stays a dark box you dump things into.
I learned this the hard way with a windowless cabinet I used for two seasons, pulling pots and soil amendments onto the patio every time I needed to check inventory.
Once I moved to a narrow shed with a window, the same tasks happened inside. Morning light let me sort seeds by planting date, repot seedlings, and clean tools on a small shelf without the back-and-forth.
The window does not need to be large. A 12–18 inch square set high on the wall keeps wall space free for rake and shovel storage while giving enough light to work by.
Position it to catch east or south light if you can, since afternoon sun heats the interior and fades plastic labels. For renters, a shed with a factory-installed window avoids any landlord conversation about modifying structures.
Made in United States
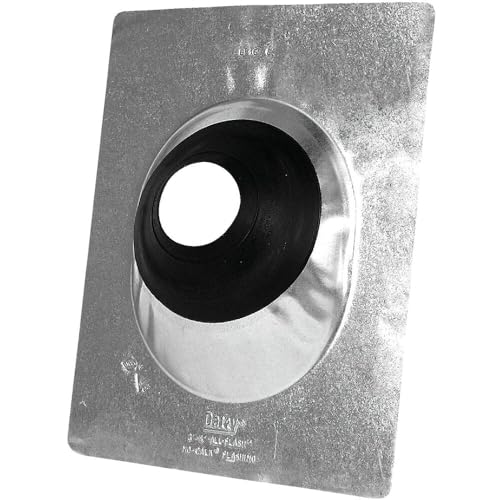
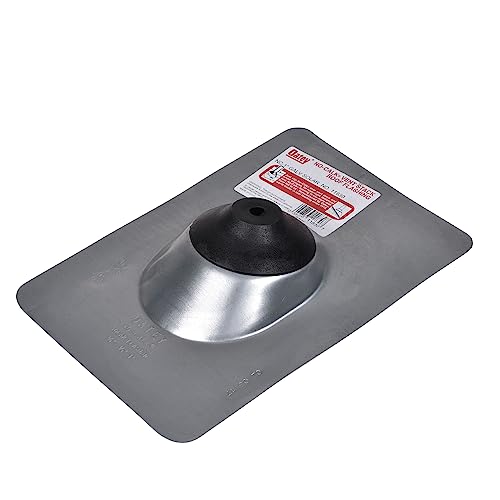
Patented All-Flash? design allows use on multiple pipe sizes

MADE IN THE USA FOR GUARANTEED QUALITY: The only metal roof pipe flashing 100% manufactured in the USA by an American workforce, giving contractors and builders clear sourcing documentation for projects that require domestic construction materials
4. Bike Sheds
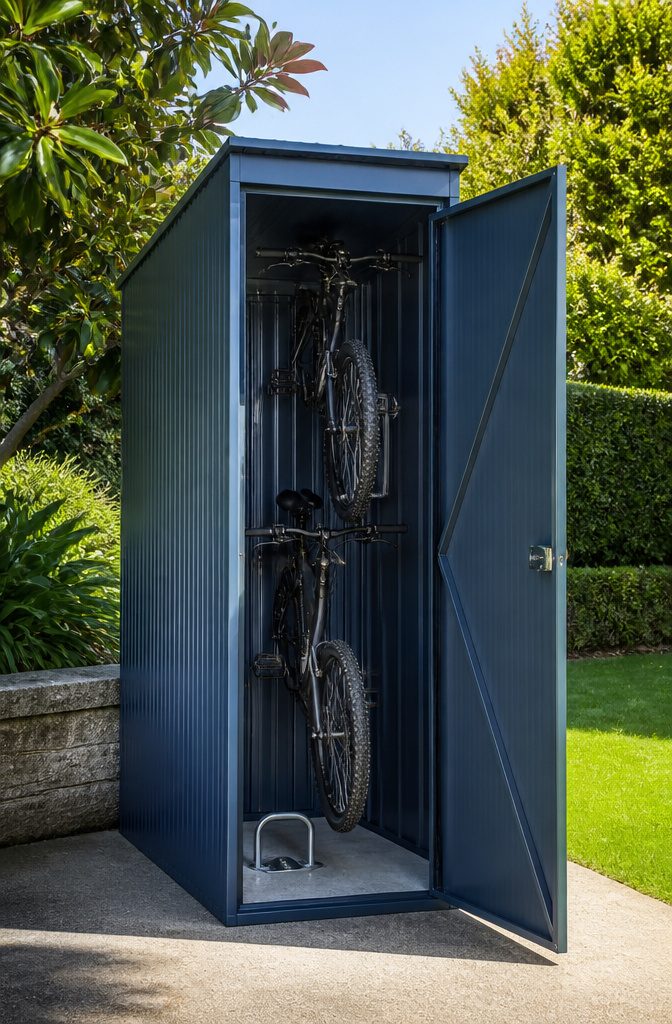
A bike shed built for a narrow footprint has to solve the part nobody shows in the product photo: getting the bicycle back out without lifting it over a lawnmower or scraping the door frame.
The width that looks fine on paper, about four feet, turns into a puzzle once handlebars and pedals enter the equation.
The sheds that work best run longer than they are wide, giving you a straight shot in and out. Roll the front wheel to the back wall, lean the bike slightly, and the door stays clear for the next one.
Some designs hinge the door on the long side instead of the short end, which changes the whole geometry of the space.
Locking matters more here than with patio cushions. A hasp and padlock through the door handles only protects the shed, not the bicycle inside.
What convinced me, reading through a dozen of these setups, is the floor anchor: a metal loop bolted through the shed floor into the ground beneath, letting you run a chain from frame to concrete.
Without it, a thief lifts the whole bike and walks. With it, the shed becomes the cage, not just the container.
The narrowest workable option I found uses a vertical rack that stores one bike above another.
You lift the front wheel onto a hook and roll the rear into a channel. It costs you ceiling height, not floor width, and keeps both machines accessible without the shuffle.
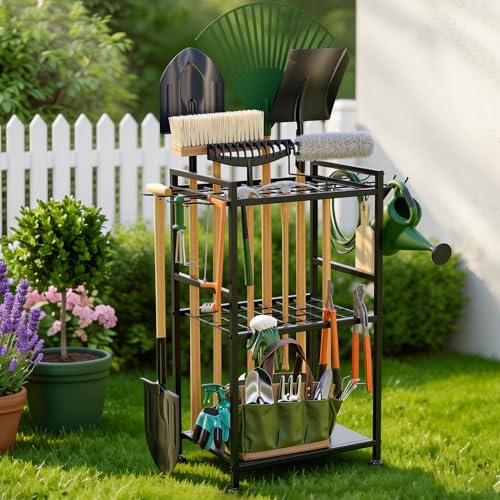
1. 【All-In-One High Density Storage】 Maximize your storage space with this high-capacity garden tool rack. It occupies only 16"×12" compact space yet can hold more than 35 tools. Equipped with 4 side slots and 5 hanging hooks, it easily stores 10 D-grip tools like pruning shears, garden trowels, short shovels and garden hoses. Ideal for tidying up messy spaces perfectly for gardening enthusiasts.

【Efficient Garden Tool Rack】High quality gardening tool holder with shelves, large tool slots, S hooks in one. The clever design allows the tool rack to store tools of various sizes with strong load bearing capacity, realizing comprehensive storage of gardening tools.

【Compact 4x8 FT Lean-To Metal Shed】 This space-saving lean-to shed features a reversible design that can adapt to your wall layout, making it ideal for placement in side yards, patios, or tight backyard corners where space is limited.
5. Multi-Purpose Sheds
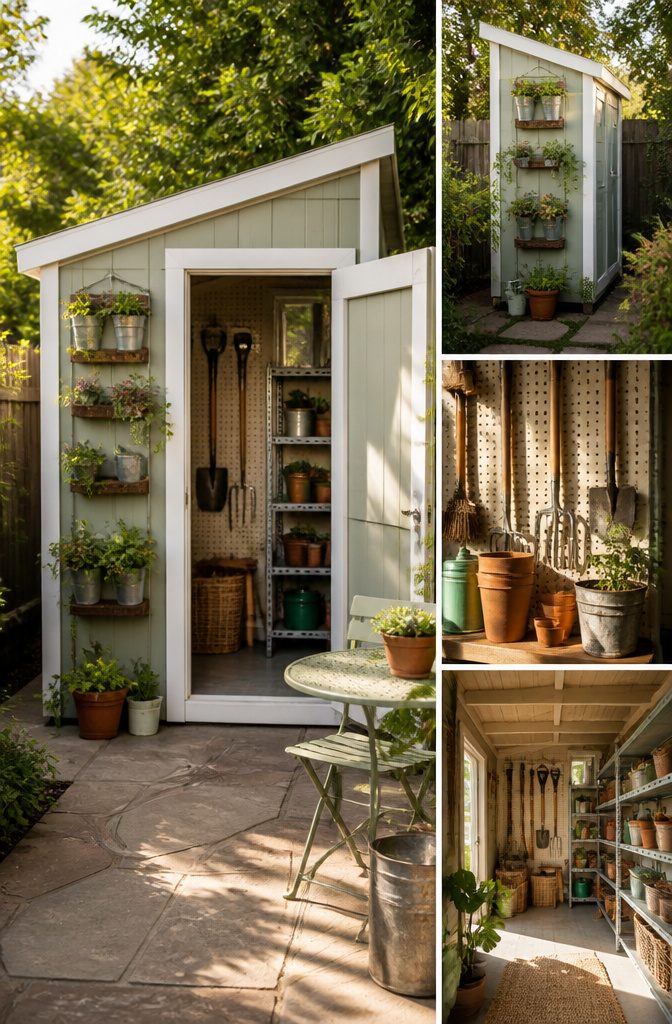
A narrow shed wall is just four feet of vertical real estate, and what you bolt to it decides whether the space earns its keep or becomes a junk collector.
I spent one weekend swapping hardware in a 4-foot lean-to behind my garage, and the difference was immediate: pegboard and a fold-down bench turned it into a potting station in spring, then a miter saw stand once I traded the hooks for French cleats and added a dust shield from a cut-up shower curtain.
The same brackets that held seedling trays in March carried PVC pipe for a kids’ mud kitchen by June, with the sink basin slotted into the lower shelf where I had kept bags of potting mix.
The trick is planning for the swap, not the first use: drill your anchor holes on a vertical grid, 16 inches on center, so nothing needs new holes when the purpose changes.
Play areas need the lowest rail at 24 inches for a toddler’s reach; a workshop wants the first cleat closer to 30 to save your back. One afternoon of measuring beats a wall full of mismatched anchors you have to abandon.

VERSATILE STORAGE OPTIONS: With external dimensions measuring 55.3 inches in length, 31.8 inches in width, and 74.4 inches in height, DWVO's garden tool storage comes in a multitude of sizes, colors, and shapes to choose from; Great for outdoor backyards, gardens, courtyards, and utility rooms; Additionally, DWVO's outdoor storage can serve as a cozy and secure shelter for pets

【Clear Window Design】This 8×6 storage shed is designed with built-in clear windows to welcome natural daylight and improve visibility when reaching for items.
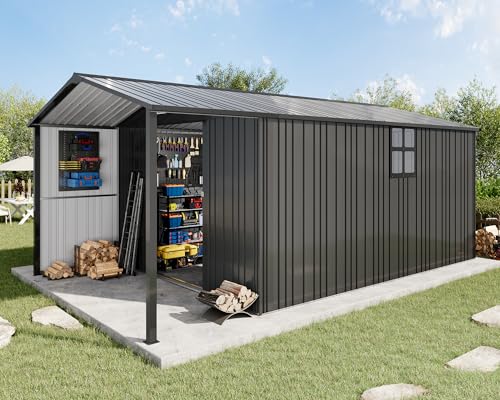
Dual Purpose, Storage Meets Relaxation: More than a shed—it’s a space to store your gear and unwind with a coffee. Lounge area (116.5"×42.5") makes it your own backyard retreat
Wood, Metal, or Vinyl
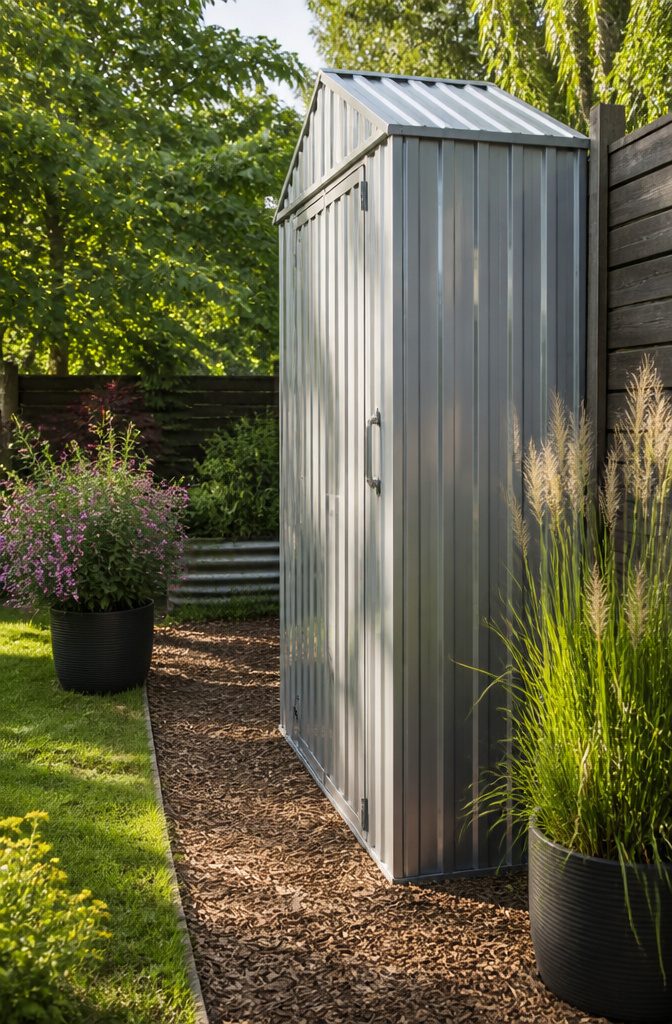
Wood tends to win on looks in a narrow shed because the grain softens the long wall lines that otherwise read like a shipping container.
I have seen cedar board-and-batten make an eight-foot-wide shed feel like a garden room rather than a utility box.
The catch is moisture movement. A slim footprint leaves no overhang to shield the base, so the bottom boards wick water unless you keep them six inches off the ground and reseal every couple of years.
I would not use wood if the site stays damp.
Metal solves that. Galvanized steel sheds shrug off rot and need no paint, which matters when both long walls are fully exposed to sun and rain.
The panels on a narrow metal shed telegraph every dent, though, because there is no depth of shadow to hide irregularities.
A kicked soccer ball or a fallen branch leaves a pucker you will see from across the yard. Assembly takes patience; the screw lines have to stay straight or the whole wall looks off.
Vinyl splits the difference. The color runs through the material, so scratches do not show, and the hollow panels insulate slightly better than metal.
But the plastic expands more than either alternative, and in a long, thin structure that thermal movement stacks along one axis. The seams between panels can gap in hot weather if the installer left no room to breathe.
For a weekend build with no maintenance budget, vinyl is probably the practical call. For something you want to look at for twenty years, I would still fight the wood fight and keep a brush handy.

Durable, Weatherproof Resin Construction: Built from heavy‑duty polypropylene resin reinforced with steel, this shed is fully weather‑resistant and UV‑protected, ensuring it won’t peel, rot, or rust.

Weather-Resistant Storage: Crafted from durable 12mm double-layer PP walls, this outdoor shed withstands sun, rain, and snow, keeping your tools, garbage cans, and garden accessories safe and dry all year round
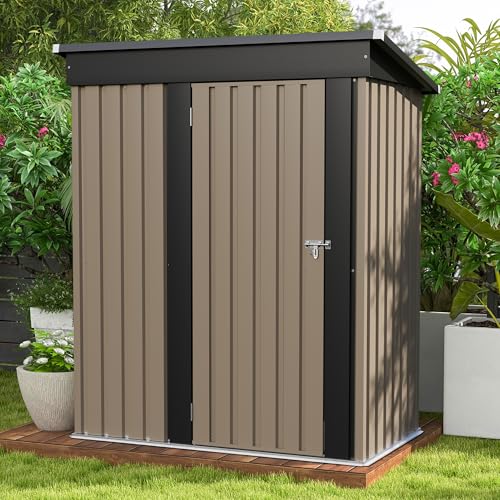
Multiple Uses: The Patiowell compact storage room is versatile, fitting perfectly in your backyard, garden, or anywhere you need. It can be utilized as a storage room or tool room, to keep your yard tidy
Where to Put It
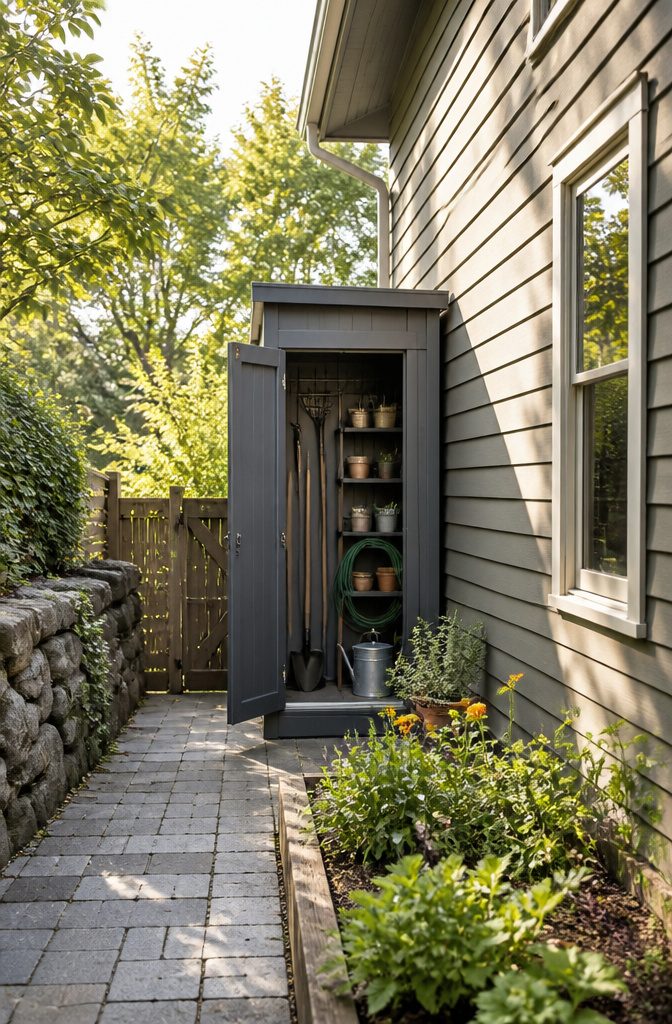
A narrow shed tucked against the side of your house only works if you can actually open the door. I learned this the hard way after installing one with the door swinging outward toward the fence.
The door needs a full arc of clear space, and in a tight yard that means checking the swing path before you set a single post.
Measure twice: once for the shed footprint, once for the door radius plus your own body squeezing through with a wheelbarrow.
Sunlight matters more than I expected. My first shed went on the north side of the garage and turned into a dim cave by mid-afternoon.
Morning light on the east face keeps the interior usable without wiring, and it cuts the damp that warps anything wooden you store. South-facing walls in hot climates will bake your paint and anything heat-sensitive inside.
Proximity to the house or another structure is the tradeoff.
Close enough to run an extension cord or lean a ladder against the eave, but not so close that roof runoff drips between the buildings and turns the gap into a mossy trench you can’t reach to clean.
I leave about eighteen inches, enough to slide in for maintenance but not enough to waste the strip.

Size Dimension: Overall size is 21.2"W x 9.4"D x 59.2"H. Each shelf can offer 80lbs weight

Durable Construction: Crafted from imported High-Density Polyethylene (HDPE) with blow-molded double-wall panels, this storage cabinet is far sturdier and more durable than wood alternatives. It can withstand various outdoor conditions, ensuring long-lasting use for your storage needs

Withstands 70 mph Winds & 20" of Snow: Built from heavy-duty galvanized steel with a rust-resistant gray coating. Sloped roof sheds rain and melting snow — no pooling, no leaks. Your gear stays protected in every season.
Shelves, Pegboards, and Hooks
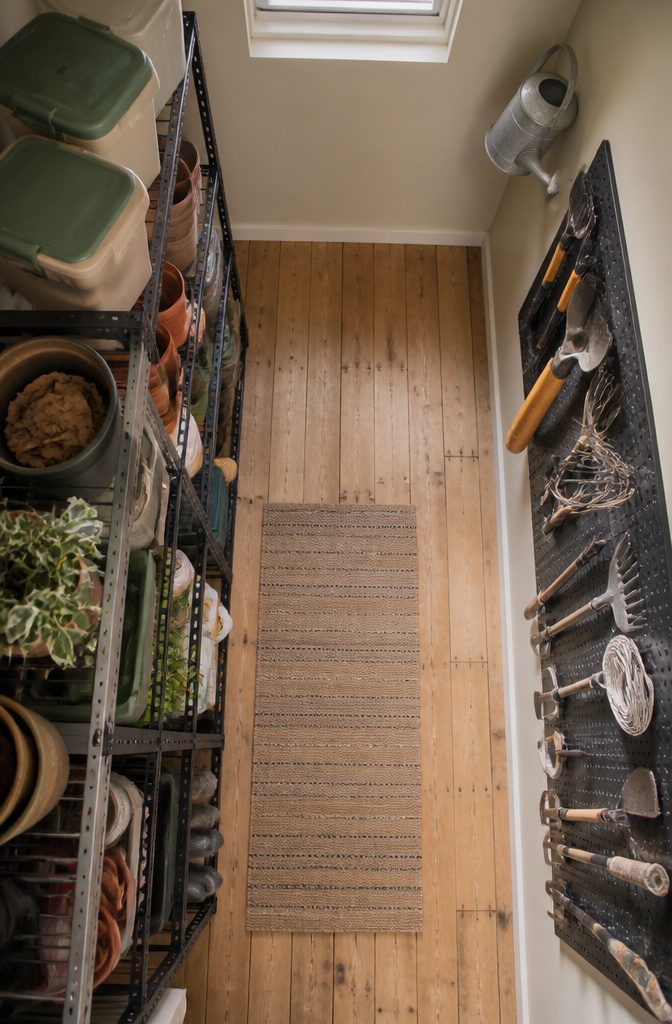
A narrow shed only works if you can actually reach what you store. I learned this after installing shelves along both walls of a four-foot-wide shed and finding the back half became a black hole of forgotten items.
Now I run a single bank of adjustable steel shelving down one wall only, keeping the opposite side open for movement.
The height matters more than the depth: four tiers set at 12-inch intervals handle most garden tools and supply bins without the top shelf becoming unreachable dead space.
Pegboard reads as a garage cliché, but a two-foot strip mounted at eye level on the back wall changed how I use the shed.
Hooks for the rake, the hand saw, and the one hammer I actually grab let me put hands on them without stepping inside.
Everything else, the specialty tools I touch twice a year, lives in labeled bins on the top shelf or slides into the narrow gap between the shelving unit and the wall on a simple L-bracket ledge.
The categorizing rule that stuck: front row gets the weekly items, back row gets the seasonal. When I broke that and let the pruning shears migrate behind the seed starting trays, I stopped pruning.
Paint and Trim That Helps
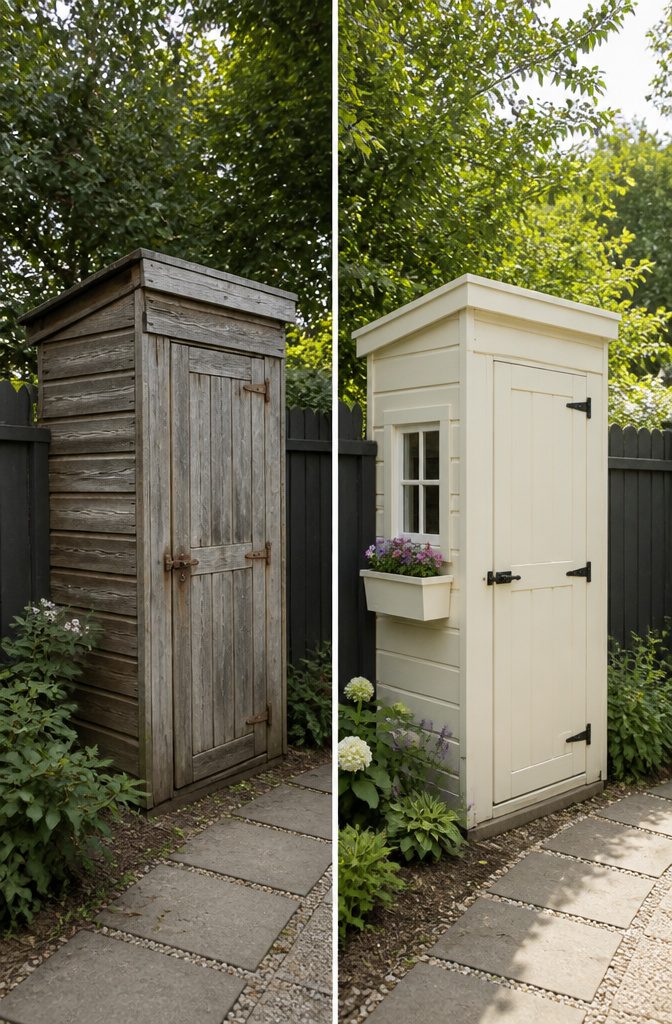
A narrow shed pressed against a fence line disappears faster than you’d think, and the right paint job is what keeps it from looking like a shipping container someone forgot to move.
I learned this the hard way after painting my first garden shed a deep forest green that seemed like a natural choice until it turned into a dark block against an already dark fence.
Light colors push the walls outward visually, and on a structure with barely six feet of width to spare, that optical inch or two matters more than any trim detail.
The shoebox shape is the real enemy. Flat color from roof to foundation emphasizes every straight line and makes the shed read as even longer and thinner than it is.
Breaking that up with trim in a slightly lighter or darker shade, run vertically at the corners and horizontally where the wall meets the roof, interrupts the eye before it travels the full length.
I like a soft cream or pale sage for the body with crisp white trim, though a charcoal body with light gray trim works if your yard already leans modern.
Small decorative elements help too, but restraint counts.
A window box with trailing plants, a simple bracketed overhang above the door, or even just hardware in a finish that catches light can pull attention to specific points instead of letting the eye sweep the whole narrow rectangle.
What you skip matters: shutters on a shed under four feet wide look like costume jewelry, and two-tone schemes with strong contrast fight the space instead of working with it.

Spacious 4x7 Lean to Design: This lean to shed offers 30 sq ft of storage (86.4"D x 50.96"W x 77.85"H), is designed to be placed against house walls, fences, or garages, making it ideal for limited outdoor areas. Its compact footprint maximizes backyard space while still offering a generous interior for tools, equipment, and seasonal storage.

Wall-Mounted Garage Tool Organizer-Reclaim floor space with 17.5"x4" horizontal wall design—secures shovels, rakes & brooms vertically. Ideal for garages/sheds with exposed studs, keeps long-handled tools accessible yet tangle-free

Multifunctional Garden Tool Organizer: Garden tool storage can organizes up to 50 garden tools, including yard tools, farm tools, lawn tools, and cleaning equipment etc. Provide large capacity in a compact size. It simplifies tool storage and organization. Height-adjustable feet suitable for uneven ground. Suitable for garage, garden, shed, outdoors and backyards
One DIY Plan That Works
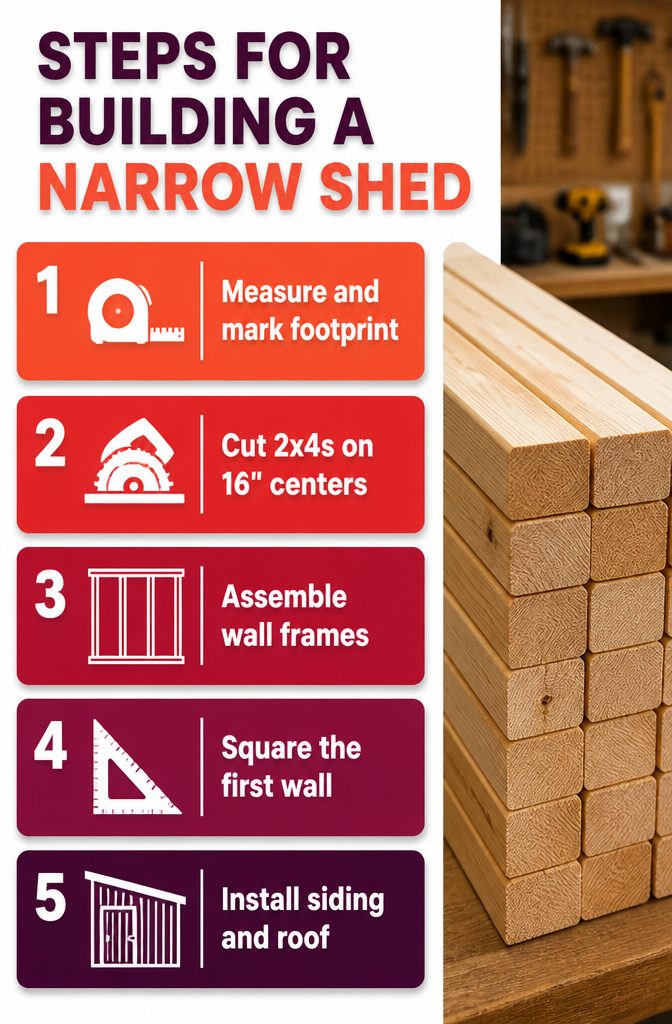
A narrow shed built from a real plan starts with 2x4s on sixteen-inch centers, and that spacing matters more than the wood grade.
The first time I tried to wing it, I cut everything to what looked right in the driveway.
By Saturday afternoon the wall frames racked sideways when I stood them up, and Sunday turned into a salvage job with extra braces I had not budgeted for.
The second build, I used a plan that called out every stud, every header, and the exact angle for the lean-to roof.
Materials ran about $340 at the local lumberyard: fourteen studs, three sheets of T1-11 siding, a pair of pressure-treated 4x4s for the skids, and the corrugated panels. I had the footprint marked and the first wall squared before lunch.
The difference was not skill; it was not stopping every twenty minutes to decide what came next. A plan lets you buy once, cut once, and finish while the weather holds.

Tidy Up Your Yard: Tired of shovels, hoses, and lawnmowers cluttering your patio? This small metal shed gives you a dedicated, weatherproof home for all your outdoor gear. The clean dark grey finish blends subtly into gardens, patios, or lawns – so you get a neat yard, not an eyesore.


[Security and Durability] The whole storage shed is a steel frame structure, the metal garden storage shed adopts electro-galvanized steel process and paint treatment, which is suitable for various climates, without worrying about the metal rusting, the all-metal storage shed will not be deformed by the sun, and has excellent moisture-proof ,UV resistant performance.