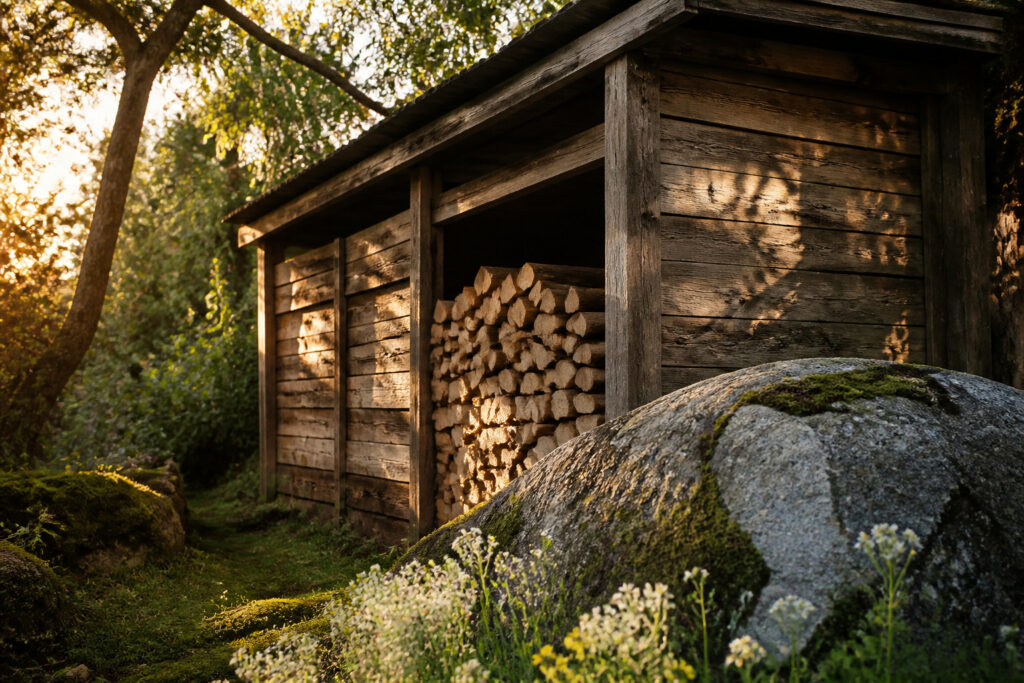
A wood shed idea only works if you match the build to how wet your climate is and how fast you burn through a stack.
The best designs in this list span a single afternoon with a pallet and a drill, up to a two-weekend specialist build with mitered rafters and corrugated roofing.
What sorts one from another is whether you need the wood fully enclosed for damp winters, or open-sided so air moves through and seasons the pile before you touch it.
Even the simplest gravity-held crate rack keeps logs dry if it sits under an existing roof, and the greenhouse-style plastic wrap can cut drying time in half if you leave the lower edges vented so mold does not form.
Heat-treated pallets marked HT, a 4-foot by 8-foot pole frame, and that 15-foot distance from your house foundation show up across half these builds because they are the details that keep the shed from failing by the second season.
1. Pallet Wood Shed
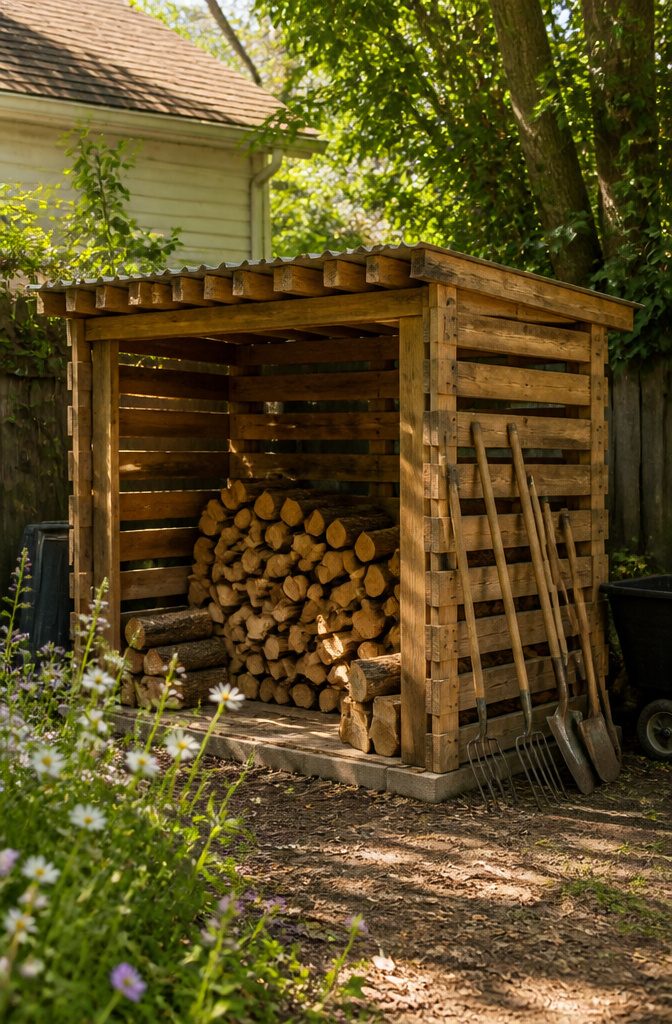
Shipping pallets come in a handful of standard sizes, which makes them easier to work with than you’d expect from scrap wood.
Heat-treated pallets marked with an "HT" stamp are the ones to grab; that stamp means the wood was kiln-heated to kill microorganisms, not soaked in chemicals you don’t want near firewood you’ll eventually burn. Skip anything stained or smelling off.
Family-owned nurseries, printing shops, and grocery stores are the places to ask, though you should always check with a manager first. Big-box retailers usually run their own recycling programs, so they are not worth the stop.
Two approaches work for the build itself. You can screw whole pallets together for three walls and a floor, then lay a fourth across the top as a roof.
Or break them down board by board with a reciprocating saw and build from scratch, which takes longer but gives you cleaner lines and a tighter fit against weather.
Either way, wear a mask and goggles while dismantling. Sand the planks, then disinfect them with a mix of equal parts bleach and water, letting the solution soak in rather than wiping it straight off.
The extra afternoon of prep keeps the shed from turning into a mold source by fall.

38 Cu.ft Storage Shed: With a spacious 38 cu.ft capacity, this storage unit is a fantastic choice for keeping frequently used outdoor tools handy during summer or neatly storing firewood for the winter.

Ultimate Firewood Shelter for Efficient Storage: Looking for a reliable firewood storage shed? Our premium galvanized steel firewood shelter offers ample space for efficient firewood storage. This wood sheds is designed to keep your logs dry, well-organized, and ready for use. Enjoy the convenience of having seasoned firewood at your fingertips with our outdoor firewood racks.
2. Lean-To Against Existing Structure
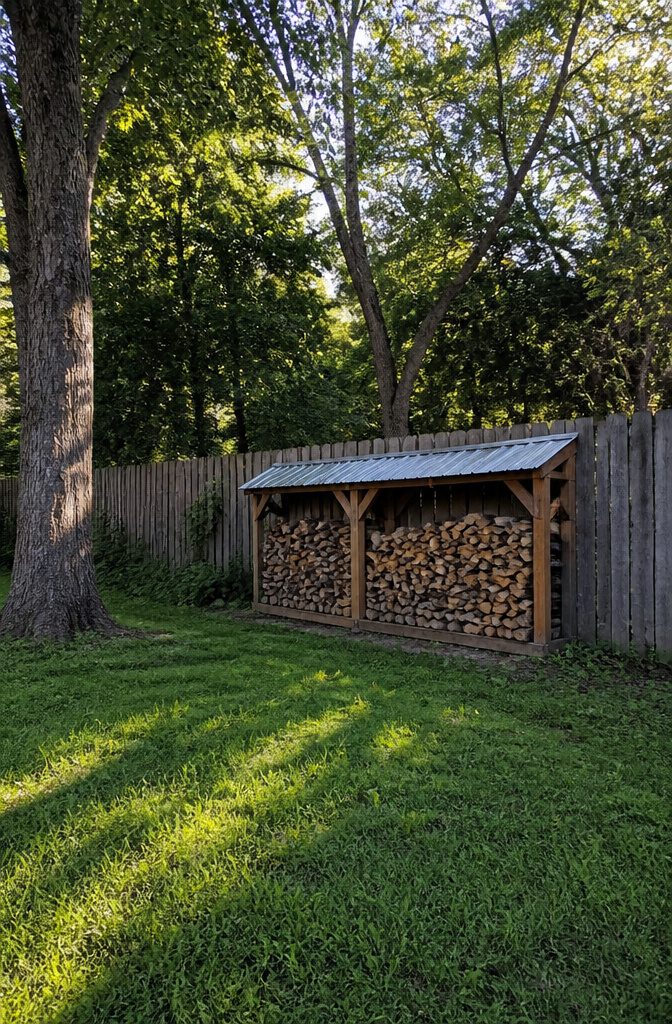
A lean-to wood shed is the simplest way to get a roof over your firewood without building four walls from scratch.
The back wall of your house, garage, or fence does the heavy lifting, and you add posts, a slanted roof, and open sides to let air move through the stack.
That airflow matters more than most people realize; wood seasons properly only when moisture can escape, so keeping the shed detached rather than sealed against the structure is the smarter play.
Cedar holds up well for this kind of exposed build because it resists rot on its own and weathers to a silver-gray that looks intentional rather than neglected.
Pressure-treated 2x4s stretched across concrete blocks will keep the bottom row off damp ground, which stops the base from turning spongy before its time.
Keep firewood stacked at least 15 feet from the house, even with a lean-to design that hugs a wall.
That distance is the usual rule for fire safety, and it also breaks the bridge ants and termites would otherwise walk straight across into your siding.
Airflow is critical to wood seasoning, so simply build it adjacent to the existing structure and add a roof to keep the wood dry.
A weekend of cutting and fastening, or under an hour with a panelized kit if you would rather not measure twice.

【Heavy-Duty Construction】Built with rust-resistant galvanized steel frames for the storage shed and outdoor gazebo, this metal shed ensures structural stability. Pre-drilled holes on legs allow secure anchoring with included stakes or bolts, resisting winds up to 24mph. Perfect for long-term use in gardens, patios, or backyards.

【 FIT FOR 2x4 LUMBER 】- Each outside metal wood stacker bracket measures 12- ¾ inch length by 3-¾ inch width by 6" depth. The inside 8 holes (3-¾ x 1-¾) well fit to the wood with cross section of 2 x 4 (lumber NOT included), and good ideal for personalized board dimension cutting. This allows you to customize just how big you want your out side log stacking to be.

Store More Firewood for Winter: 8FT Large Capacity Firewood Rack stores up to 1/2 face cord of firewood, giving fireplace owners and fire pit users organized outdoor wood storage for winter heating
3. A-Frame Wood Shed
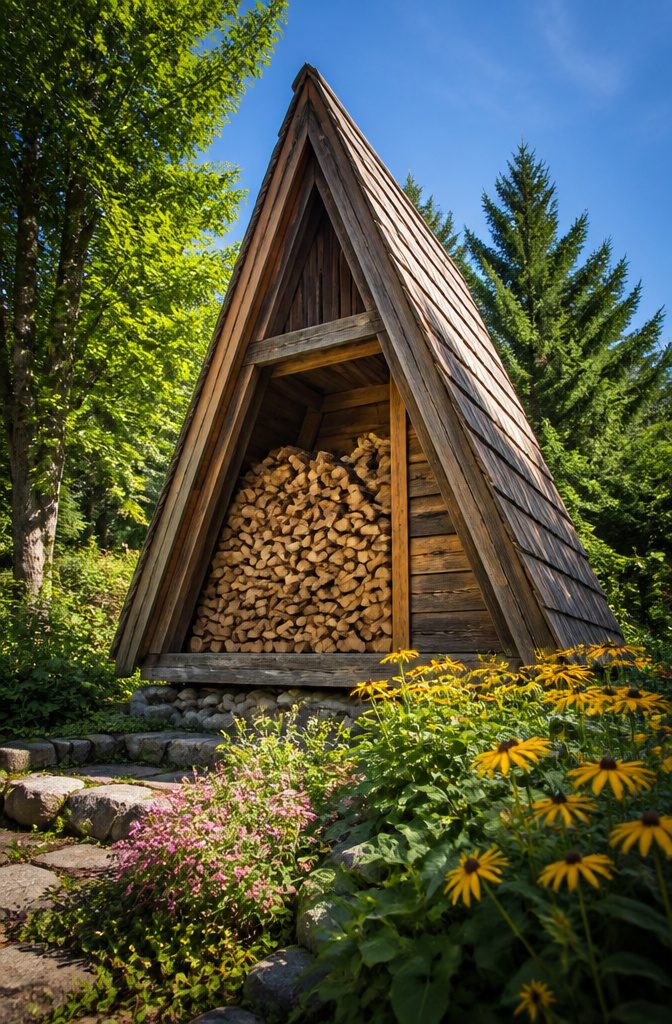
The steep pitch of an A-frame wood shed is what makes it worth building in the first place.
Rain and snow slide straight off those dramatically sloped sides instead of pooling on top, which means your firewood stays dry through seasons that would soak a flatter roof.
That same angle buys you more headroom inside than you’d expect from such a simple frame.
You can build one from a pallet base, a handful of 2x4s, and whatever roofing you have on hand, whether that’s wood boards or metal sheets.
The construction stays basic, but the payoff is real: usable space overhead and weather that sheds itself.
Store the finished shed at least 15 feet from your house, since wood sitting near the foundation creates a direct path for insects to follow indoors.
I go around my place once a year to check that separation, and it has saved me more trouble than any other single habit.

EASY FRONT ZIPPER ACCESS: Say goodbye to struggling with entire covers! Vailge firewood rack cover features a convenient full-length front zipper and opening. This allows you to easily add or retrieve firewood without removing the entire cover, saving you time and effort in rain or snow.

Firewood Organized: Amagabeli 8ft firewood rack measures 96" W x 12" D x 41.4" H , 4" off the ground. Heavy duty firewood rack outdoor with kinding holds and stores up 1/4 face cord of firewood. Perfect size fire wood racks to fit on outdoor back porch, back yard deck, outside backyard fire pits, under eaves, tool shed, wood shed, chaotic pile inside the cabin, indoor garage, family room, covered patio to hold enough wood for fireplace all seasons

- 8 Support Legs - Our outside wood rack holder is made of 8 support legs that are more stable and will not be tilted by heavy weights. That's more, have been tested, our indoor large firewood racks not only hold up to 1/3 face cord of firewood but also high capacity up to 2550 pounds
4. Pole Barn-Style Wood Shed
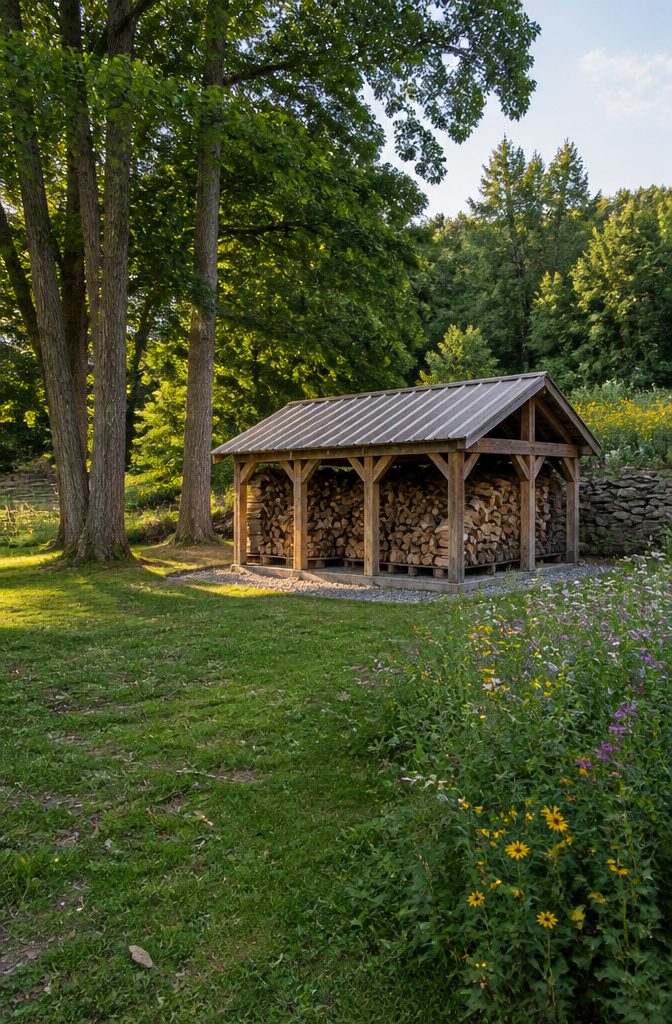
A pole barn-style wood shed takes the same approach farmers use for equipment storage and applies it to firewood. Posts set in concrete support the roof, leaving the sides completely open so air moves through from every direction.
That airflow is what seasons wood properly; stacked on the ground or against a solid wall, the center of the pile stays wet and the bottom rots.
The post-hole construction is straightforward.
Dig holes, set your posts, pour concrete, then frame the roof. No siding to install, no doors to hang.
A 4-foot wide by 8-foot long by 4-foot high structure holds an entire cord of wood, which makes the math easy if you burn one cord a season and want to keep last year’s dry while this year’s seasons.
The open sides do mean some weather gets in. Driving rain will wet the outer rows, so face the open sides away from your prevailing wind if you can.
For the cost of a few posts, some rafters, and metal roofing, you get storage that dries wood instead of trapping moisture.
I would build it on a gravel bed or concrete piers, not bare dirt, so the bottom layer stays clean enough to carry inside.

Heavy Duty Metal Panels: This multi-functional corrugated metal roof panel is made of high-quality galvanized steel, featuring long-term weather resistance, corrosion resistance, waterproof performance and excellent color fastness.Ensuring reliable performance for a long time

Easy to Splice: The polycarbonate sheet is made of 12 pieces 39.37in x 36.6in spliced together to form 3.2ft x 32.8ft.The corrugated design allows for seamless splicing of two panels together without the use of any tools. Unpacking may have white resin powder, just take a damp cloth and wipe it off for normal use

【 Durable and sturdy】: This hexagonal head metal screw is made of galvanized steel, with a head treated with baking paint, providing high hardness and excellent corrosion resistance. The threads are precise, clean, and clear, making it easy to penetrate wood and plastic, ensuring secure fixation and making it easier to drive screws, saving time.
5. Repurposed Old Shed
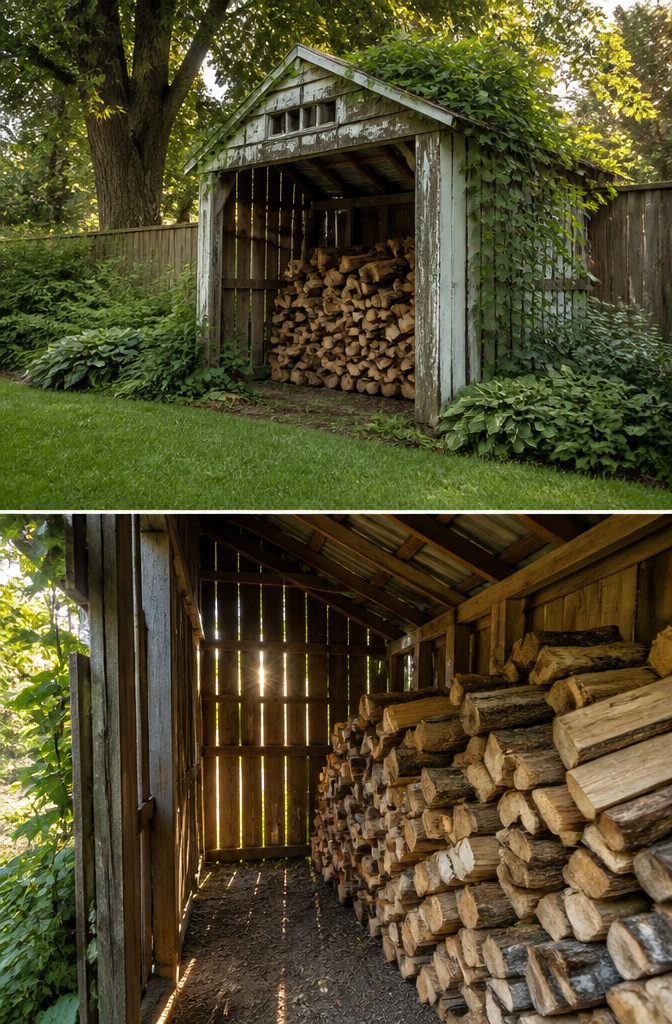
An old shed sitting in the corner of a yard is already a structure with a roof and framing, which saves the weekend and the bulk of the budget.
The first thing to check is whether the floor and sill plate are still solid. Poke the corners with a screwdriver; if it sinks in past the first quarter inch, that wood is compromised.
Look for sawdust trails or small holes that signal carpenter ants or termites, and step on the joists to feel for bounce that means rot underneath.
Remove the floor panels entirely if you are storing firewood inside.
Logs on the ground draw moisture up through the boards and back into the stack, which is the same reason firewood left on bare earth will rot instead of season.
With the floor out, air moves underneath as well as through.
The passages note that removing one wall panel is the usual move for access and airflow, though in a damp climate I would rather cut vent slots high and low in the existing walls and keep the weather protection.
Paint buys a little more life for old siding, but it does not fix structure. If the sill is rotted, sister a new treated board alongside it before you load a cord of oak against the wall.

【High Strength and Toughness】Our plastic films feature 5-Layer Co-Extrusion technology for high mechanical strength and flexibility, and they can protect your plants from UV radiation at high temperatures

High-Quality Polyethylene Material: The greenhouse film is made of high-quality polyethylene with 6 mil thickness, tear-resistant and against UV radiation for long-lasting uses.
High-Quality Polyethylene Material: The greenhouse film is made of high-quality polyethylene with 6 mil thickness, tear-resistant and against UV radiation for long-lasting uses.
6. Minimal Tool-Free Rack
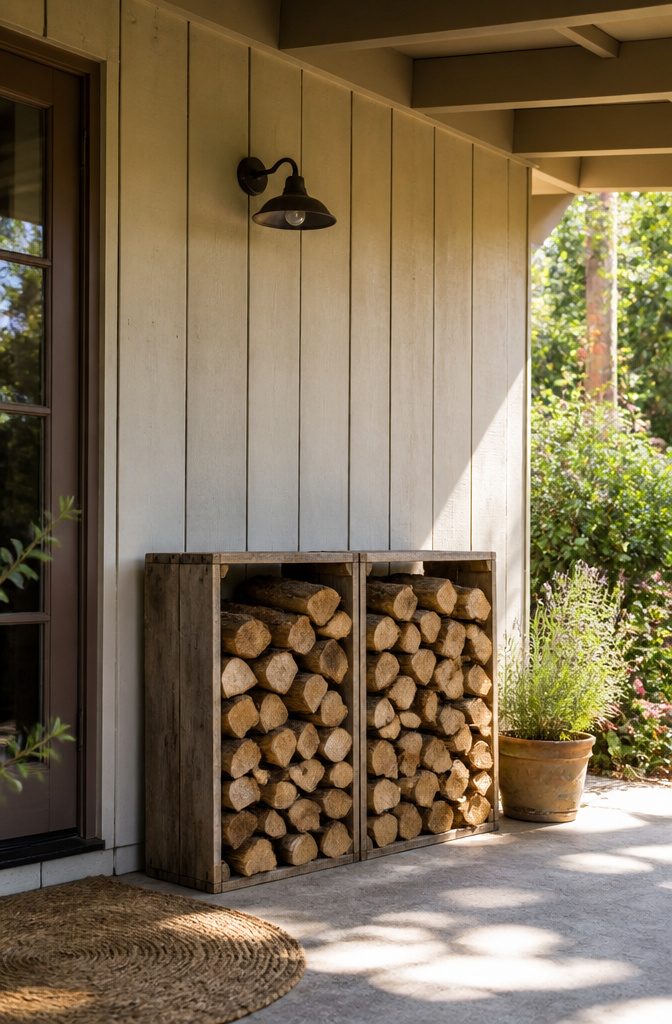
A gravity-held firewood rack needs nothing but weight and balance to stay upright.
Stack two wooden crates on their sides, one atop the other, and the load of the wood itself locks them in place beside a door or under an eave. No screws, no drill, no extension cord to hunt for.
Concrete blocks and a few boards work the same way.
Set three blocks in a rough rectangle, lay scrap lumber across them, and pile split wood on top. The mass of the wood keeps the frame from shifting, and if one board warps, swapping it takes thirty seconds.
Living off-grid or working a site without power makes this approach more than a convenience. It is the difference between stacking wood that afternoon and waiting until you can borrow a generator.
An elevated deck or porch overhang turns into ready shelter; the rack sits underneath, the roof is already built, and air moves through the sides to season the stack.
If the climate runs damp, a tarp thrown over the top rail handles the worst of it.
The rack itself costs nothing if you are already buying crates for storage or pulling pallets from behind a grocery store. The only real limit is the length of the lumber you can carry or find.
7. Simple DIY Backyard Shed
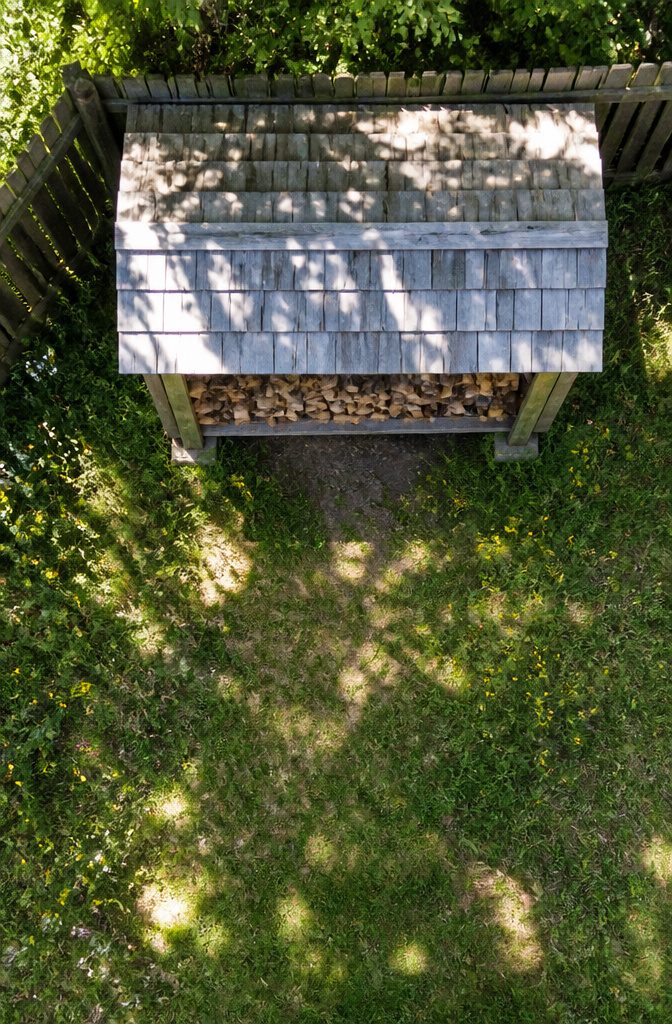
A weekend firewood shed starts with four 2×4 boards, each 12 feet long, and 22 cedar fence pickets measuring 5.5 inches wide by 72 inches long. That is the whole skin of the thing; no plywood, no siding, no trips back for forgotten trim.
The 2x4s frame a simple rectangle on the ground, stood upright or laid flat depending on how much airflow you want underneath.
Two more 2x6s at 12 feet would brace the long sides if you are following the original plan, though the core structure holds together without them if you are shaving dollars.
The cedar pickets nail or screw straight to the frame, spaced a finger’s width apart so the wood seasons. Cedar weathers to silver-gray and resists rot without paint, which saves a weekend and the cost of a gallon.
Self-tapping star-bit deck screws are what the cut list calls for: 50 at 2-1/2 inches for the frame, 200 at 2 inches (or 1-5/8 or 1-3/4 if that is what the bin holds) for the pickets.
The star bit matters more than the exact length; a Phillips head strips out after the fiftieth board, and you will hit the fiftieth board by noon on Saturday.
What goes wrong is usually the gap. Pickets swell in August rain and shrink by February, so that finger-width spacing in June turns into a quarter-inch draft by Christmas.
Build it looser than looks right. The wood dries faster, and the shed does not turn into a solid wall of mildewed cedar by year three.

【 Spacious 2-in-1 outdoor storage 】 This firewood storage shed measures 98”L x 41”W x 63.5”H, providing ample room for firewood, garden tools, patio furniture, or equipment. Use it as a dedicated log holder or a general outdoor storage shed. Keep your backyard tidy and organized.
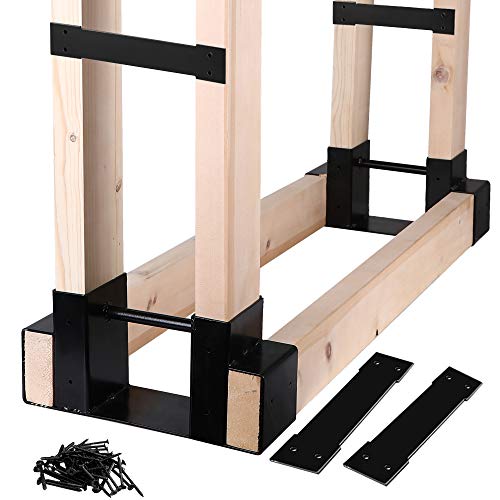
WHAT YOU GET -- A pair of firewood log brackets with wood screws,13.2" *3.7"*6". (Lumbers are not included).

Effortless Installation: Our user-friendly guide, comprehensive manuals, and detailed video tutorials guarantee a seamless setup. Additionally, our expert technical team offers remote support whenever needed.
8. Smoking Rack
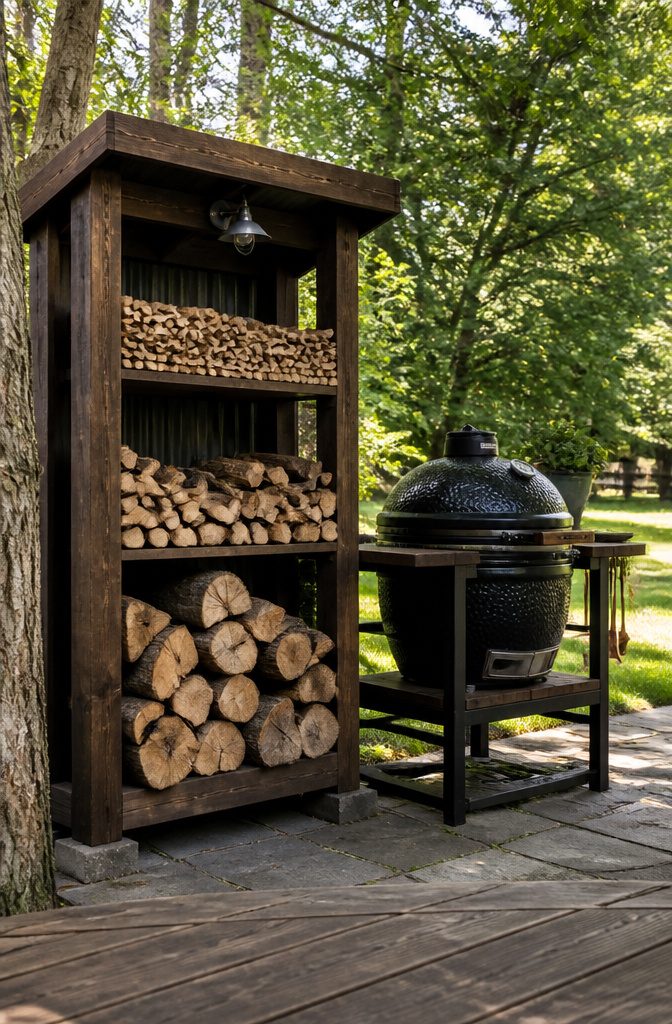
A smoking rack sits close enough to a grill or smokehouse that you can grab wood without leaving the fire, and its open frame does double duty: the same gaps that let smoke drift through when you cook also move air around the stack to season the firewood underneath.
I like the logic of putting your larger splits on the bottom and kindling-sized pieces up top, since the weight settles itself and you reach for the small stuff first when you are feeding the fire.
The rack does not need walls to work.
Without them, a light breeze pulls moisture out of green wood in roughly the same months it would take in a fully enclosed shed, and if you do cold-smoke fish or cheese the open sides keep the draft from choking on its own creosote.
What limits this design is the weather you cannot step around.
Rain hits the stack from the side unless you site it under an eave or add a deep roof overhang, and in heavy snow country the open rack loads up and takes longer to dry than a three-sided box.
For a yard that already has a covered cook area, though, the smoking rack saves you from building twice.

[UNIVERSAL SIZE] Firewood log rack cover size: 48*24*49 inches, which can fit 4FT firewood rack

The fire wood rack measures appr 8.0 W x 1.0 D x 3.8 H feet, holds and stores up to 1/2 face cord of firewood and easily withstand a load of upto 4500 pounds. Perfect size to fit on outdoor porch, backyard deck, outside fire pits, under eaves, on patios, or put it on a hard surface, such as paving stones, concrete patio or gravel.
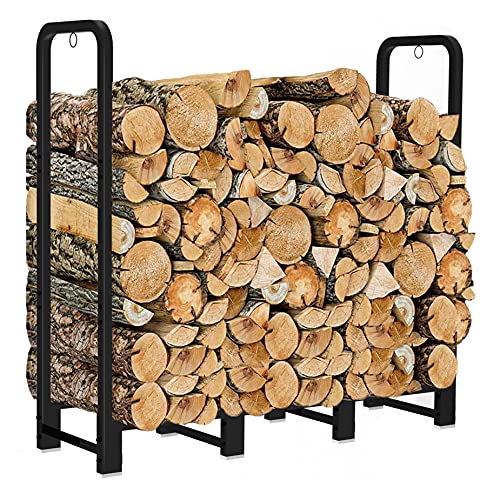
High Capacity Storage: The fire wood rack measures appr 4.0 W x 1.0 D x 3.8 H feet, holds and stores up to 1/4 face cord of firewood and easily withstand a load of upto 550 pounds. Perfect size to fit on outdoor porch, backyard deck, outside fire pits, under eaves, on patios, or put it on a hard surface, such as paving stones, concrete patio or gravel.
9. Easy Firewood Rack
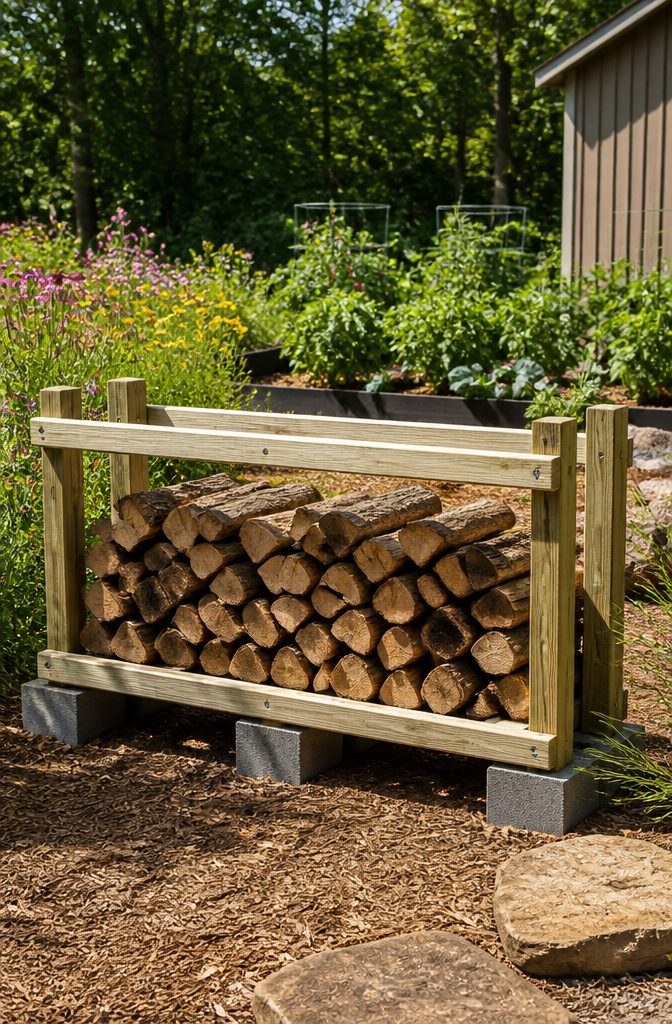
A firewood rack built from pressure-treated 2x4s and cinderblocks gets the wood off the ground by Saturday afternoon with almost no planning. The blocks create a level foundation, and the lumber stretched across them carries the stack.
Four posts with a rectangle of wood at the bottom and another at the top complete the frame. I have watched enough people overthink this to say that the assembly is obvious once the pieces are cut.
The rack holds enough firewood for multiple nights of burning, and the whole build stays under a few hours if the lumber is already dry.
Metal poles and fittings are the alternative if you want something different from wood, arranged to whatever size fits your stack.
Either way, keep the rack away from the house. Stacking firewood directly against a structure creates a bug superhighway indoors, and you will notice the problem before the season ends.

Heavy-Duty Double-Layer PVC Build:This value pack includes 25 corrugated roof panels, each 60.83" x 22.05" at 0.04" (1mm) thick, plus 200 matching screws and washers. The rigid double-layer construction resists denting and bending, so each panel holds its shape under foot traffic, snow load, and wind

Heavy Duty Metal Panels: Our metal roofing panels are made of high-quality galvanized steel and offer long-term weather resistance, corrosion resistance, rust resistance, and waterproof performance. These panels remain durable and strong even under extreme weather conditions.

Heavy Duty Metal Panels: Our metal roofing panels are made of high-quality galvanized steel and offer long-term weather resistance, corrosion resistance, rust resistance, and waterproof performance. These panels remain durable and strong even under extreme weather conditions.
10. Kee Klamp Firewood Rack
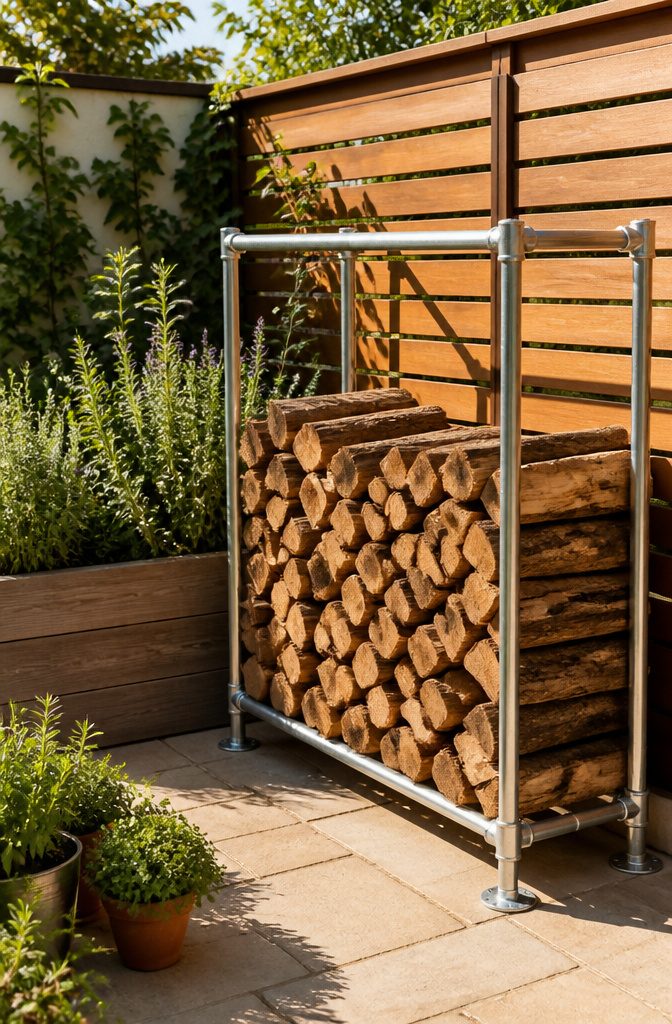
Metal pipe and Kee Klamp fittings give you a firewood rack that scales to whatever space you have without cutting a weld.
The fittings slip over standard pipe and lock with a hex key, so you can resize the frame as your woodpile grows or shrinks.
I like that the whole thing stays modular; you are not locked into the dimensions of a single-season stack.
The galvanized steel frame carries serious weight. Split oak or hickory loads in heavy, and this rack takes the pressure without bowing or racking sideways.
The open design keeps air moving through the stack, which matters more than most people think until they pull punky wood from a damp corner.
You can roof it if your climate demands that, though the pipe frame itself handles rain and snow without maintenance. For renters or anyone who might move, the whole rack breaks down with a single wrench and travels flat.
That portability is rare in firewood storage, and it is the main reason I would reach for Kee Klamp over welded angle iron for anything under a full cord.

High-Quality Polyethylene Material: The greenhouse film is made of high-quality polyethylene with 6 mil thickness, tear-resistant and against UV radiation for long-lasting uses.

Oversized 10 x 26 FT Coverage: Pumtus greenhouse plastic sheeting film measures 9.84 x 26.24 feet, providing expansive coverage for large-scale gardens, farm or hoop houses. The generous size eliminates seams that weaken protection, you can cut it to your desired size or fold it into rolls.
High-Quality Polyethylene Material: The greenhouse film is made of high-quality polyethylene with 6 mil thickness, tear-resistant and against UV radiation for long-lasting uses.
11. Greenhouse Firewood Shed
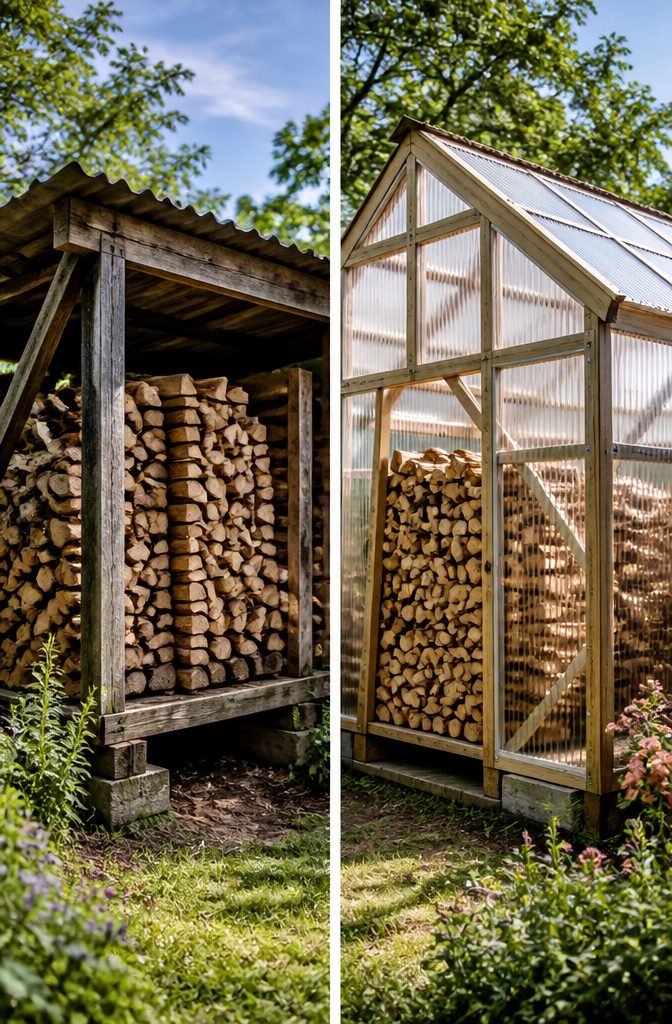
A greenhouse-style firewood shed wraps plastic sheeting around a simple wood frame to trap solar heat and speed up drying time.
The plastic creates a mini greenhouse effect that draws warmth inward, which helps pull moisture out of freshly cut logs faster than an open-air stack would manage on its own.
The real challenge is balancing that heat against enough airflow to stop mold from forming.
Seal the plastic too tightly around the sides and you end up with humid, stagnant air that turns your firewood pile into a breeding ground for fungus. Leave too many gaps and you lose the warming effect entirely.
The practical middle ground is a roof and back wall fully covered in plastic sheeting, with the front and lower edges left open or fitted with vent gaps that let air move through the stack from bottom to top.
That upward draw carries moisture out while the trapped heat on the roof and rear face still does the drying work.
This design suits anyone burning wood in a firepit through the fall months rather than heating a whole house all winter.
A smaller stack dries faster in the greenhouse effect, and the plastic is cheap to replace when it weathers out after a season or two.
12. Two-Layer Wood Storage
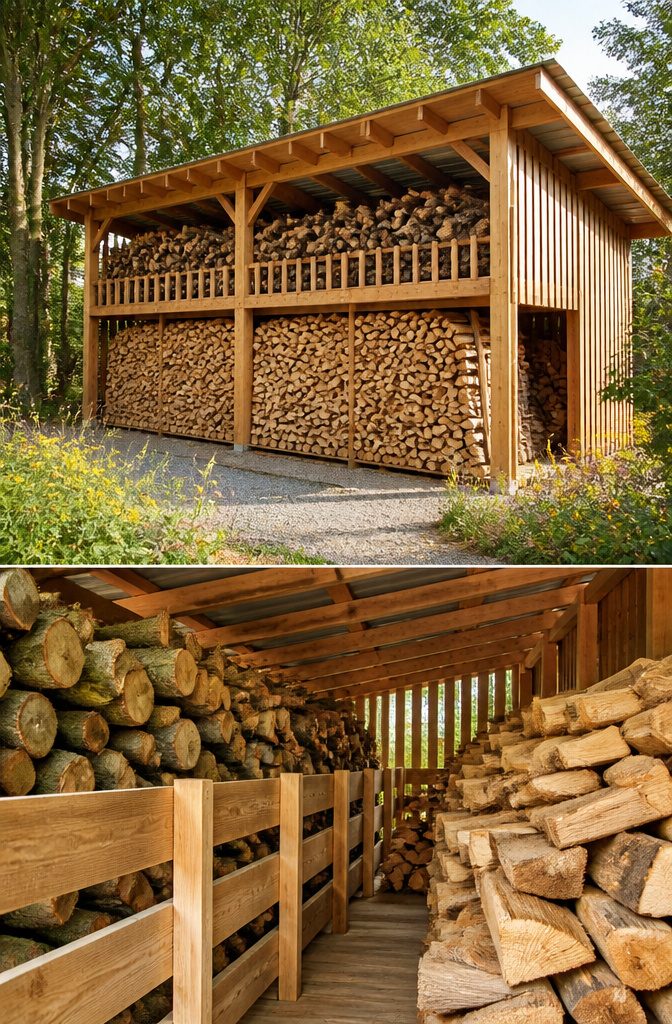
A two-layer wood storage shed keeps green logs apart from the seasoned pile you are actually burning.
The newer, wetter wood sits on the lower level or in the back where air can still reach it, while the ready-to-burn stack stays up front and dry.
You move wood forward instead of restacking the whole pile, which matters more than I expected once winter settles in.
The separation also protects the dry wood from picking up moisture off the fresh cut.
Logs on the ground rot, and even stacked green wood sheds humidity into the air around it. A simple partition, sometimes just a slatted wall or a raised platform, keeps the two environments from mingling.
For a small yard, this design squeezes more function into the same footprint as a single-layer shed.
A pole barn-style frame, roughly 4 feet wide by 8 feet long by 4 feet high, holds a full cord and leaves the interior open for whatever division your wood supply needs.
The open sides move air through both sections, which is what seasons the back pile while the front one waits its turn.
13. Straightforward Woodshed
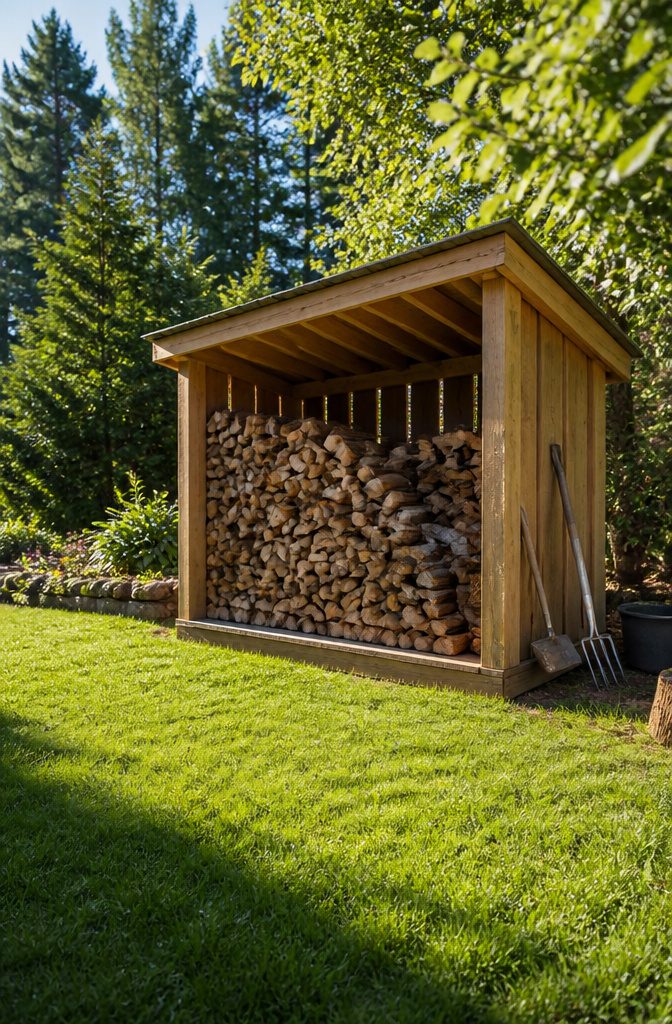
A three-sided shed with the open face to the south or leeward side is the shape that has kept firewood dry since long before anyone called it design. The back wall and two sides block wind and driving rain.
The roof carries water clear of the stack. The open front lets sun reach the wood and gives you room to work without ducking through a doorway.
I spent an afternoon last fall walking a property line with a neighbor who was overthinking his build.
He wanted hardware, hinges, maybe a sliding door. The pile he was covering had sat under a tarp for two winters and was still half green.
What convinced me, reading through a dozen of these old builds, is that the ones that work strip everything back to that single function. Air moves through.
Water does not. That is the whole job.
Face the open side south if you are in a wet climate; face it leeward if your wind comes steady from one direction. The wood seasons faster, and you are not fighting a door every time you fetch an armful.
14. Log Rack
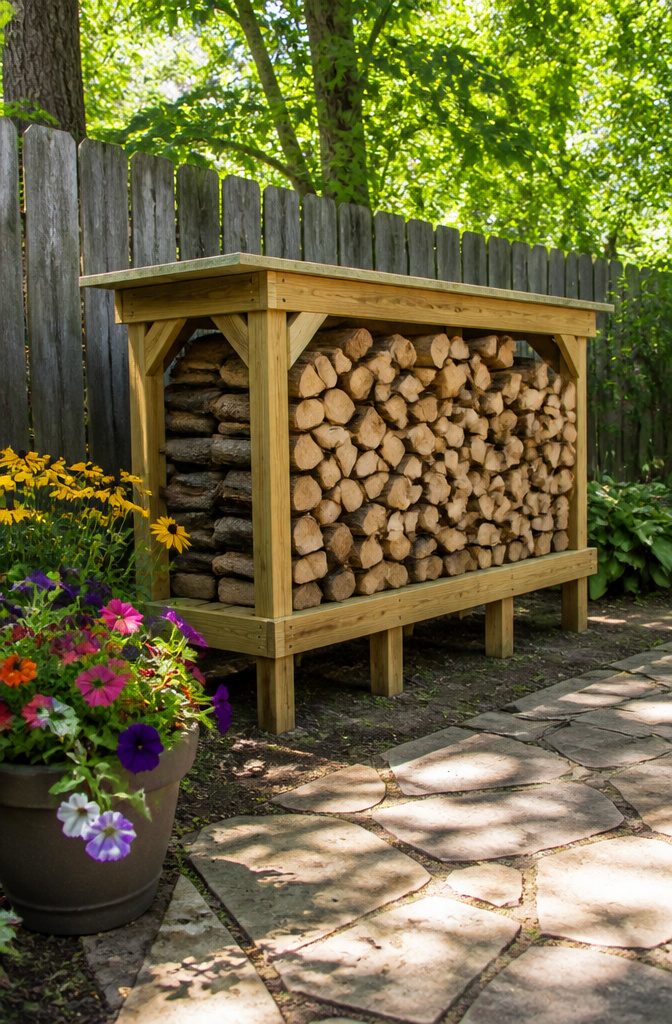
A log rack is the wood shed idea that skips walls entirely, and for seasoning firewood that is usually the smarter choice.
The design is nothing more than a rectangle of 2x4s or metal uprights with a few horizontal supports to keep the stack off the ground.
Elevation matters more than enclosure because airflow around all four sides of each log pulls moisture out faster than any roofed box with solid walls ever could.
I built my first one from pressure-treated 2x4s and cinder blocks, thinking the blocks would speed things up.
They did not. The wood sat too low, ground moisture crept up through the bottom row, and the whole pile developed a musty smell by spring.
What fixed it was raising the lowest supports to about six inches and leaving a palm’s width of gap between every row of logs so wind could move through.
Metal uprights with welded brackets cost more upfront but save the yearly check for rot. Either way, a sheet of corrugated metal across the top keeps rain off without trapping humidity underneath.
The whole project runs a Saturday afternoon and sits comfortably inside a tight budget, which is why this design keeps showing up in backyards where the goal is dry wood by October, not architecture that competes with the house.
15. Pyramid Outdoor Storage
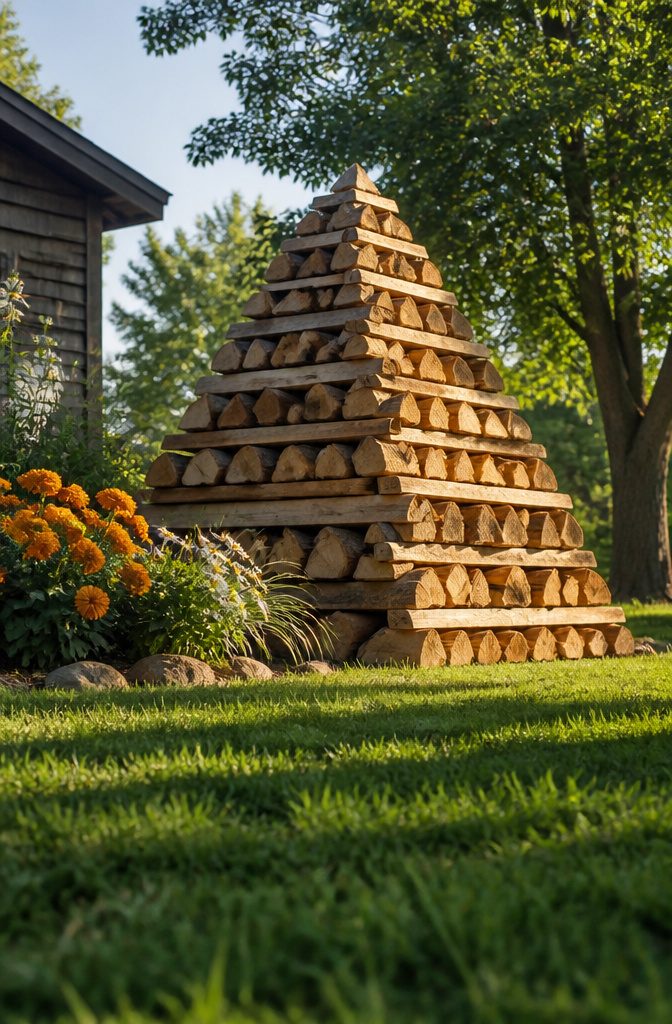
A pyramid stack turns firewood storage into its own structure, no frame required beyond the pallet base you already own.
Start with a row of split logs along the ground, then lay each ascending row a little closer to center so the walls slope inward and meet at a peak.
The geometry does two jobs at once: the inward pressure keeps every piece locked in place so the pile resists toppling, and the steep planes let rain run off before it soaks past the outer shell.
I have seen these built against a fence line and freestanding in the middle of a lawn, and the compact footprint suits a small yard where a full shed would eat the sightline.
Keep the stack at least 15 feet from the house foundation; wood that sits near the ground against exterior walls draws insects straight indoors.
The pyramid also reads as deliberate from the street, not a heap of scrap, which matters when storage lives in your front or side yard.
16. Back Door Log Store
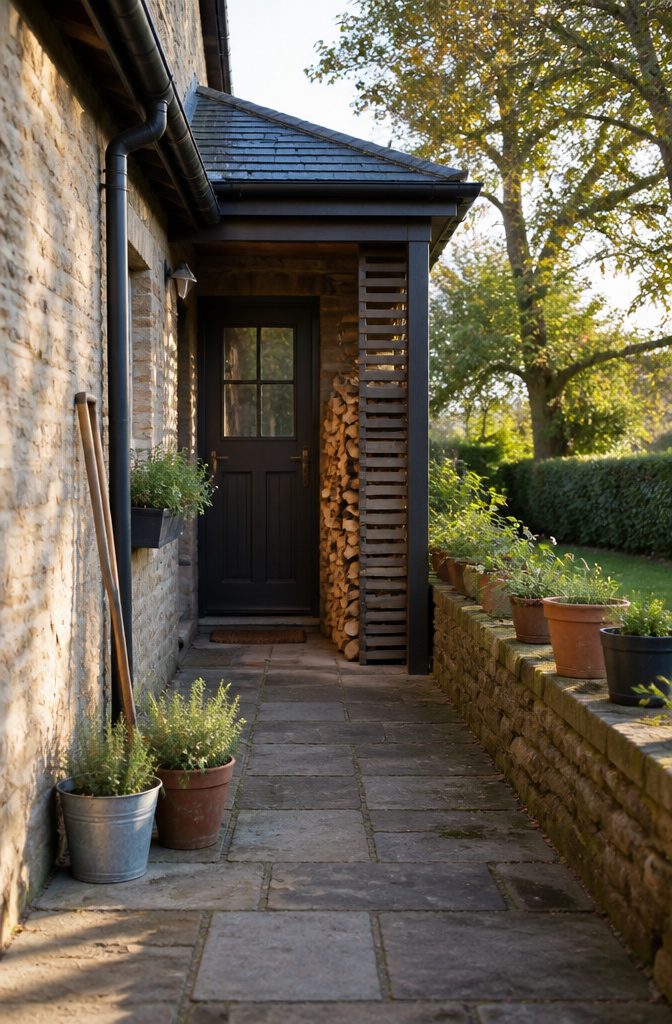
A narrow log store at the back door cuts the chore of hauling firewood through rain or snow, but the convenience runs straight into a hard limit.
Fire codes in most areas want combustible material kept about 15 feet from any structure, and a wooden house only tightens that case.
The risk is not just the wood itself but what it attracts: pests that move from the stack to the siding, or worse.
Two ways to play this. One is to build a lean-to style bin tight to a garage or fence wall, using the existing structure as your back panel but leaving an air gap so the wood seasons.
Cedar holds up here; it weathers without the rot that cheaper lumber invites. The other is to keep the store detached, roofed, and small enough to sit at that 15-foot line while the path stays clear.
Either build takes a weekend and off-the-shelf lumber, or a panelized kit if you want the assembly under an hour.
The gap matters more than the footprint: airflow dries the wood, and dry wood burns cleaner and carries less weight back to the house.
17. Specialist Firewood Shed
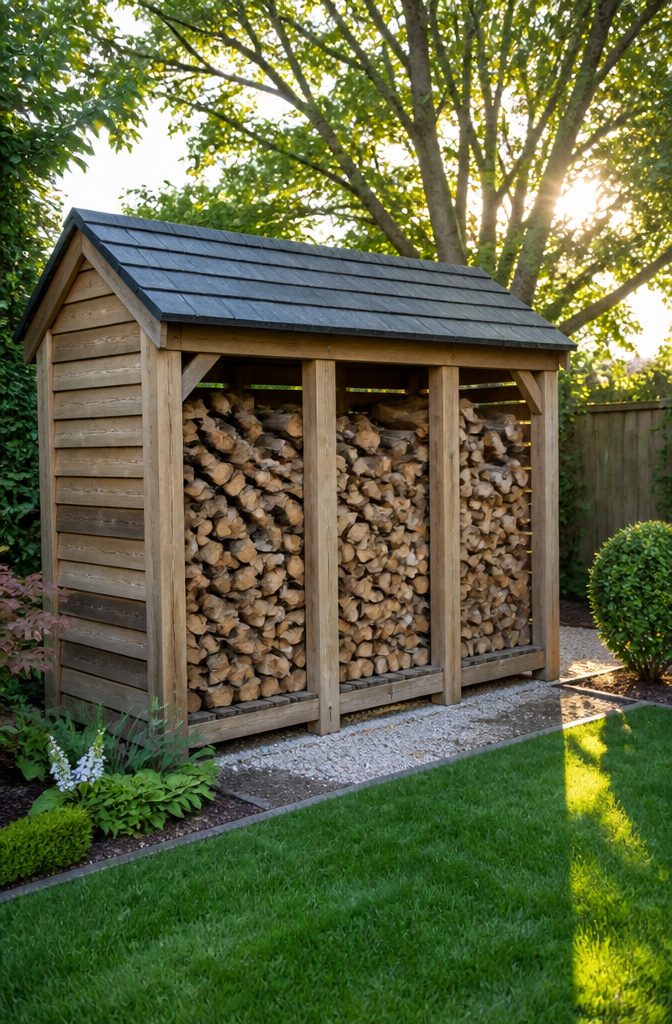
A specialist firewood shed sits at the point where weekend projects end and serious joinery begins.
The plans that circulate for this build assume you already own a miter saw and know how to read a rafter table, because the roof joins to the wall frame with cuts that have to sit flush or the whole shed racks.
The standard footprint runs 4 feet wide by 8 feet long by 4 feet high, the same material-friendly module that makes a pole barn economical, and at that size it holds a full cord with the ends stacked in alternate directions for airflow.
What separates this from the pallet racks and lean-tos is the enclosure. The sides and roof are sheathed, not open, which matters if you burn through damp winters.
The plans include measured drawings for the roof pitch, the stud spacing, and the floor joists lifted off the ground so the bottom course of wood stays dry.
You will find the tutorial and cut list through the original build site, not a big-box retailer, and the author assumes you have a buddy to help stand the walls.
Budget two weekends, not one, and expect to spend more on pressure-treated 4x4s and corrugated roofing than on the entire structure of a basic open rack.
18. 4ft by 2ft Log Store
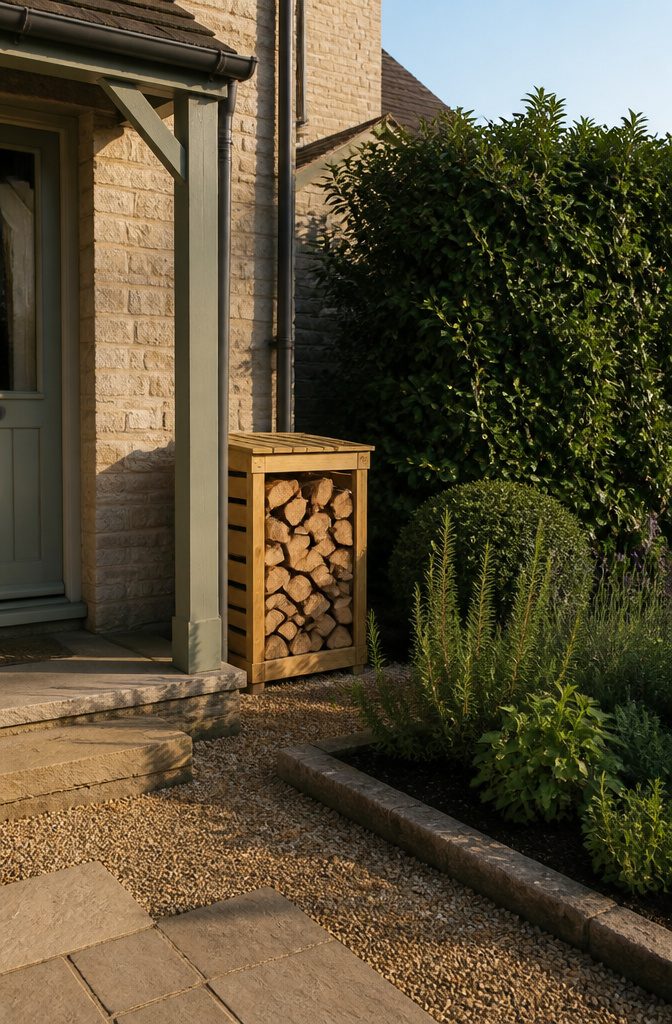
A 4ft by 2ft log store tucks beside a porch step or flattens against a garage wall without eating the yard whole.
That footprint holds about a face cord of split wood, enough for a modest fireplace or a few weekends of campfires, not a whole winter’s burn.
The narrow depth keeps the store from jutting into walking paths. Set it on a couple of concrete pavers so the bottom row stays dry, and lean the slatted roof forward slightly so rain runs off toward the front.
Three sides of slats or pallet slats let air move through the stack while the back panel faces the house or fence, hiding the mess from sightlines.
I would not try to stack green wood in this size and expect it to season fast. The air volume is too small.
This store works best as a dry holder for already-cured logs you pull from a larger pile elsewhere, or for someone who buys kiln-dried bundles by the half cord and burns through them in a season.
For renters, the light weight means two people can shift it when the lease ends, and the footprint fits most landlord rules about "temporary structures."
19. Large Woodshed
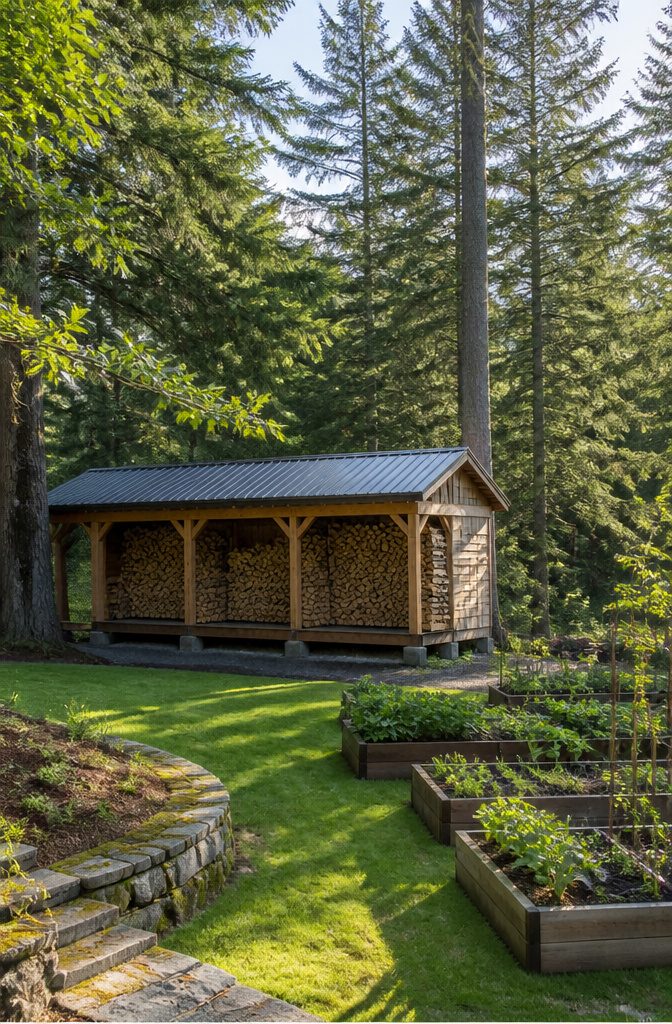
A full heating season burns through more wood than most people picture going in.
When I sized up what four cords actually looks like stacked, the footprint stopped being a shed idea and started being a small building project with real span considerations.
Roof beams need to carry snow load across sixteen feet or more without sagging, which means checking local code tables for rafter spacing rather than guessing.
The sources I trust split large sheds into four separate bays, and that division matters more than I first thought.
Fresh-cut wood goes in one bay, seasoned wood in another, so you burn the oldest stock first instead of digging through a single pile every February.
Pole barn construction keeps the interior open, with support posts roughly eight feet apart carrying the roof load and leaving airflow to move through the whole stack.
A 4-foot-wide by 8-foot-long by 4-foot-high bay holds one full cord, so scaling up is modular math rather than custom carpentry at every step.
If the budget runs tight, building two bays this year and adding the roof extension next spring keeps you under a thousand dollars now without trapping green wood against a wall later.
20. Timber Frame Woodshed
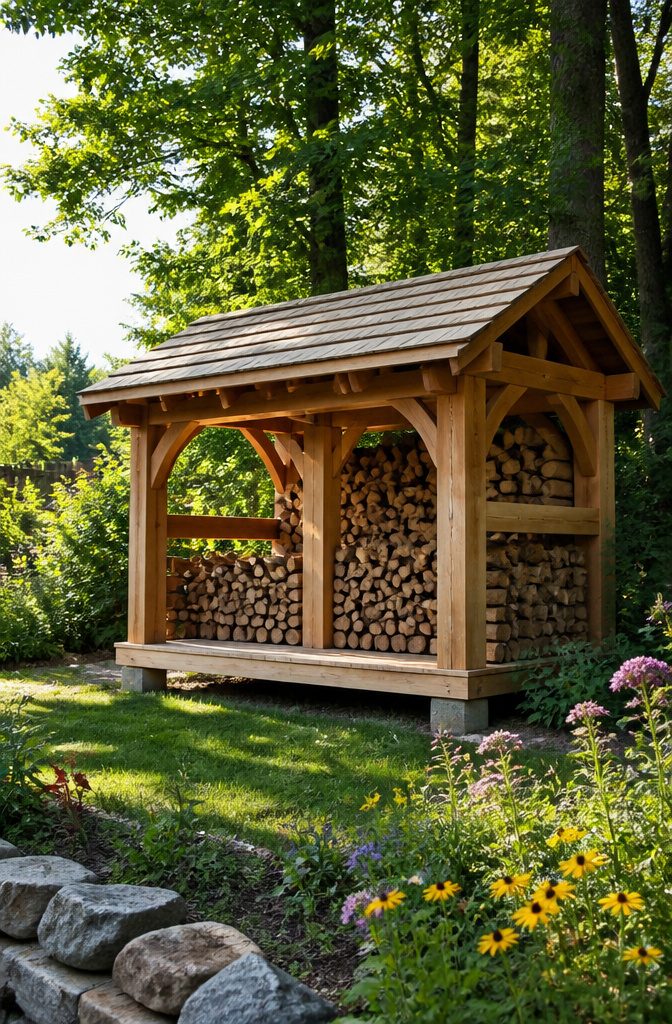
A timber frame woodshed carries its weight through joined posts and beams, not through nailed-together studs. Traditional mortise-and-tenon joints lock each beam into its upright with gravity and pegs; modern connectors use steel plates and bolts to the same end.
Either way, the frame itself becomes the structure, and the roof load travels straight down through the posts to the ground.
The walls stay open on purpose. Boards or tin may cap the gable ends to break wind, but the sides need only slats or nothing at all, since the frame does not depend on sheathing for stiffness.
Air moves through the stack, which matters more than enclosure.
This method lasts because the joints flex slightly rather than fighting every shift in humidity. A post set on a stone or concrete footing will outlast any framed wall that traps moisture at its base.
The skill level sits somewhere between a weekend box build and fine carpentry. Cutting a clean mortise by hand takes practice, but connector plates let you assemble the same geometry with a drill and a level.
What you gain in either case is a shed you can re-tighten or re-peg decades in, rather than rebuilding when the nails let go.
Frequently Asked Questions
What is the best way to store firewood?
Firewood should stay off the ground, stay dry, and have open airflow on all sides so it seasons instead of rotting.
A simple rack or three-sided shed works; the key is elevation and ventilation, not a sealed box. Keep any stack at least 15 feet from your house to block pests and meet fire safety rules.
How do I build a firewood shed?
Start with a level foundation of concrete blocks or piers, frame walls and a slanted roof with pressure-treated lumber, and leave at least one side open for airflow.
Designs range from screwed-together pallets to a proper three-sided shed with a south-facing opening; a basic version takes one weekend, a framed and sheathed build takes two.
What materials do I need for a firewood shed?
Pressure-treated 2x4s or 4x4s for the frame, cedar or fence pickets for siding if you want walls, and concrete blocks or pavers to lift the wood off damp ground.
Self-tapping deck screws hold up better than Phillips-head, and a sheet of corrugated metal or plastic sheeting handles the roof.