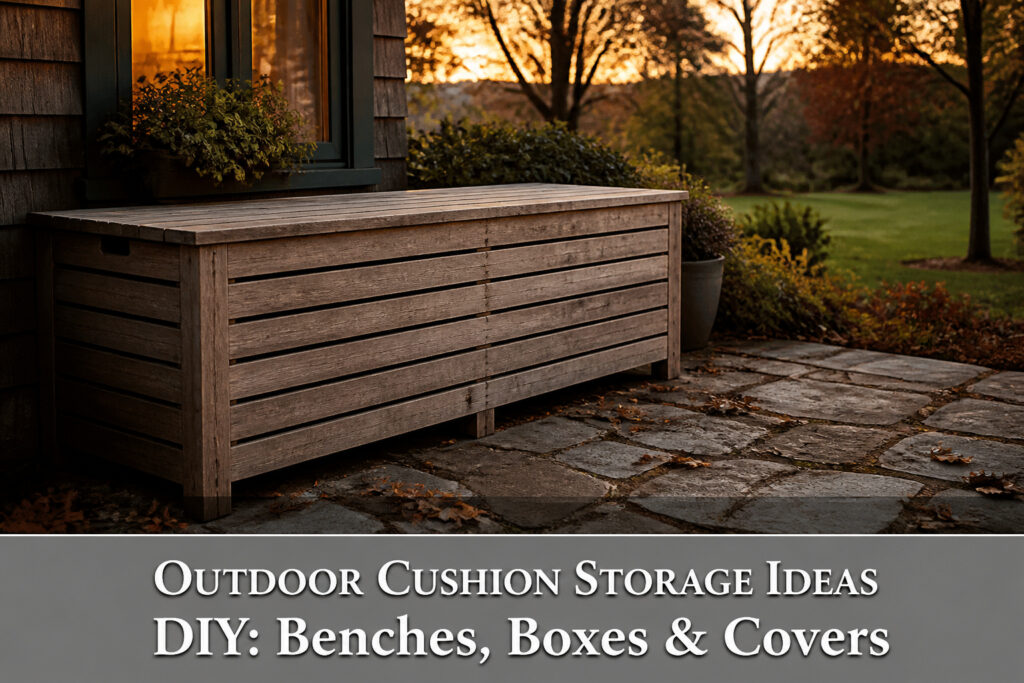
Outdoor cushion storage you build yourself ranges from a slatted cedar bench that weathers to gray, to a plywood box on casters that rolls under a table, to waterproof bags that fail when their zippers separate after one summer of heat.
The common trap is building the frame before you measure the tote, or skipping exterior-grade hardware because the joints looked tight during assembly.
A slat bench built to standard dimensions, 24 1/2 inches tall by 49 inches wide, runs about $120 in cedar and takes closer to a full day than the six-hour estimate once you account for cutting every 1×3 to identical length.
Outdoor Storage Bench
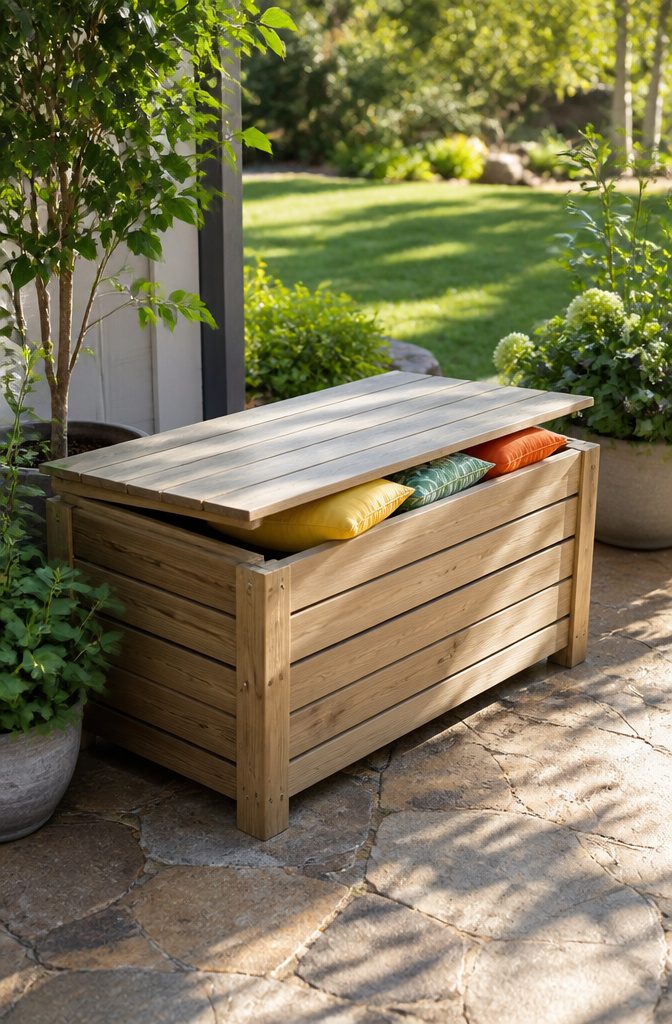
A slat-design bench built for outdoor cushion storage runs about 24 1/2 inches tall by 25 inches deep by 49 inches wide, dimensions that fit most standard cushion sets without dominating a patio.
The frame works in cedar or pressure-treated pine; cedar runs roughly $120 in materials and weathers to a soft gray, while pressure-treated holds up longer against rot but carries that greenish tint until it dries and needs exterior-rated hardware throughout.
The angled slats are the practical detail. Tilted slightly downward, they let rain run off instead of pooling on the seat, and the gaps between boards keep air moving underneath so cushions stored inside do not mildew.
Assembly is pocket-hole joinery with a Kreg Jig and a miter saw for the repeated cuts; the slats themselves are simple 1x3s spaced to create that louvered look without any actual louver hardware.
The catch is time. Even with a Kreg Jig handling the joinery, getting every slat cut to the same length matters more than it looks.
An eighth-inch variance throws the whole front panel off square, and pocket screws do not forgive that the way a nail might.
Budget closer to a full day than the six-hour estimate if you are stopping to check each cut against the last.

All-Weather Protection for Everyday Outdoor Living: Built for real outdoor use, this patio bench cushion features water-resistant, tear-resistant fabric that stands up to light rain, sun, and daily wear. Ideal for front porch, deck, terrace, sunroom, garden, or backyard seating, it helps protect your outdoor furniture seating so it stays looking great season after season
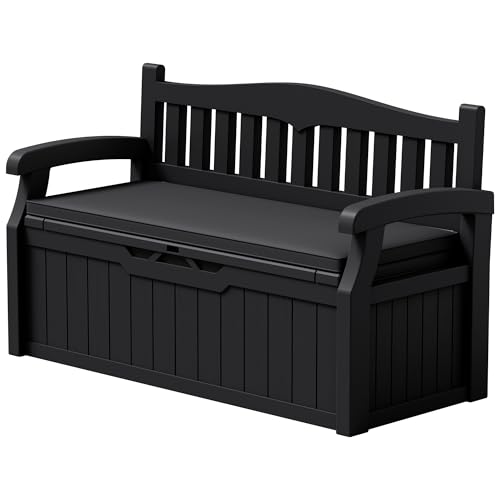
Optimal Size:Exterior: 52.8 in. L x 22.6 in. W x 32. 3 in. H / Interior: 48. 4 in. L x 22.4 in. W x 16.9 in. H, blends perfectly into a variety of patio styles, saving space without sacrificing practicality

Spacious and Versatile: The 55-gallon storage deck box has a large capacity and is perfect for storing gardening tools, pool accessories, outdoor cushions, etc. The outdoor storage box versatile design allows it to be used as a stylish bench, providing extra seating for outdoor gatherings or relaxing time in the garden or patio.
Modern Cedar Storage Bench
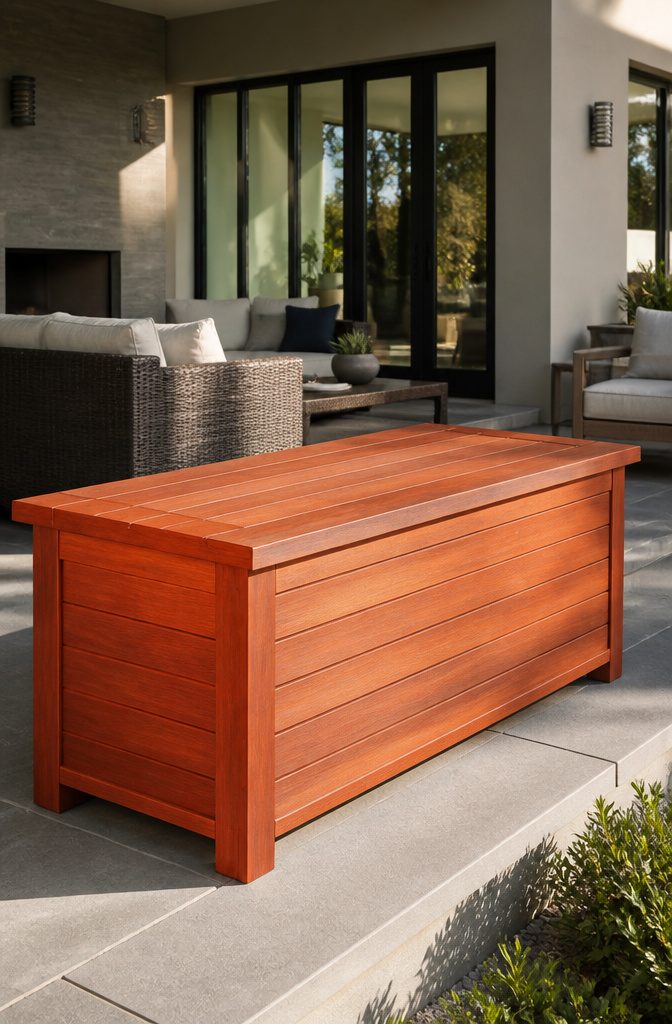
Cedar costs more than pressure-treated pine, but the difference buys wood that resists rot on its own without chemicals. That tight grain that makes cedar attractive also changes how you waterproof it.
Pressure-treated pine swells and shrinks more, so construction leaves gaps that water runs through; cedar stays dimensionally stable, which means joints stay tight and you need to think about where water will sit rather than where it will escape.
A spar urethane with UV blockers holds the red tone through winter without turning gray. I left a cedar box unfinished once, and it silvered within two months of the first rain.
The same finish goes on the hardware, by the way, exterior-rated screws and glue or the joints open up regardless of the wood species.

Durable Solid Wood Frame: Made of natural acacia wood, our storage bench is sturdy and durable without easy deformation or cracking than those made of fir wood. The teak oil coating provides a beautiful and lustrous finish in addition to a layer of protection. All parts are connected by premium hardware, ensuring a high load bearing capacity of 355lbs.

Storage & Seating Combo: This 2-in-1 outdoor storage bench offers internal dimensions of 38.78 × 16.02 × 10.04 in (985 × 407 × 255 mm), comfortably seating two people while providing ample storage space. It features a built-in pneumatic rod and easy-to-open handle for secure and convenient access.

SLATTED, VENTED DESIGN: This outdoor storage has slatted sides and raised base to promote airflow and drainage to help keep contents drier.
Outdoor Storage Coffee Table
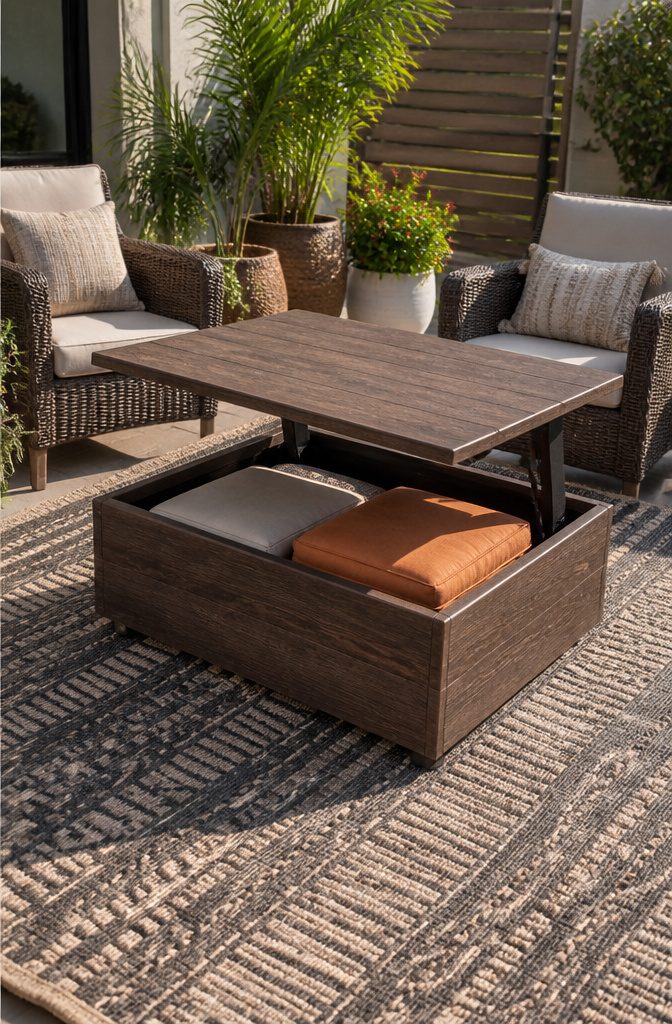
A low box with a lift-top lid gives you a surface for drinks and a place to stash cushions underneath, but the height is a real compromise.
At coffee-table level, around sixteen to eighteen inches, the lid sits low enough that people can prop their feet on it or set down a plate without reaching up.
That same low profile means you are bending deep to lift cushions in and out, and the lid wants to swing down hard if you let go.
The sources that rank for this build almost all add lid support hinges to solve the slamming problem.
These are the soft-close or gas-strut brackets that hold the weight as you lift and lower the lid without a bang. Standard butt hinges alone, three across the back, keep the lid attached but do nothing for the drop.
Inside the box, a plastic liner or a sheet of pond liner tacked to the walls stops the real enemy of stored cushions: condensation. Wood breathes and sweats with temperature swings, and that moisture collects on the bottom.
The liner creates a barrier so the cushions rest on plastic, not on damp plywood, and any water that does get in pools where you can wipe it out instead of soaking into foam.

Durable Material: Crafted from high-quality, recyclable HDPE material, this XTWEEX coffee table is built to last through changing seasons and varying weather conditions. Whether it's bright sunshine, strong winds, or heavy rain, the durable construction helps maintain its appearance and color over time. Thoughtfully designed for both indoor and outdoor use, it offers lasting quality you can rely on—blending sustainability with everyday comfort.

Lift Top Coffee Table: Wooden Lift tabletop coffee table measures 35.43" L x 35.43" W x 17.72" H when closed, great for small aparment and spaces. Transform your living room with our lift top coffee table. Enjoy meals, drinks, or work comfortably with the top that lifts to your preferred height, offering style, functionality, and convenience in one chic design

DUAL-PURPOSE & STORAGE: Featuring a liftable top design, this patio coffee table effortlessly converts into a dining table. The integrated storage shelf, accessible when the table is lifted, is ideal for keeping snacks, magazines, blankets, pillows, furniture covers, and more organized.
Outdoor Lounge Chair with Storage
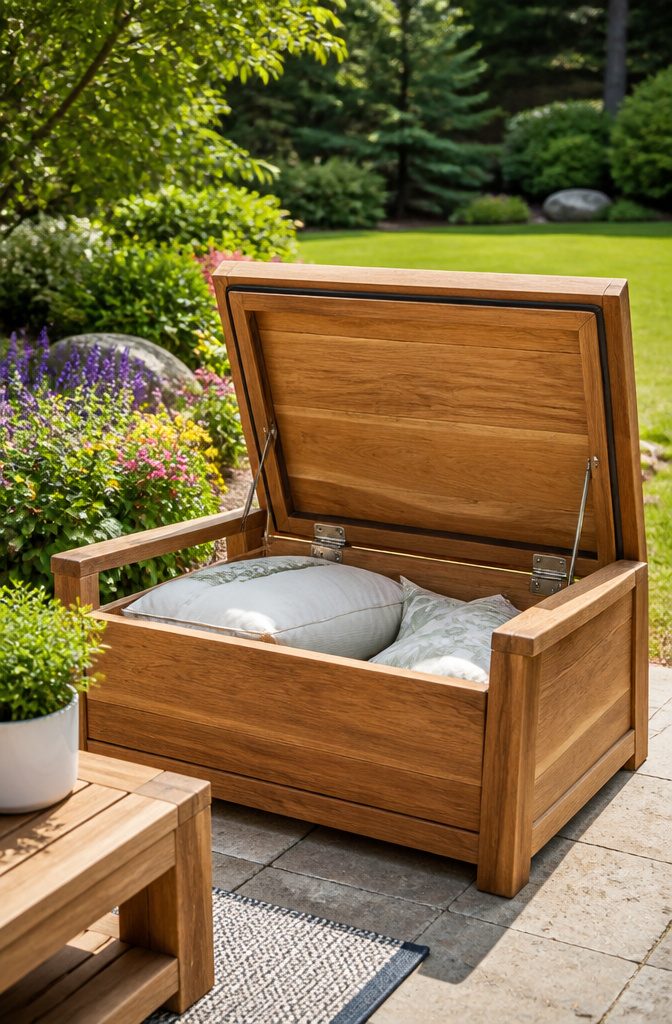
A lounge chair frame deep enough to hide cushions needs a seat that carries weight while it keeps rain out, and those two jobs fight each other.
The hinge sits at the back, where every opening cycle stresses the pin and every rainstorm finds the gap.
What convinced me, reading through a dozen build logs, is how fast a standard piano hinge corrodes in that spot: bare steel turns gritty in one season, and once the pin swells, the seat no longer closes flat.
The seal warps next. Builders often run a foam gasket around the rim, but summer heat softens the adhesive and the gasket migrates or compresses permanently.
A marine-grade hinge and a bulb seal in a routed groove outperform stick-on foam by years, though the groove takes an extra jig setup.
Water still pools if the seat deck lacks slope; a slight taper toward the back, even 1/8 inch over the depth, drains the cavity instead of letting it stew.
The real limit is the frame itself. Two-by stock, not plywood, carries the hinge screws without stripping, and the cavity depth tops out around six inches before the seat flexes under a 180-pound sit.
Any deeper and you are building a storage box with a lid that happens to look like a chair, which is a different project entirely.

【Wide Compatibility Size】-The patio cushion storage bag will covers up to 68"L x 29"H x 20"W. Perfect fit for most chair, bench, chaise cushions and also the Christmas tree.

【Dimension】- 68"L x 30"W x 20"H/173 x 76 x 51cm, fits for most outdoor cushions and also other furniture.

Large Capacity: NettyPro outdoor cover storage bag guaranteed to fit Christmas trees, decorations and other chair, bench, chaise cushions up to 50" W x 15" D x 25" H.
Outdoor Storage Box on Casters
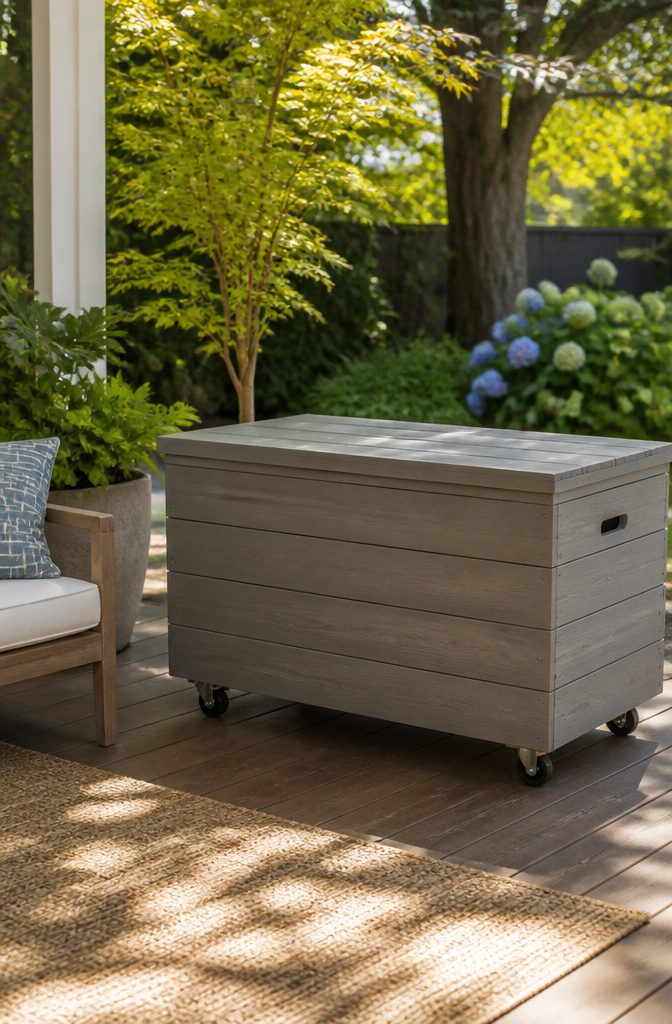
A plywood box on locking casters rated for at least double the loaded weight solves two problems at once: the box rolls where you need it, and it sits above water that pools on concrete or collects between deck boards.
I learned the weight rating lesson the hard way on a cart I built for garage bins.
The casters looked sturdy enough, but the plate mounts bent at the welds after a few months of rolling over the expansion joints in my driveway.
For a box loaded with saturated cushions, which weigh far more than dry ones, those joints and gaps become a repeated impact that undersized wheels simply cannot survive.
The lift matters too. Even two inches of clearance lets air circulate underneath and keeps the bottom plywood from wicking moisture off a patio that takes hours to dry after a storm.
Without that gap, the lowest board delaminates first, always starting at the corners where water lingers longest.

【Accurate &Durable Design】- Pocket Hole Jig Kit is made of high quality and solid metal materials, will not rust or crack, and can easily drill oblique holes to make the joint perfect. At the same time, this fixture can create flush, angle and angle shapes Pocket hole connector for connecting legs and guide rails, building cabinets

Pocket-Hole Jig XL: Engineered for extra-thick material from 1-1/2 in to 3-1/2 in, ideal for 2x lumber and structural builds

【Perfect After-Sales Service】If for any reason you are not completely satisfied with your purchase, or encounter any problems during use,you can click the "contact seller" button to send an email to us, and We will provide you with a satisfactory solution within 12 hours.
Oversized Outdoor Storage Box
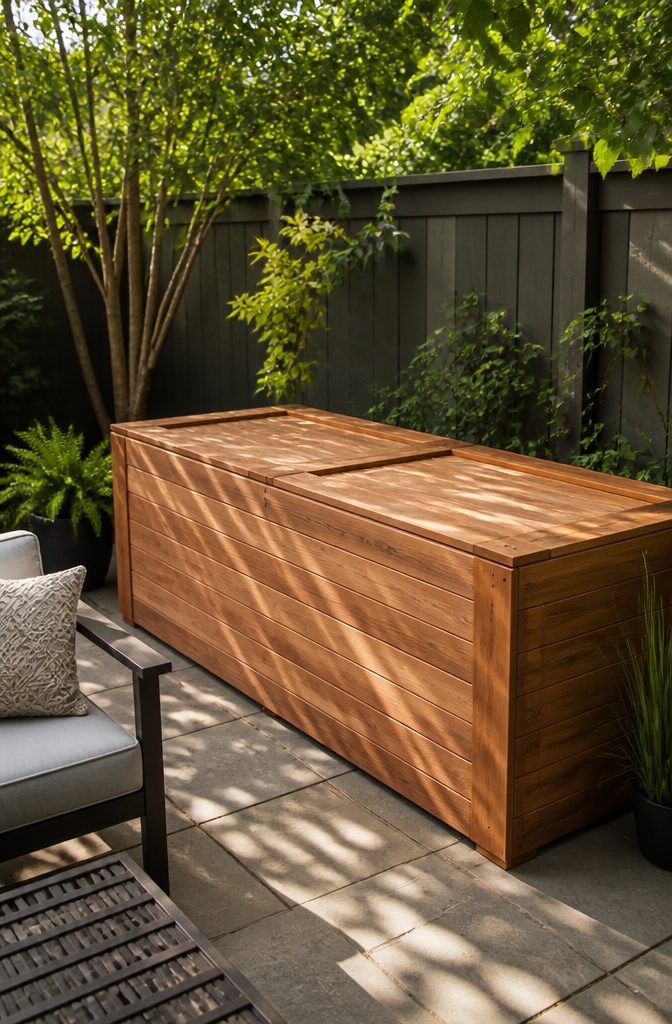
Cedar is the lighter choice if two people ever need to shift an empty box around the patio.
Pressure-treated pine carries the same rot resistance but adds enough weight that moving it becomes a job for the same afternoon you build it, not a quick adjustment later.
At 2.5 by 2.5 by 7 feet, the lid turns into a lever problem: a single long piece of cedar or pine will warp across that span, and the hinges take the strain every time one person lifts while the other side drags.
A center divider inside helps, but it also splits the storage into two compartments that may not fit your longest lounge cushion.
Pocket hole screws pull the frame square, yet at this scale an eighth-inch gap between slats compounds fast, and the front panel ends up flimsy no matter how tight the joints looked during assembly.
Build the lid in two hinged sections if the box passes six feet, or accept that opening it means walking to both ends.
The cedar looks better, though you will spend longer picking straight boards; treated pine forgives more but arrives wet enough to twist as it dries.
Either way, budget for exterior-grade hardware. The interior screws are not where you save money on a box this size.

EXTRA LARGE SPACE: Our YITAHOME outdoor storage box has a storage capacity of 120 gallons and dimensions of 52.1"L x 20.9"W x 24"H inside and 53"L x 22.7"W x 25.5"H outside

Built to Withstand the Elements: This outdoor deck box is constructed from heavy-duty, weather-resistant resin that resists fading, cracking, and flaking. The UV-protected material ensures it stays looking great even after seasons of direct sunlight, making it a reliable storage solution for your patio or garden

Durable Solid Wood Construction: Crafted from solid fir wood, this outdoor porch bench boasts exceptional durability and a 660-lb weight capacity. Waterproof slats with polished natural grain resist warping, cracking, and weather damage, ensuring years of reliable outdoor use.
Outdoor Sofa with Hidden Storage
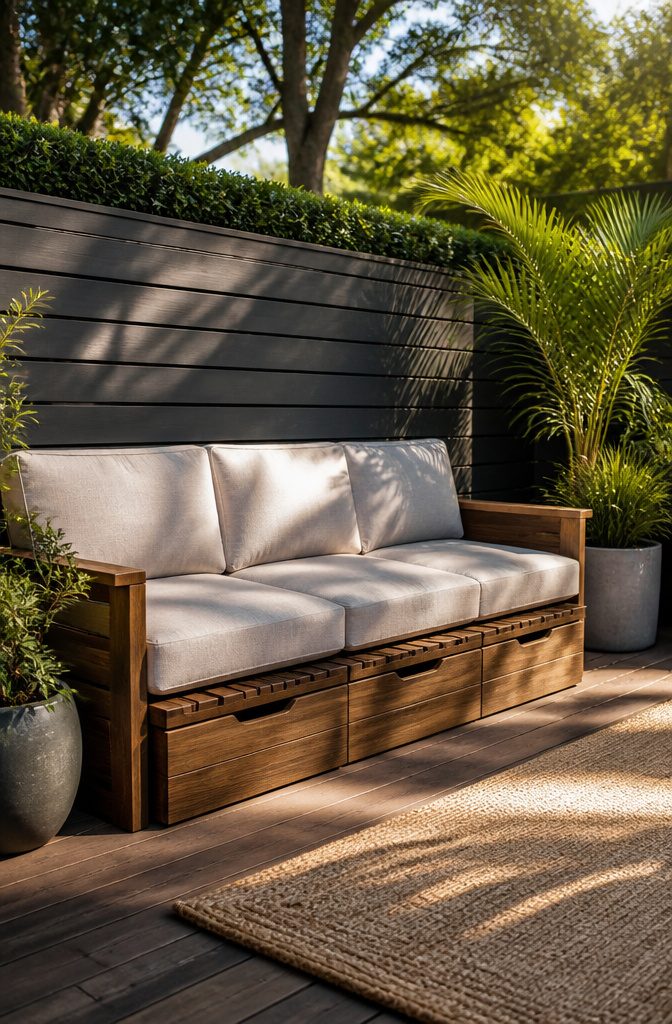
A built-in outdoor sofa with storage beneath the seat cushions is the cleanest way to keep pillows out of sight without adding another piece of furniture to the deck.
The choice between drawers and a hinged lid comes down to how much rain your area gets and how lazy you are about maintenance.
Drawers keep the contents dry even when the seat itself is wet, but they need clearance on three sides to pull out, which eats into your seating depth.
A hinge with a gas strut gives you the full cavity and costs less to build, though you are lifting the entire cushion stack every time you need a pool float.
The detail that saved my cushions was the half-inch gap between the seat slats and the storage box below it.
Water that drips through the cushions hits the slats, drains through the gaps, and falls into a separate cavity rather than pooling in the storage area. I skipped this on my first build, thinking a tight seal was better.
After one sideways rainstorm, the bottom inch of every cushion was damp for three days. The gap lets air move even when the lid is shut, and any water that does blow in has somewhere to go.
I drilled two small weep holes in the front face of the box, angled down, and that handled the rest.

[Acacia Wood Structure] Thanks to natural acacia wood, renowned for its strength and longevity, the wooden outdoor storage bench provides a large top load capacity of 330 lbs, withstands the rigors of daily use while maintaining its timeless appearance.

Premium Fir Wood: Made from sturdy, high-quality fir wood, this outdoor potting bench is safe for handling herbs and vegetables. Its stable surface and smooth touch blend naturally into garden surroundings, offering a comfortable, durable workspace for all your gardening tasks

Spacious and Functional Storage: Our outdoor storage bench can help keep your space organized and tidy, perfect for organizing cushions, pool supplies, toys, and garden tools; The outdoor storage box seat is the ideal addition to your patio, garden, pool, or deck
Storage Bench with Totes
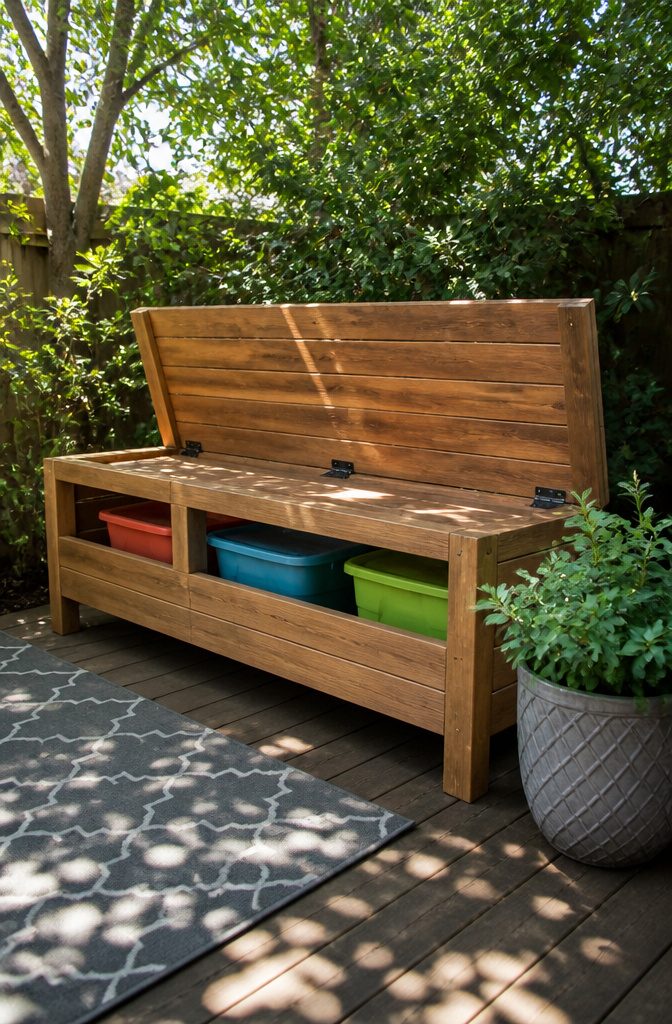
A bench frame built around standard plastic storage totes sounds straightforward until you actually stand in the tote aisle with a tape measure.
The 18-gallon and 27-gallon sizes are the ones that usually fit this project, but the listed dimensions on the label are for the base, not the lip that catches the rim or the height with the lid snapped on.
I have seen builds where the frame went up first and the totes were an afterthought, and the result was either a half-inch of wobble on every side or a tote that sat so proud of the frame it looked like a cooler in a cardboard box.
Measure the tote you intend to buy, then add a half-inch to the interior width and depth of your frame.
That gap is what lets air move between the wood and the plastic, and air movement matters more than a snug fit ever will.
The frame itself can be kept simple.
One approach uses 1x4s for every piece, with pocket holes at the ends and the bottom frame set about two inches up from the ground so the tote does not sit directly on whatever puddles after rain.
The lid of the bench, usually hinged at the back, rests on top of the frame and clears the tote lid underneath by that same half-inch or so.
The weak point in this system is the tote lid. Plastic storage lids crack, especially after a season or two of UV exposure and the stress of being snapped on and off with garden-dirty hands.
When the lid goes, the bench still works, but the cushion inside is no longer sealed against dust or the squirrels that will investigate any gap they find.
Replacing a cracked lid means either finding the same tote model still in stock, which is harder than it sounds after two years, or buying a whole new tote and hoping it fits the frame you already built.
The frame outlasts the tote almost every time, so buy the spare tote up front if you have the closet space, or size the frame around the most common footprint you see in the big-box aisle and accept that you may need to shim a replacement later.
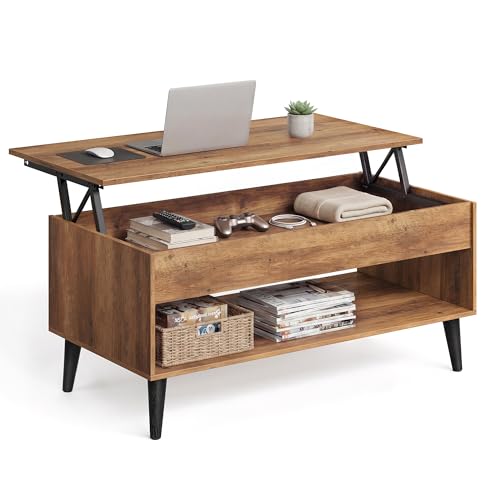
Versatile Mid-Century Charm: The refined finish and crisp lines give this center table a mid‑century modern vibe that fits beautifully in apartments, dorms, and other small spaces
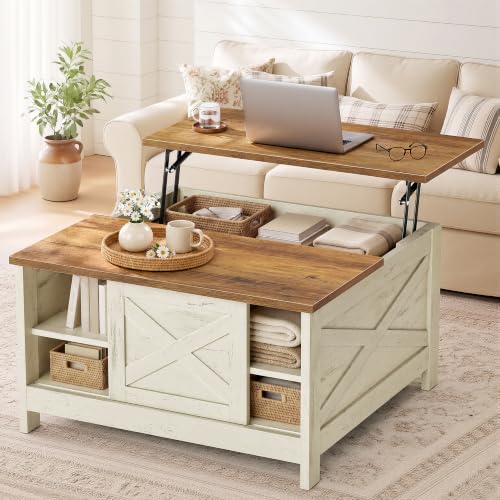
Flexible Lift-Top Design: A high-quality pneumatic rod smoothly raises the desktop from 17.9 to 23.2 inches. This versatile coffee table lets you comfortably work on a laptop, dine, or play games right from your sofa

Lift Top Design: The tabletop smoothly lifts to 6.3 inches, transforming this coffee table into a versatile piece for everyday use. Whether you need a temporary dining surface, a convenient computer desk, or a raised workspace, the elevated floating design adapts to your needs while adding modern functionality to your living space
Louvered Storage Box
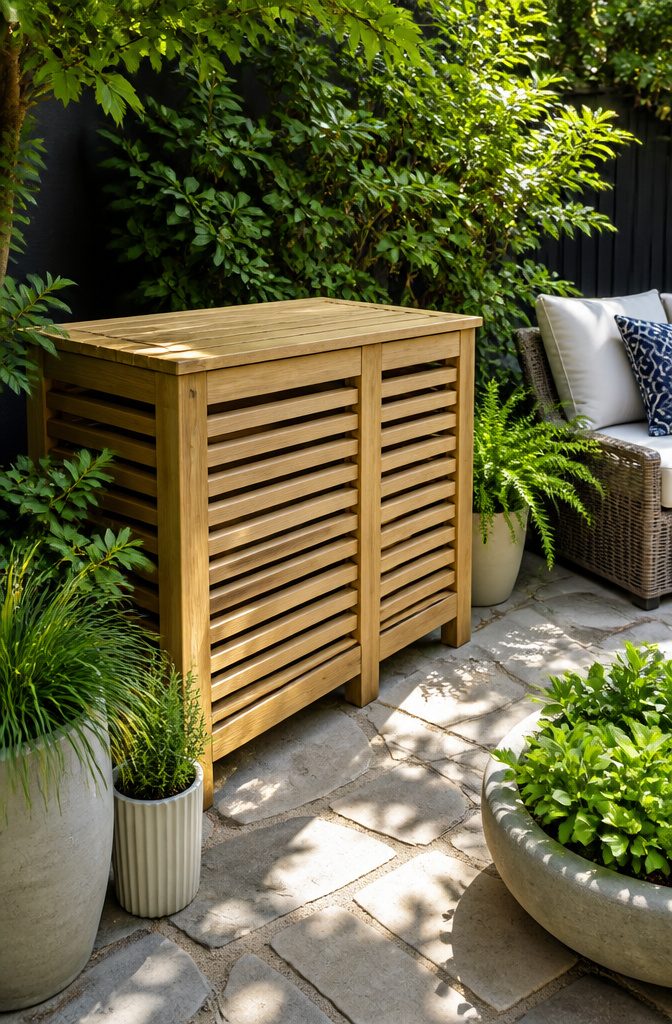
Angled slats on a storage box do two jobs at once: they let humid air escape so cushions don’t mildew, and the tilt throws runoff away from the opening instead of pooling at the seam.
Build Basic’s plan achieves this with 1 x 3 boards tilted across a 2 x 2 baluster frame, a detail that looks harder than it is.
The trick is building the rectangular frame first, front and back and sides, then attaching the slats with pocket holes so the angle stays consistent.
I would not park this box in full sun all day; the louvers breathe, but the interior still heats up, and foam cushions break down faster in trapped heat than they do in open shade.
Cedar runs about $120 in materials, though cheaper lumber works if you seal it. Six hours is a realistic build time once the cuts are done.
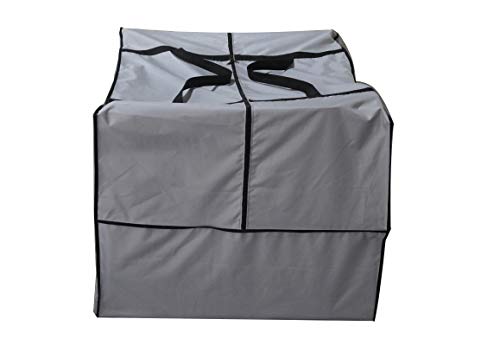
Perfect for storing chair, bench, and chaise cushions. up to 32" long x 32" wide x 24" high

PATIO CHAIR COVER: Our durable cover fits most standard stackable patio chairs, high-back chairs, and bar stools up to 27" L x 27" W x 49" H. It does not entirely cover the chair's legs or wheels.

Large Capacity: NettyPro patio storage bag guaranteed to fit Christmas trees, holiday Xmas disassembled decorations and other chair, bench, chaise cushions up to 50" W x 15" D x 25" H.
Rolling Plywood Storage Box
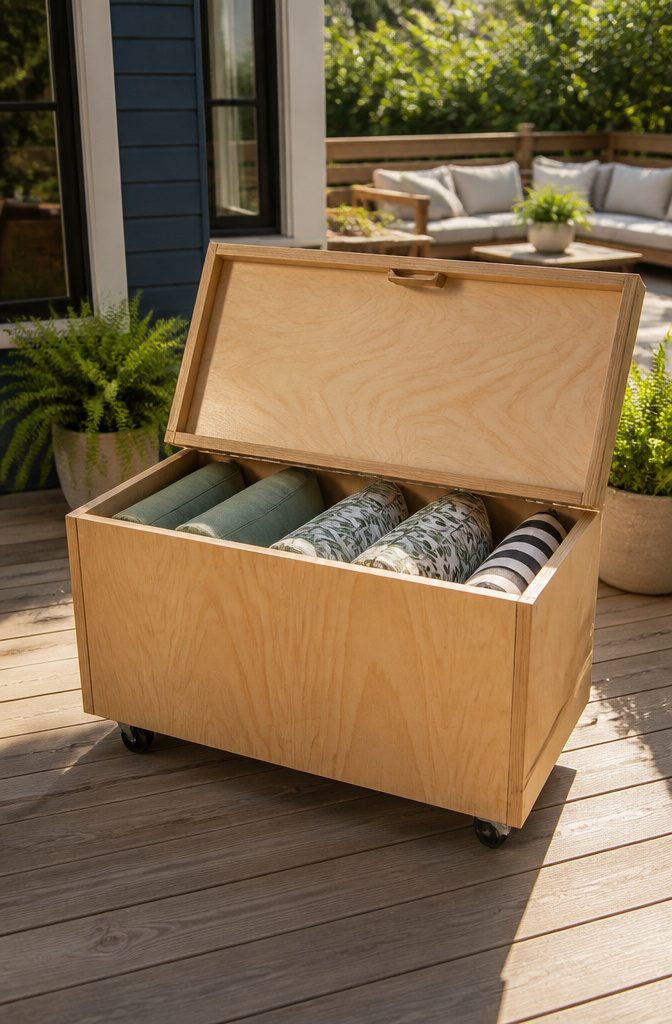
Plywood on casters solves the rolling storage problem without the weight or cost of solid wood.
The catch is the grade. Standard interior plywood will delaminate after a season of rain even if you paint it, so exterior-grade CDX or marine plywood is the only sensible starting point.
The C and D faces are rough, but they hold glue and paint, and the X rating means the adhesive itself resists moisture.
The real failure point is the edge. Water wicks into the end grain of every ply, and once the layers start separating the box is done.
Two coats of exterior primer on all cut edges, followed by paint, buys you the years you need. Skipping this is the mistake that turns a weekend build into a spring replacement.
A ¾-inch box with basic butt joints and a piano-hinge lid rolls under most patio tables and survives real weather for the cost of a single cedar plank.
The casters make it the option that moves when you need to hose the deck down.

[ 𝙀𝙖𝙨𝙮 𝙩𝙤 𝙐𝙨𝙚] Simplify your woodworking projects with this pocket screw jig. Effortlessly drill inclined counterbores in one piece of wood, then use self-tapping screws to connect it to another—no pilot hole needed. Perfect for creating hidden pocket holes, ideal for both professionals and DIY enthusiasts looking to build or repair wood joints

PRODUCT INFORMATION: The pocket hole device has two built-in magnets, which are attracted to the metal fixture to secure the positioner. The scale is clear and can be adjusted according to the thickness of the plate (0.5"-1.5"), drilling angle: 15 degrees.

Self-Calibrating Precision: This automatic pocket hole jig measures material thickness with precision calipers and adjusts the angle hole drill jig and stop collar for perfect pocket holes; Measure with calipers, tighten the collar, clamp, and drill for strong joints in seconds
Waterproof Storage Bags
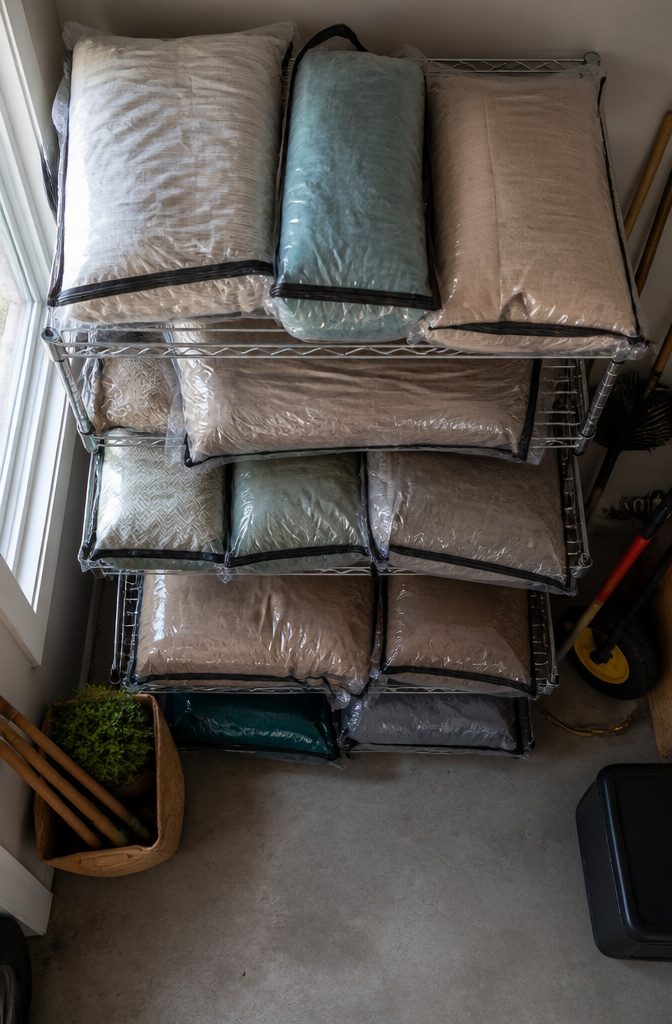
Ziploc Big Bags are the cheapest waterproof option that actually closes, which is why I keep a box in the garage for off-season cushion swaps.
The sizing hunt matters more than the brand: standard gallon bags fit throw pillows, but thick seat cushions need the XL or XXL sizes that run closer to two feet on a side.
I have yet to find a store that stocks those consistently, so ordering ahead is the safer move.
The zipper is where these fail. After one summer of heat cycling in a shed, the plastic track separates just enough that the bag stops being airtight.
DeMorrow, who tests storage methods for Family Handyman, flags this exact point: compression bags save shelf space, but squeezing cheap foam for months can leave it permanently flattened.
A regular waterproof bag that does not compress is the better bet for cushions you actually want to sit on again.
These work tucked on a garage shelf or inside a shed where the shell keeps rain off. They do not work on an open patio.
Sun degrades the plastic in a single season, and any gap in the zipper turns the bag into a humidity trap. If the only storage you have is exposed, a rigid box with a latched lid wins every time.
Storage Shed
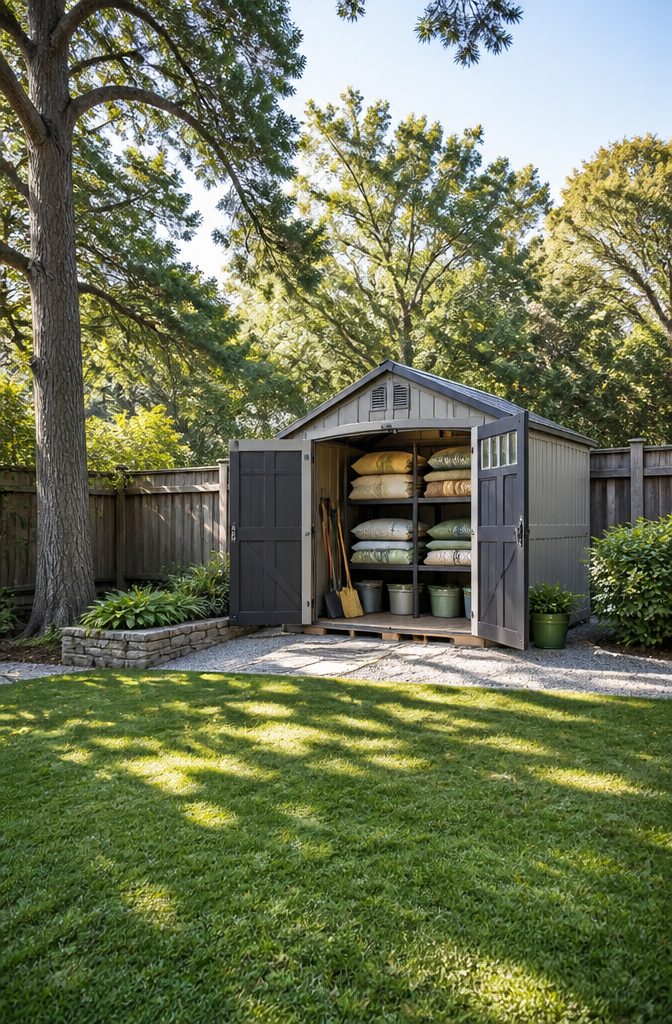
A dedicated shed gives you room for the whole patio set, but the concrete floor will still pull moisture up through the bottom of a cushion stack.
Keep everything on a shelf or rack system so air circulates underneath. The Suncast shed that turns up in most searches is water- and UV-resistant and comes with a floor, which helps, yet humidity inside still rises on still days.
If you are only storing two lounge chair cushions, this is probably more structure than the problem calls for. A storage box built from cedar 1x4s costs less, takes a weekend, and moves with you.
The shed wins when you are also parking grill gear, yard games, and the umbrella base in one place. Otherwise you are maintaining a building for two items that fit under a bench.
Outdoor Cushion Storage Cover
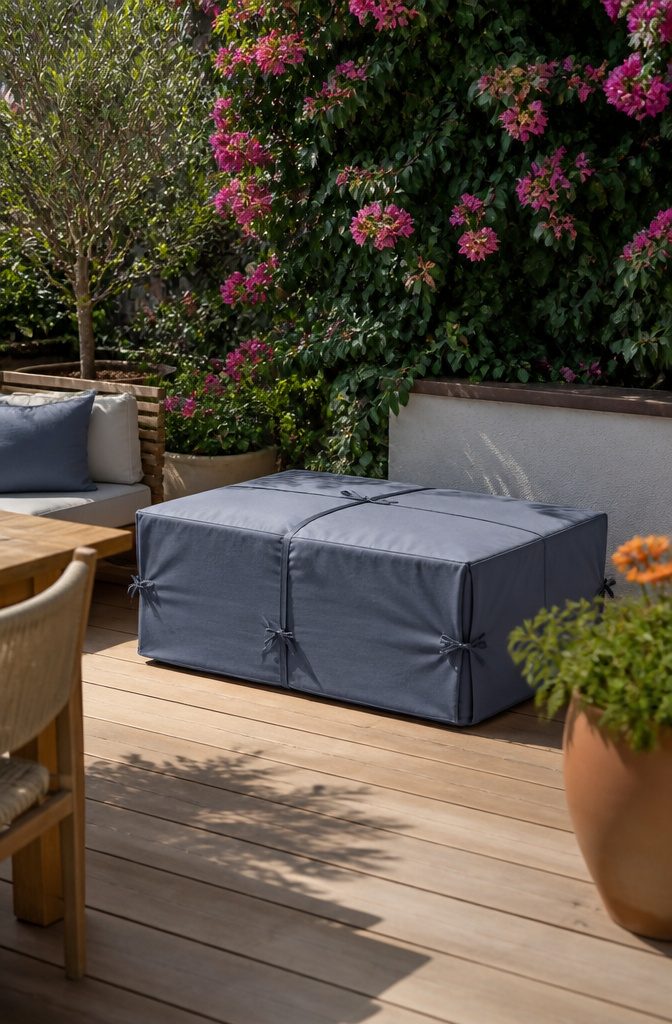
A fitted cover over stacked cushions is the fastest way to use space you already have: a corner of the patio, the gap between the grill and the wall, even the floor of a covered porch.
What separates a cover that stays put from one that ends up in the neighbor’s yard is tie-downs at the corners and midpoint of every edge, not just a drawstring at the bottom.
Wind gets under a loose skirt and works the whole thing loose in one afternoon storm.
Fabric weight matters more than the label "waterproof."
I learned this trying to cover a set of curved chaise cushions that were not even close to rectangular. A lightweight cover shifted and pooled water where the fabric sagged into the valleys between cushions.
A heavier 600-denier polyester held its shape, but the real fix was packing the stack tighter with a folded towel to fill the hollows and give the cover something flat to sit on. Without that, no fabric weight saves you.
Garage Patio Cushion Storage Shelves
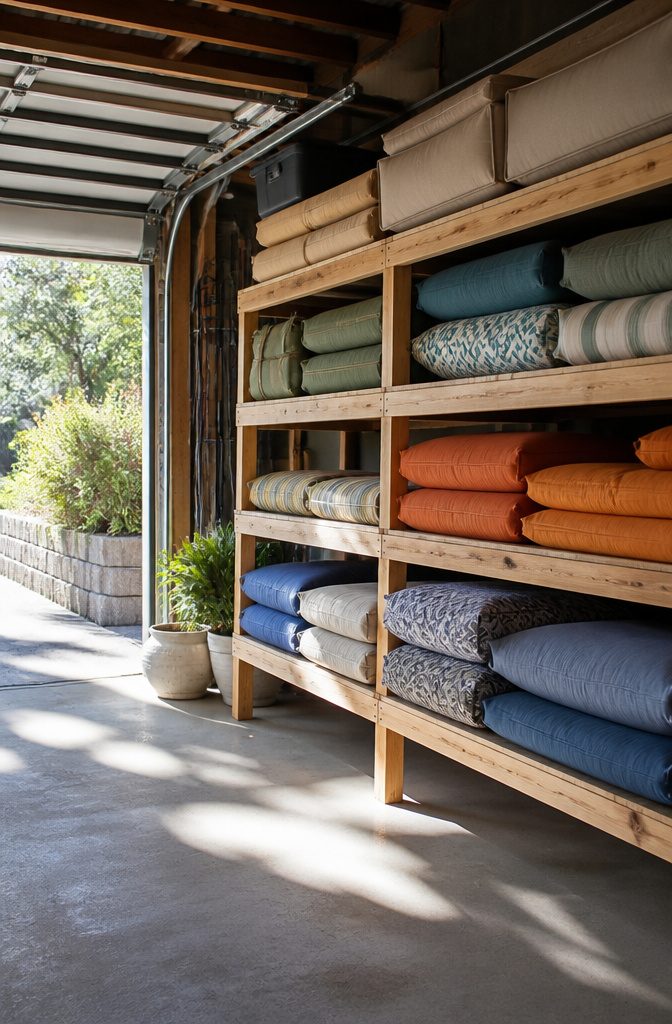
Garage shelves for cushion storage work best when they lift everything at least six inches off the concrete, even if the floor looks dry.
I learned this the hard way after a spring thaw wicking up through a slab I thought was sealed.
The moisture collects underneath anything flat, and by the time you notice the mustiness, the foam inside the cushion has already started to hold the smell.
Depth matters more than width for this job. A shelf sticking out twenty inches from the wall catches most standard seat cushions without the wasted floor space of a two-foot-deep unit.
Anything deeper and you end up stacking in two rows, which turns the back row into a forgotten pile you will not rotate.
The temperature swing in a garage still gets to fabric, even in sealed bins.
I keep cushions in the same garage as my tools, and the summer heat in there has softened synthetic covers enough that they picked up creases from the bin edges that took weeks to relax.
If your garage runs hot, skip the airtight totes for anything with a printed pattern; the trapped heat sets folds like an iron.
Pest-Free Storage for Patio Cushions
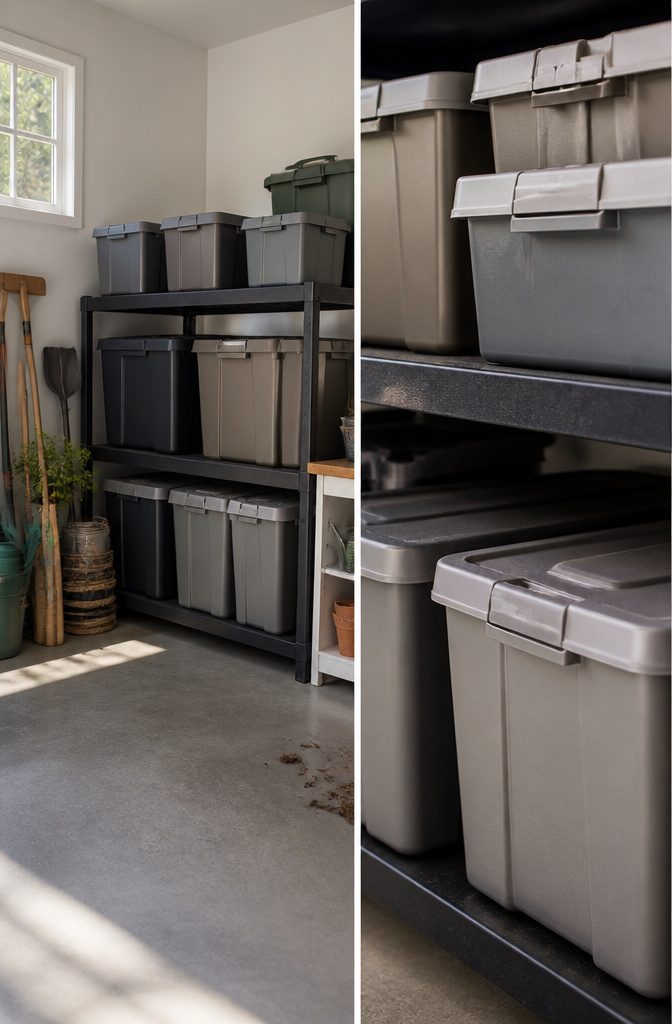
Sealed hard sides are what actually keep mice and insects out of stored cushions.
A plastic storage tote with a tight-fitting lid blocks entry points that fabric covers or loose lids leave wide open, and it stops moisture from settling into foam cores over winter months.
Elevation matters too; sitting the bin on a garage shelf or a simple plywood riser keeps it off concrete that wicks damp upward and gives rodents one less surface to climb.
I tried the old standby tricks first.
Mothballs left the cushions smelling like a grandmother’s closet for two full seasons, and dryer sheets did nothing a determined mouse couldn’t push aside. Neither created a seal, which is the only thing that actually counts.
The sign that rodents have already found your box is not the sound. It is the fine, dark grit collecting in corners, mouse droppings mixed with shredded foam or fabric fibers.
Once you spot that, the bin is compromised and everything inside needs washing or replacing. A tote that seals tight prevents the discovery entirely.
Outdoor Storage Chest
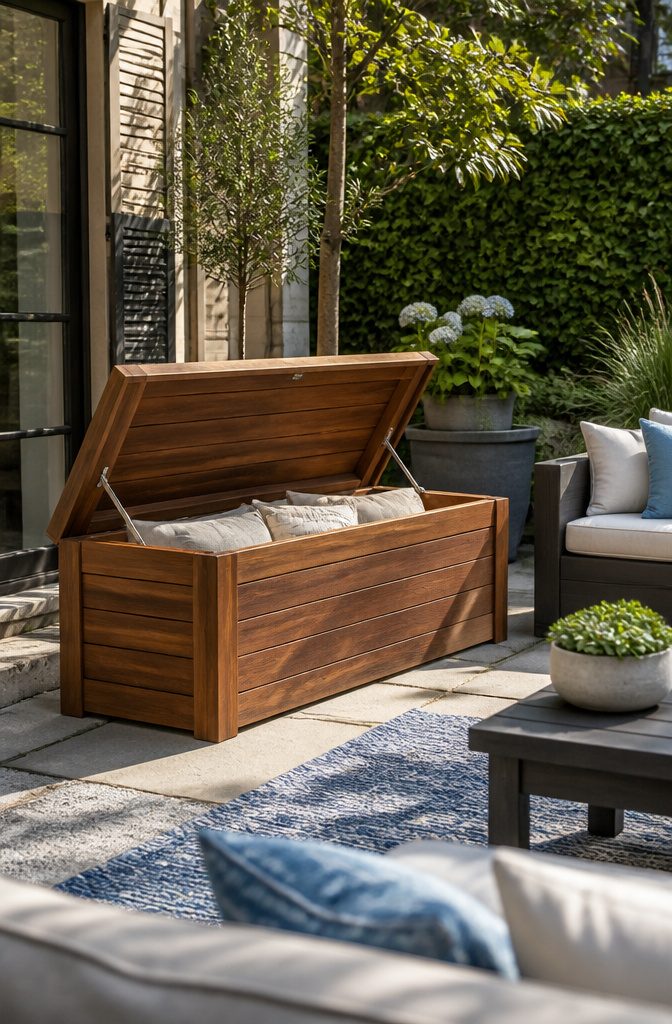
A traditional storage chest reads differently on a patio than a bench because it sits lower and invites stacking rather than lingering. The lid is the whole front face, so the hardware matters more than people expect.
I would not build one without gas-strut lid supports or at least a piano-hinge with a stay; a heavy lid that slams in a breeze is how fingers get hurt and gasket seals fail early.
The seal itself is worth the extra step if you are storing cushions through pollen season or winter.
A simple adhesive gasket around the lip turns a plain box into something that actually keeps dust out. Without it, you are just moving the cushions from one exposed surface to another.
The curved lid sheds water better than a flat one, though a flat lid doubles as a serving surface in a pinch.
Either way, the chest form works best tucked against a wall or railing where the low profile does not block sightlines.
It does not pull double duty as seating, which is the trade: you lose a place to sit, but you gain a cleaner silhouette and a volume that is easier to load from above.
Outdoor Modular Bench with Storage
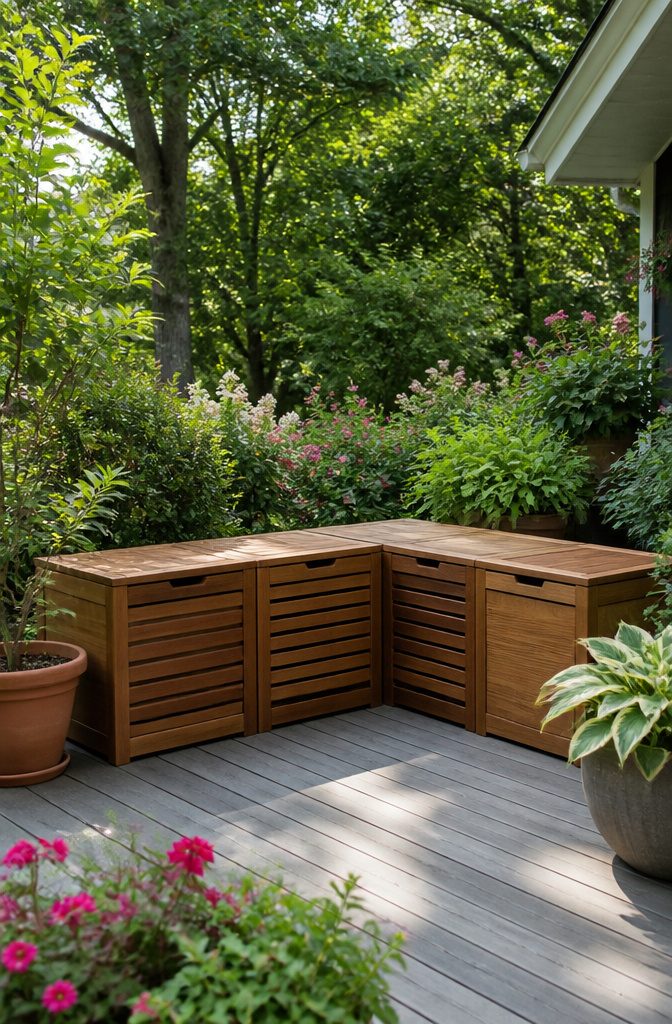
Modular bench sections solve the problem of a single heavy lid by giving each seat its own compartment.
Lifting one 24-inch panel takes a fraction of the effort of wrestling a full six-foot cover, and if rain gets past the seal on one box, the cushions in the next section stay dry.
The connection hardware matters more than most plans suggest. Threaded inserts with hex bolts through the side walls keep modules from drifting apart under weight or during a move; surface-mounted brackets snag shins and collect water.
Counter-sinking the bolt heads inside the frame takes an extra ten minutes per joint and saves the scraped ankles later.
Layout math starts with your chair depth, not the bench itself. A 32-inch dining chair needs a 28-inch bench depth to leave leg room; a 36-inch lounge chair wants 32.
For an L-shaped run, the corner module eats 4 to 6 inches of usable face on each side, so ordering a straight 60–60 corner usually lands you with two 54-inch effective seats and awkward gaps.
Two 48-inch benches meeting at a 45-degree corner module, or skipping the corner piece and floating a small table there, uses patio space more honestly.
Side Table Deck Box
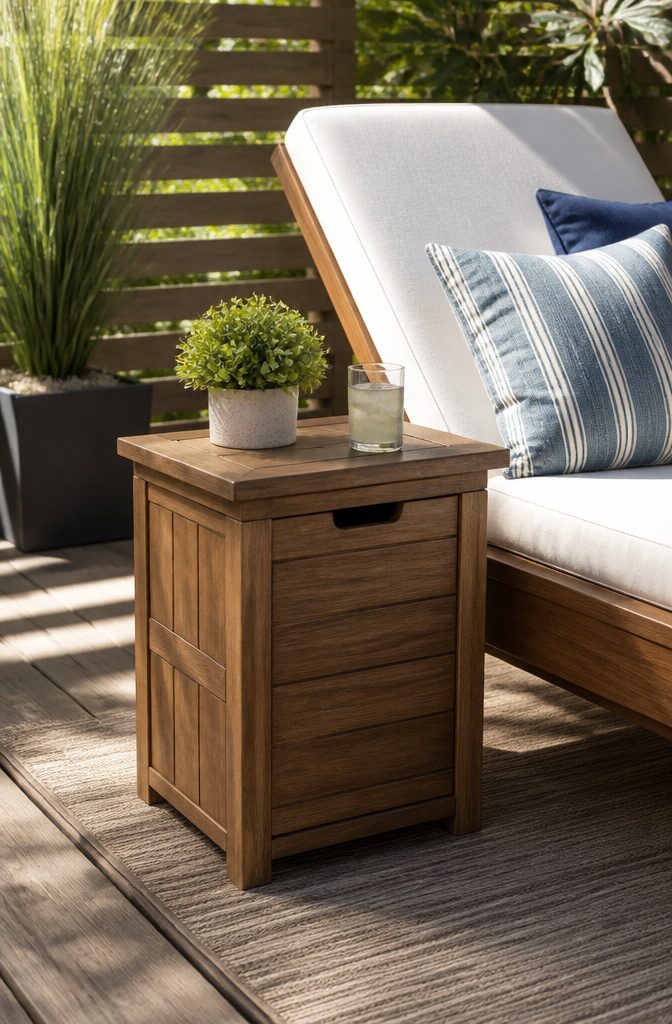
A side table deck box fits one, maybe two cushions at most. The lid has to serve as a real tabletop, so the finish matters more than on a standard storage box.
A slatted wood top looks right outdoors, but water pools between the boards and leaves rings under coffee cups. A flat surface with a slight overhang sheds rain better and keeps saucer stains from soaking in.
The bigger issue is balance.
A hinged lid with any weight to it wants to tip the whole box backward when you open it, especially on a slightly uneven deck board. The base needs to out-weigh the lid, or the feet need to grip.
I have seen people add a catch that holds the lid open, which helps, but the real fix is keeping the box low and wide rather than tall and narrow.
A 18-inch cube looks neat beside a chair, but it lifts easier than it stays put.
Umbrella Side Table with Storage
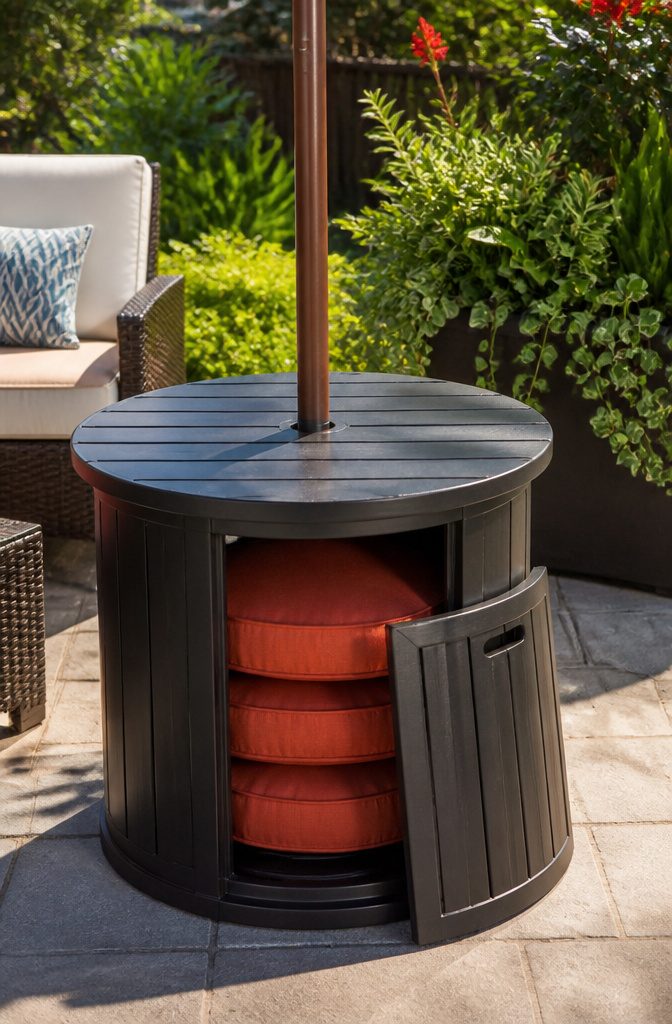
A side table built around a patio umbrella pole sounds clever until you try to use both at once.
The pole passes through the center, which leaves a ring of storage below, but that center hole eats more volume than you expect.
On a typical 18-inch table, the pole opening and its framing can swallow a third of the usable space before you fit a single cushion.
The real headache is rotation.
The umbrella turns with the wind or sun; the table stays fixed. If your tabletop has a slot or clamp gripping the pole, that grip loosens over a season of twisting.
What convinced me, reading through a dozen build logs, was how many people ended up adding a second, smaller ring below the tabletop just to keep the umbrella from working the bolt holes wider.
That lower ring costs you another inch or two of storage height.
Pole diameter matters more than the product pages suggest. A 1.5-inch umbrella pole is standard, but 2-inch poles are common on cantilever umbrellas and market styles.
Build the hole for the pole you have, not the one the plans assume, because a sloppy fit turns the whole table into a wobbler.
Some designs use a collar you tighten from underneath, which helps, but that hardware sits in the same space where you hoped to stack cushions.
For the effort, you get a tabletop and maybe enough room for two folded seat pads. A standalone box beside the umbrella gives you more cubic feet and no spinning parts to fight.
L-Shaped Outdoor Storage Bench
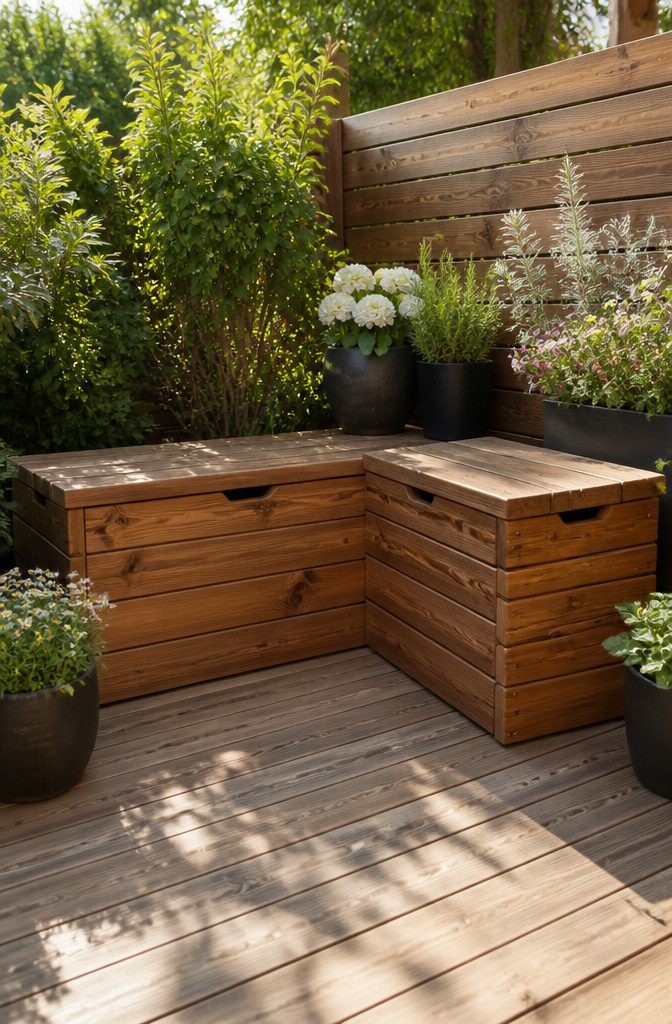
Corner seating eats up a lot of patio real estate, so building storage into an L-shaped bench earns that space back twice over.
The joint where the two legs meet is where most DIY versions fall apart; a simple butt joint with screws pulled loose on me after one wet season, and switching to lag bolts through a 4×4 corner post fixed it.
Two shorter lids meeting at the corner handle better than one long lid spanning the whole angle, because a single lid warps across the diagonal and the gap lets water in no matter how you seal it.
The inside corner is the real headache for cushions.
Standard square cushions leave a dead wedge of wasted space or force awkward overlaps, so sizing the seat depth to match your actual cushion stack matters more here than on a straight bench.
I sized mine for two 24-inch cushions per side and left the corner open as a planter instead of pretending I could Tetris cushions into an angle they do not want to fill.
Frequently Asked Questions
What is the best way to store outdoor cushions?
Keep them in a dry, covered spot such as a storage bench, shed, or sealed box, and lift them off concrete or bare ground so air can circulate underneath.
A rigid box with a latched lid outperforms fabric covers or plastic bags for anything left outside, since sun degrades plastic and loose covers turn into wind traps.
How do I build an outdoor storage box?
Start with exterior-grade plywood or cedar, cut your panels to size, and assemble with pocket-hole joinery or butt joints reinforced with exterior-rated screws.
Add a piano hinge and gas-strut lid support, seal every cut edge with primer and paint, and mount the box on casters or feet to keep the bottom out of standing water.
What materials are best for outdoor storage?
Cedar and pressure-treated pine are the standard choices for wooden boxes; cedar resists rot without chemicals and weathers to gray, while treated pine costs less but carries a green tint until it dries and is heavier to move.
For plywood projects, exterior-grade CDX or marine plywood is the only sensible starting point, since interior plywood delaminates after a season of rain even if painted.