A kit turns a bottle into a lamp for around $50, versus around $200 for a comparable Pottery Barn lamp and shade.
Work fast, though: the plastic weld that locks the 1½-inch dowel in the bottle neck starts hardening within 3 minutes, and if your shade uses a harp, it goes on before the weld.
1. Clean the Bottle
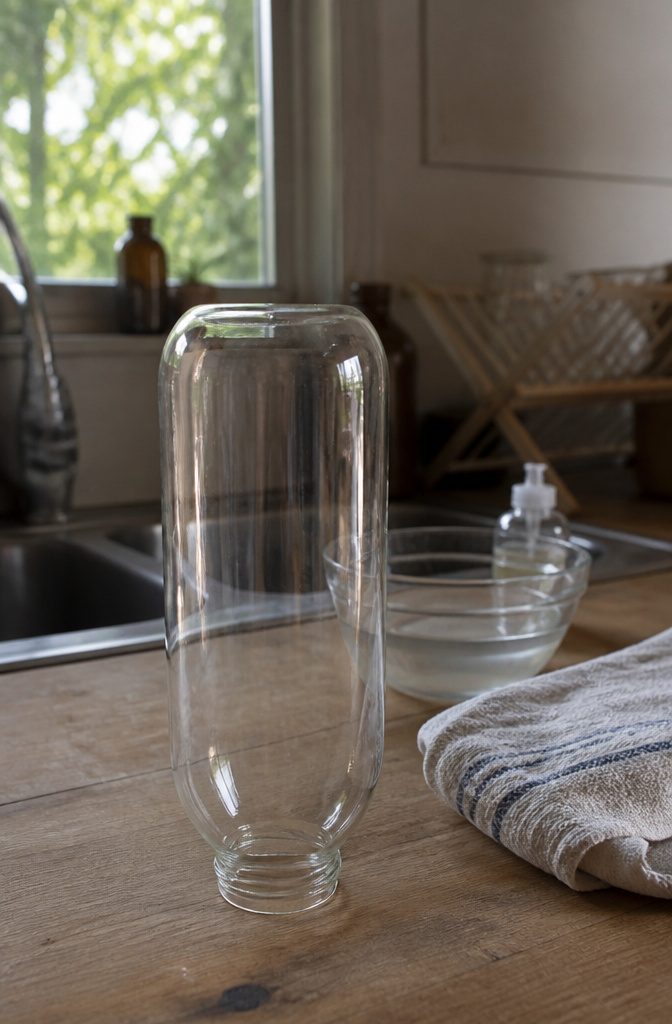
Wash the bottle before a single part goes near it.
Once the lamp assembly base is in, you can’t reach the inside, and the base doesn’t come back off easily, so any dirt or dust left behind stays visible through the glass every time the lamp is on.
Rinse with warm water and a drop of dish soap, then let the bottle drain upside down.
Dry it fully, because moisture left inside clings to the glass and collects whatever settles on it. Then hold it up to a window or under a bright bulb and turn it slowly.
I’d look twice for specks, residue rings and leftover label glue. Anything you spot is easy to fix now and impossible to reach later.
2. Drill and Cut the Dowel
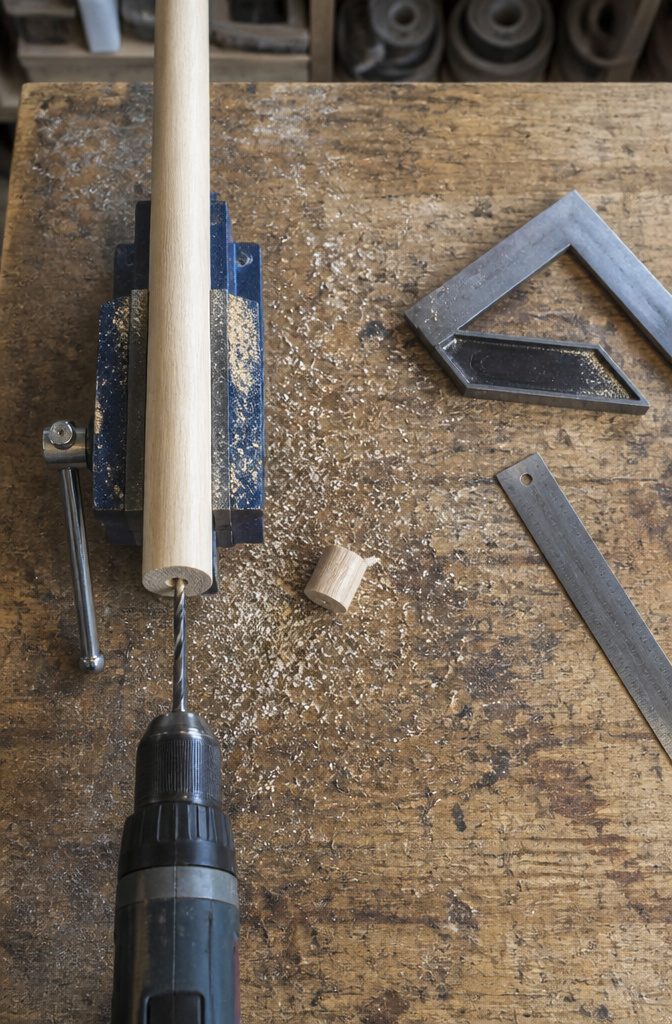
Drill the hole in the closet-rod dowel while it is still full length, then cut a 1½-inch piece from the drilled end.
A long dowel gives you something to hold, so you can clamp it or brace it against a bench and keep your free hand well back from the bit.
Cut first and you are drilling into a stub barely bigger than a thumb, too short to grip and quick to spin or skid the moment the bit bites.
Mark the center of the end grain before you start so the bit has a dimple to sit in. Hold the drill square to the face, because a wandering hole leaves the finished piece crooked.
Then measure 1½ inches from the drilled end and saw straight across. A light sanding of the cut face helps it sit flat.
3. Mount the Socket Base
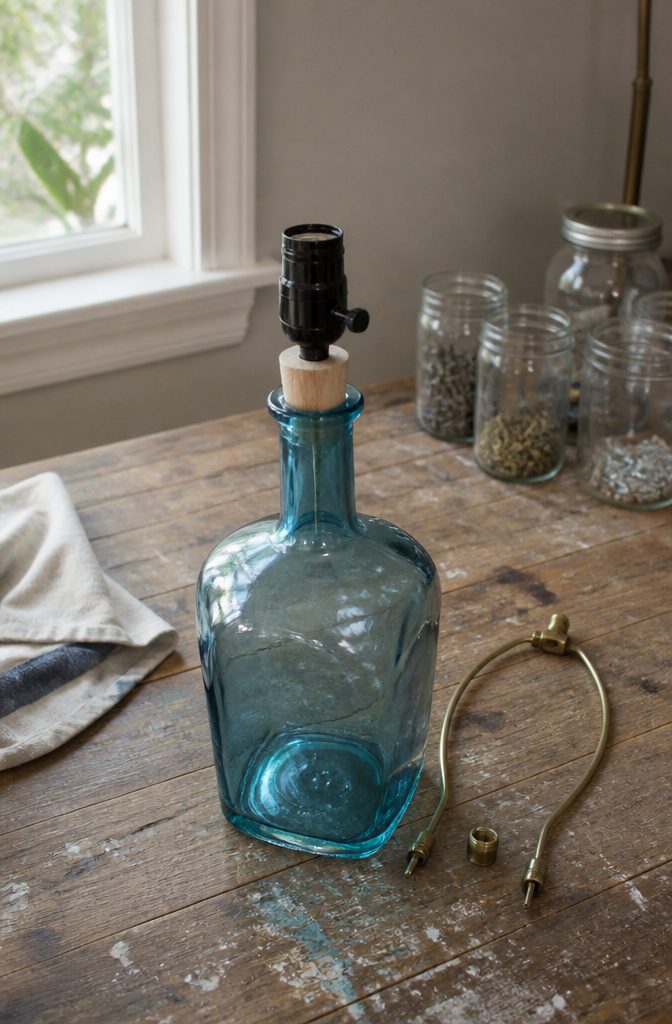
The lamp socket base drops into the hole in the dowel and sits there like the center of a cork.
That dowel is the plug: once it’s pushed into the bottle neck, it’s the only thing holding the socket upright. So the base should seat snugly in the hole, not wobble or tilt.
Test the fit dry, before any plastic weld comes out of its package. Set the base in the dowel and hold the whole piece over the bottle mouth.
Fixing a loose fit now is easy. Fixing it after the weld has started to harden is not.
If your kit has a harp, put it on before the plastic weld goes in.
Once the weld hardens around the dowel, the harp has no way to slide past it. I cover where the harp sits in the clip-in step.
4. Knead the Plastic Weld
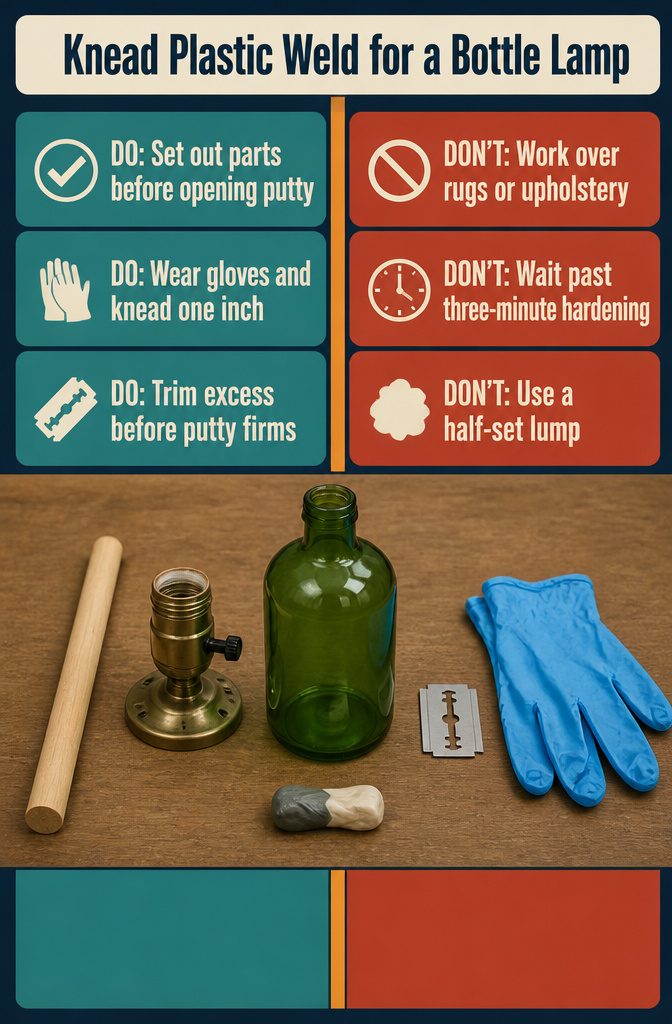
Set out the dowel, the socket base, the bottle and a razor blade before you cut anything, because the clock starts when the putty is exposed. Plastic weld starts hardening within 3 minutes.
Cut an inch-long piece, pull on gloves and knead until the two parts blend into one even color. Some people prefer working bare-handed, but I’d keep the gloves on.
Do this at a table, never over a rug or upholstery. Jute fibers grab the putty, and getting it back out is a slog.
If you hesitate, the putty stiffens before you can roll it to about the thickness of an index finger and wrap it around the dowel.
A half-set lump won’t press smoothly around the bottle opening. Once it has set, a razor blade can no longer trim the excess, so trim before it firms up.
5. Seat the Assembly in the Bottle
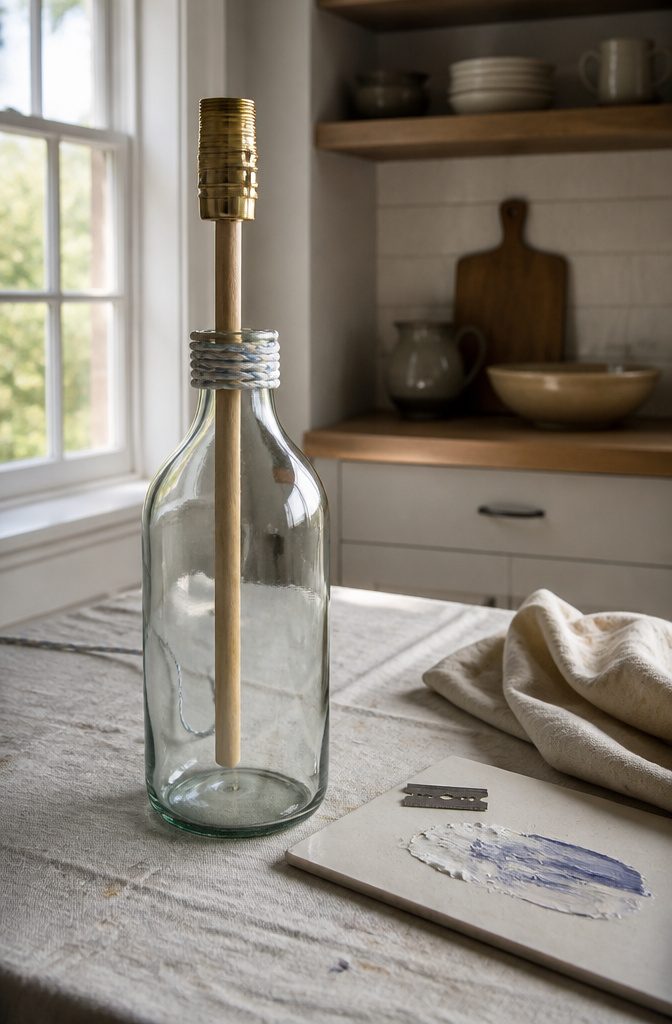
Roll the mixed plastic weld into a rope about as thick as your index finger, 6 or 8 inches long. Wrap it around the dowel, then lower the dowel, with the socket base already attached, into the bottle opening.
The clock matters here.
The weld starts to harden after about 3 minutes, so work without stopping to rearrange anything. Press the excess down and around the opening with a fingertip.
Once the shade is on, you won’t see it, so it only needs to look tidy. If a lot squeezes out, slice it off with a razor blade before it starts to harden.
Do this over a bare floor or a covered table, never over a rug. Weld that lands in a jute rug is very hard to pull back out.
6. Let the Plastic Weld Set
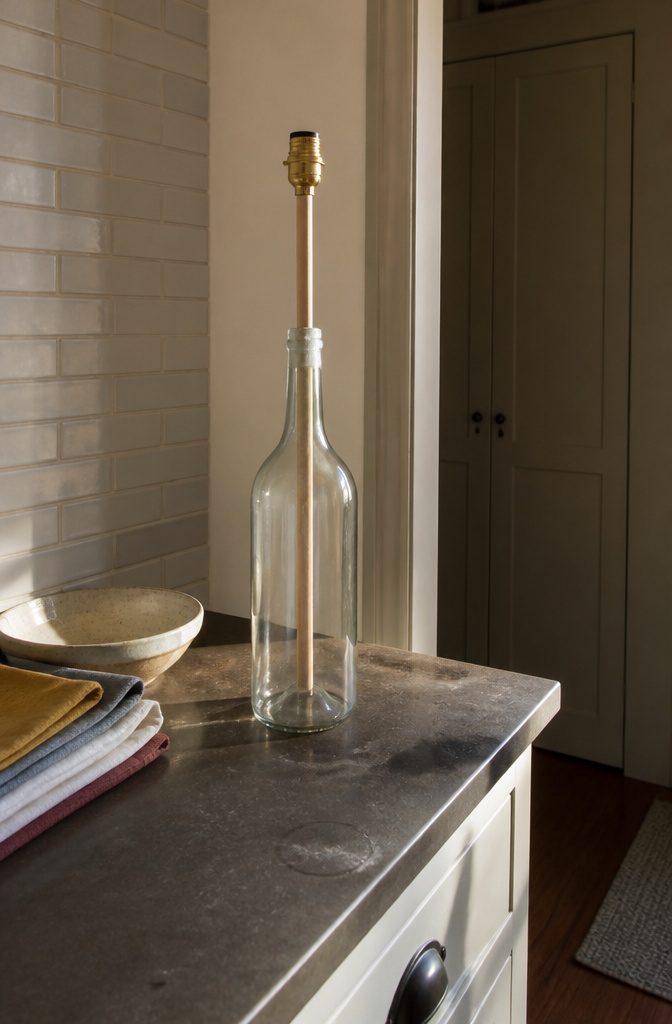
The plastic weld starts to firm up within 3 minutes, but firm is not set. A surface that feels hard can still be soft underneath, so give it a couple of hours before you ask anything of it.
Park the bottle on a flat shelf or a counter corner where nobody will bump it.
Leave it undisturbed, and don’t wire or tug on it until it is solid. Pulling cord through the dowel or tightening socket screws puts sideways pressure on the joint, and a half-cured bond will shift and leave the lamp leaning.
Press a fingernail lightly into a spot that won’t show.
If it dents, wait longer. A lamp that stands straight for good is worth a slow afternoon.
7. Feed and Knot the Cord
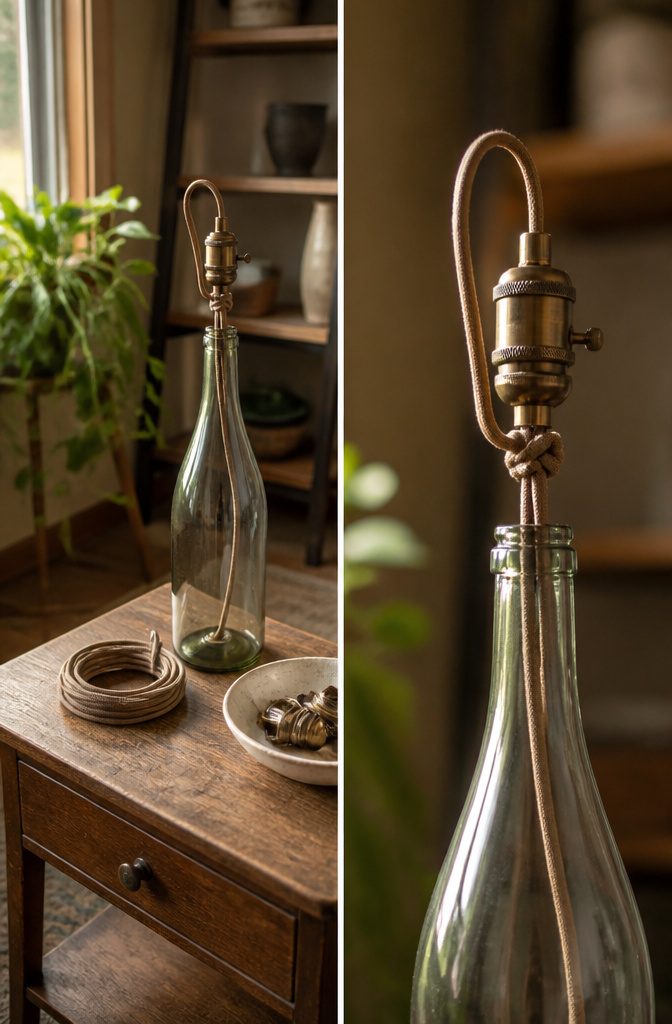
Thread the free end of the cord up through the socket base, then tie a simple overhand knot below it.
The knot is your strain relief: it jams against the base, so a tug on the cord can’t pull the wires off their screws. Leave enough slack above the knot to reach the terminals later.
I choose a side-mount kit because the cord exits through a notch in the base and the bottle stays undrilled. The glass stays whole, and you can take the lamp apart and reuse the bottle for something else.
A bottom-mount kit looks cleaner, since the cord drops straight out the base.
But it means drilling the glass, which calls for a glass-rated bit and slow, wet drilling, and one slip can crack the bottle. For a first lamp, I’d skip it.
8. Wire the Socket Screws
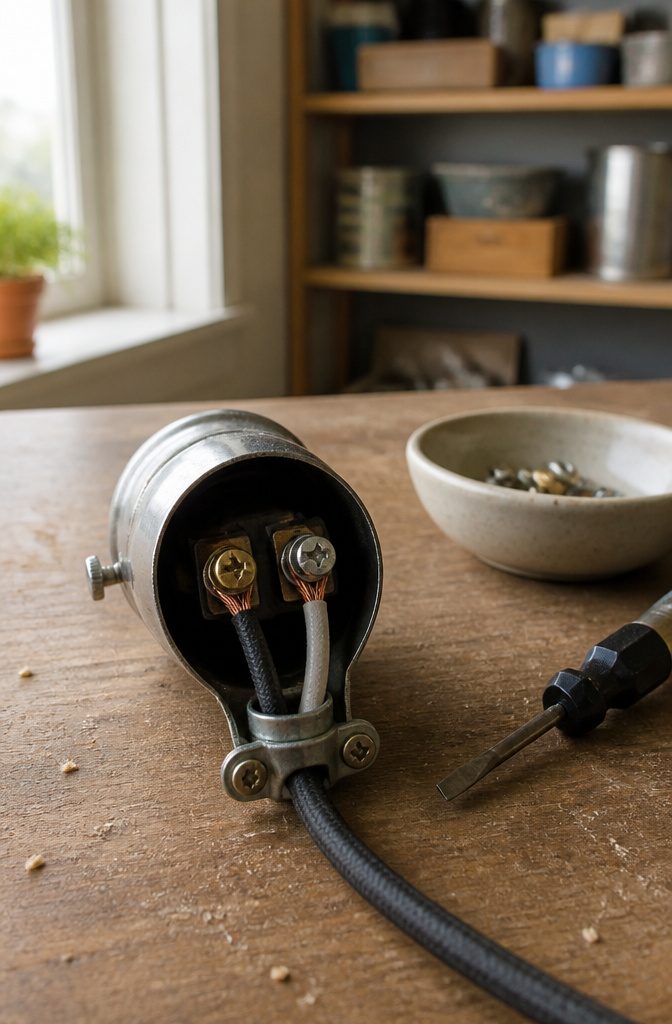
The ribbed side of the cord goes to the silver screw, and the smooth side goes to the brass one.
Loosen each screw a few turns, wrap the bare wire around it so the strands sit snug against the screw, then tighten it down.
Keep the insulation out from under the screw. Pinched plastic leaves a bad connection, so strip back enough wire that the bare copper does the gripping.
Give each wire a gentle tug once it’s tight. If it slides, unwrap it and start that screw over.
Kits differ a little in how the terminals are laid out, so read the instructions that came with yours and follow them wherever they differ from what I’ve described here.
9. Clip the Socket Into Its Base
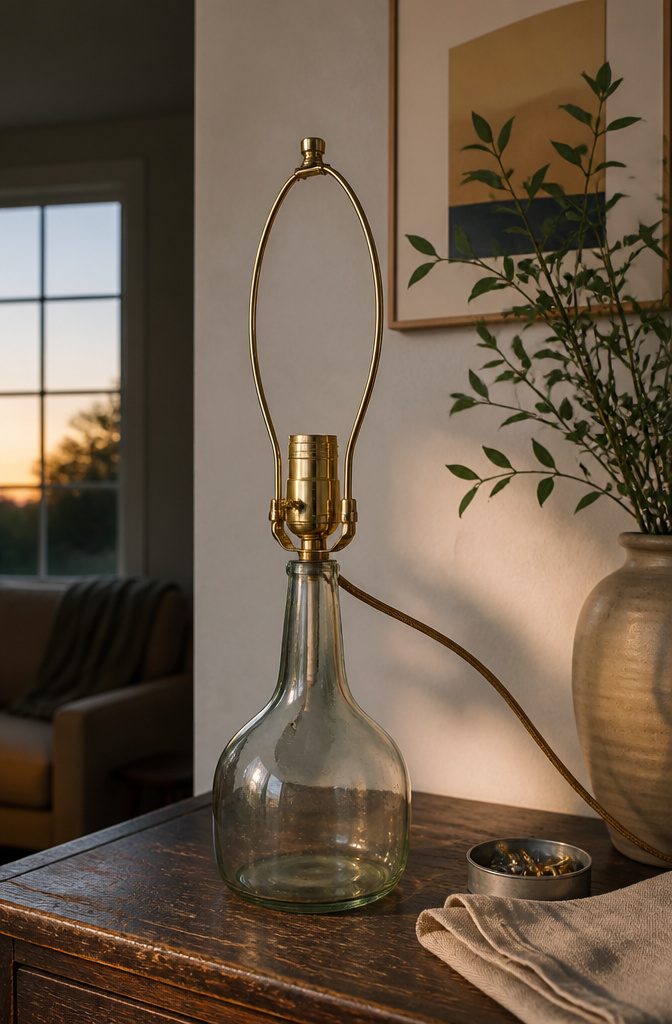
Press the socket down into its base slowly and watch the cord as it seats.
A wire caught between the socket shell and the base rim can pinch through its insulation, which means a bad connection. If a wire bulges at the edge, lift the socket out, tuck the wire clear, and press again.
If your shade sits on a harp, the harp has to go onto the base before the plastic weld is applied. This is the step where forgetting it costs you, so check your shade now, before you touch the weld.
If you skipped the harp, a clip-on adapter slips over the bulb and holds the shade with a finial.
It works, but the shade sits loose and slides around on the bulb if you knock it. I’d treat it as a rescue, not a plan.
10. Add the Bulb and Shade
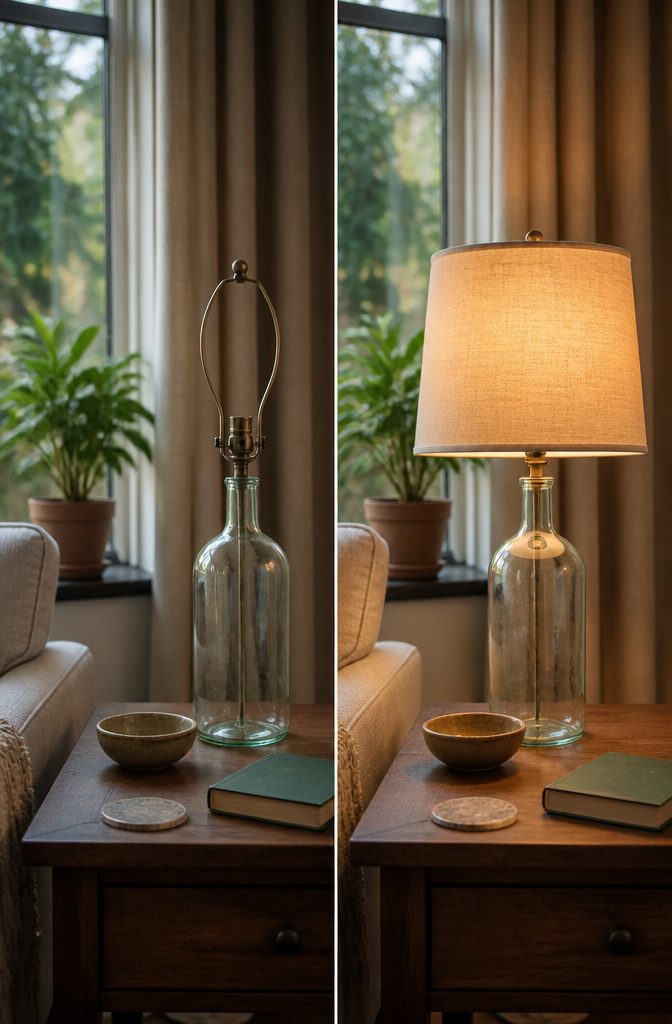
Use an LED bulb. LEDs run cooler than incandescent or halogen bulbs, which matters when the bulb sits inside a glass body with only a narrow neck for heat to escape.
Trapped heat is hard on the socket and the cord, so I wouldn’t put anything hotter in a bottle.
A bottle lamp has no harp, and a shade built for one can still work without it.
A harp adapter and a finial hold the shade in place: the adapter supports the shade’s fitter, and the finial screws on top to pin it down.
The shade can slip or tilt if the lamp gets knocked, and that’s the weakness of this route.
I’d still choose it over hunting for a different shade, because it costs little and keeps the lines clean. Tighten the finial by hand until the shade stops wobbling, and place the lamp where elbows and pets won’t reach it.
11. Plug In and Test
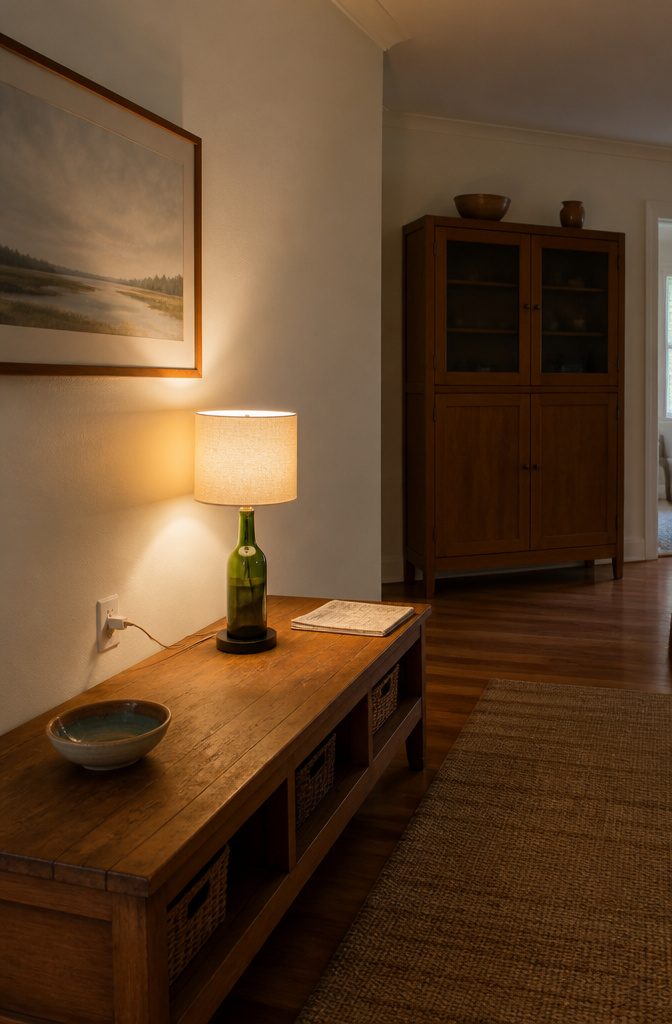
Set the lamp on a clear, stable surface away from curtains and paper before you plug it in.
Stand back, keep your face and hands clear of the socket, and switch it on. Wiring done wrong can flash the first time power reaches it, so treat this first switch-on as a test, not a reveal.
If the lamp flashes or stays dark, unplug it from the wall before you touch anything. Then open the socket and recheck the screw connections.
A loose screw or a wire that slipped out from under its screw head is the usual cause. Retighten, reassemble, and test again from the same distance.
Choosing the Lamp Body
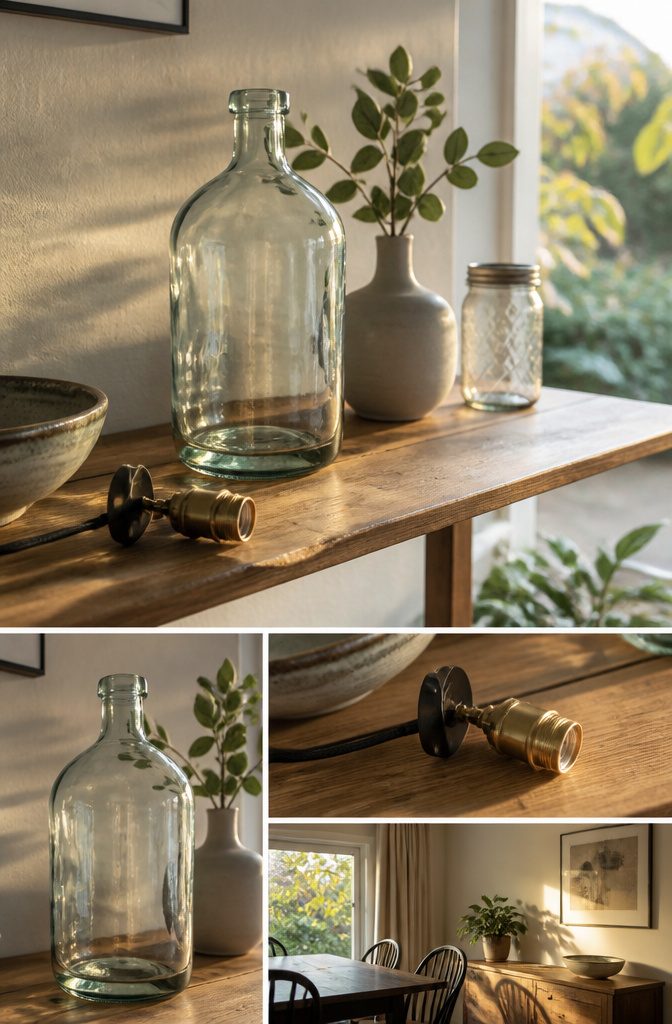
Jars, bottles, vases and even a teapot all work as lamp bodies, so choose one you’d happily keep on a shelf.
A vase needs a cord exit hole near the back and bottom, drilled with a concrete bit, so you commit to the piece before you start.
A bottle can skip drilling entirely with a side-mount kit. For a first lamp, I’d take that route, since drilling adds a chance of ruining a vessel you like.
Skip glass that looks thin and fragile. A heavier bottle feels more like furniture, and it sits steadier under a shade.
The savings are real: a bottle from World Market, a shade, and a kit from the lighting section at Home Depot came to around $50, against around $200 for a comparable Pottery Barn lamp and shade.
Lamp Kit Choices
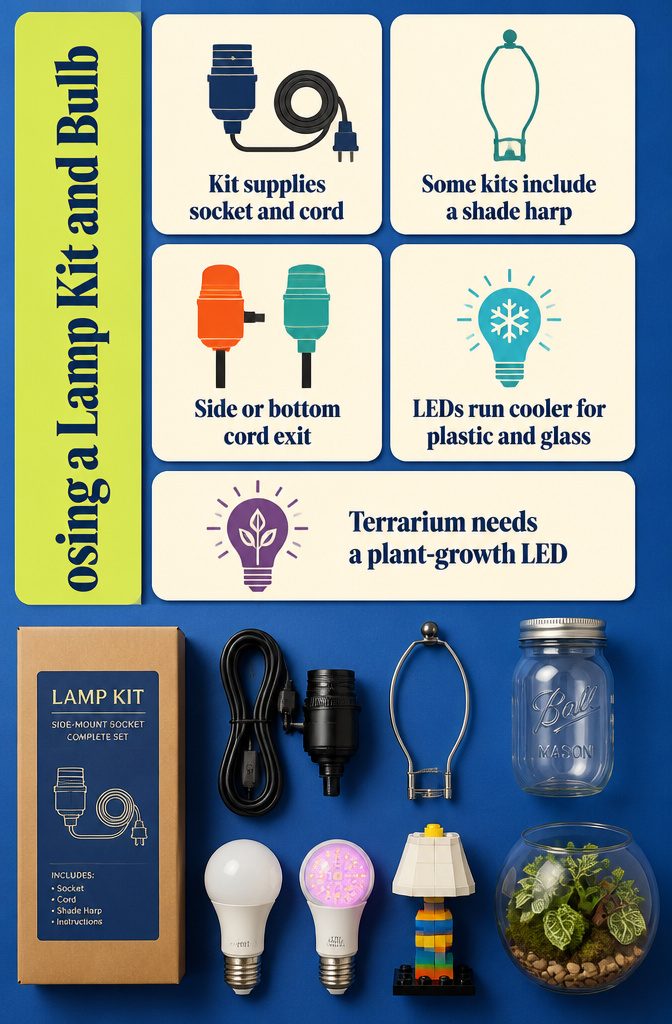
A kit bundles the electrical parts, so you skip hunting for them one by one:
- The kit supplies the socket and the cord, and some include a harp, the wire frame that holds a shade above the bulb.
- Side-mount and bottom-mount refer to where the cord leaves the socket assembly. Pick the one that matches how the cord will exit your lamp body.
- Follow the instructions in the box. Wiring layouts differ between kits, and a short video tutorial of your kit type makes the first connection less guesswork.
- Choose an LED bulb for mason-jar, Lego and upcycled-plastic lamps. LEDs run cooler, which protects the plastic and keeps the glass from getting hot.
- A terrarium lamp calls for an LED made for plant growth, so the bulb lights the room and feeds the plants.
Finish the Look
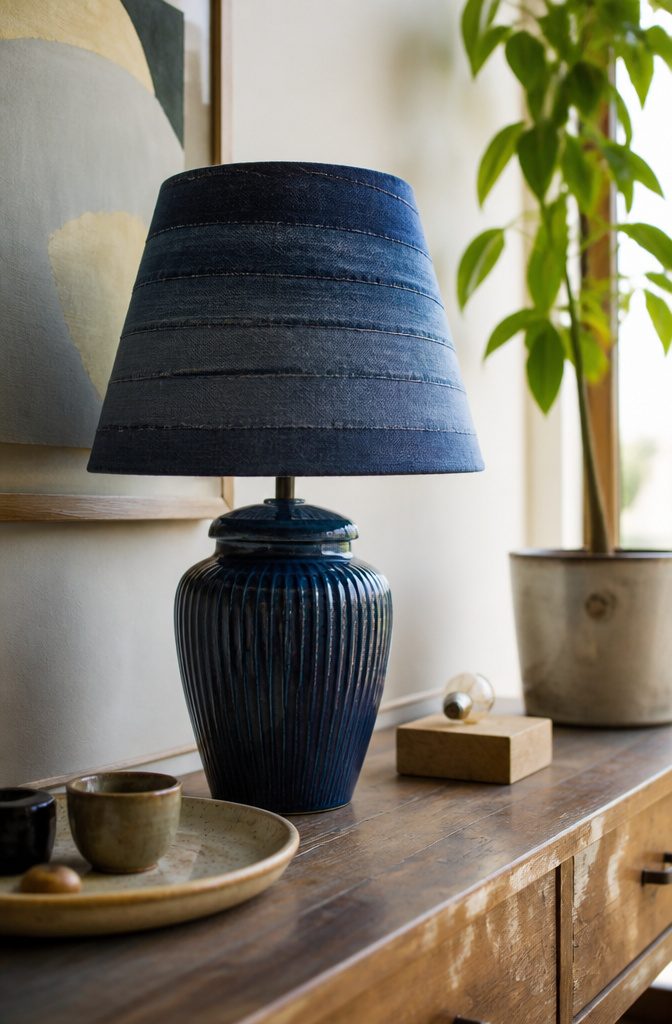
A kit that includes a harp is the easier route: the wire frame sits over the bulb and the shade drops onto it.
Without one, you need a lampshade adapter, so check which your kit has before you buy a shade.
Once the wiring is done, super glue the saucer to the vase and paint it to match the vase color.
A matching cap looks like part of the vase instead of an add-on, and it should be finished before the shade goes on.
For a shade with more texture, glue denim strips around a plain one, overlapping them slightly.
Cut the strips 1–2 inches wide so they stay uniform. If you have no bottle, a 4 × 4 × 10-inch wood block makes a good Edison-style base, and I’d pair it with an E14 or E27 bulb.
Frequently Asked Questions
How much does it cost to make your own lamp?
A bottle lamp came to around $50 in total: a bottle from World Market, a shade, and a kit from the lighting section at Home Depot.
A comparable lamp and shade from Pottery Barn ran around $200. Your total will shift with the bottle and shade you pick.
What kind of bulb should I use in a bottle lamp?
Use an LED bulb.
LEDs run cooler than incandescent or halogen bulbs, and a glass body with a narrow neck gives heat little room to escape. Trapped heat is hard on the socket and the cord.
Do I have to drill a hole in the bottle?
No. A side-mount kit lets the cord leave through a notch in the base, so the glass stays whole.
A bottom-mount kit needs a hole drilled in the glass with a glass-rated bit and slow, wet drilling, and one slip can crack the bottle. For a first lamp, side-mount is the safer pick.
How long does the plastic weld take to set?
It starts hardening within 3 minutes, so have every part laid out before you cut the putty.
A hard surface can still be soft underneath, so leave the lamp alone for a couple of hours before wiring or tugging on anything. Press a fingernail into a hidden spot; if it dents, wait longer.
Which wire goes to which screw on the lamp socket?
The ribbed side of the cord goes to the silver screw and the smooth side goes to the brass screw.
Wrap the bare wire snugly around each screw and keep the insulation out from under it. Tug each wire gently afterward, and follow your kit’s instructions if its terminals are laid out differently.
What should I do if my new lamp flashes or won’t turn on?
Unplug it from the wall before you touch anything.
Then open the socket and check the screw connections, since a loose screw or a wire that slipped out from under its screw head is the usual cause. Retighten, put it back together, and test again from a safe distance.