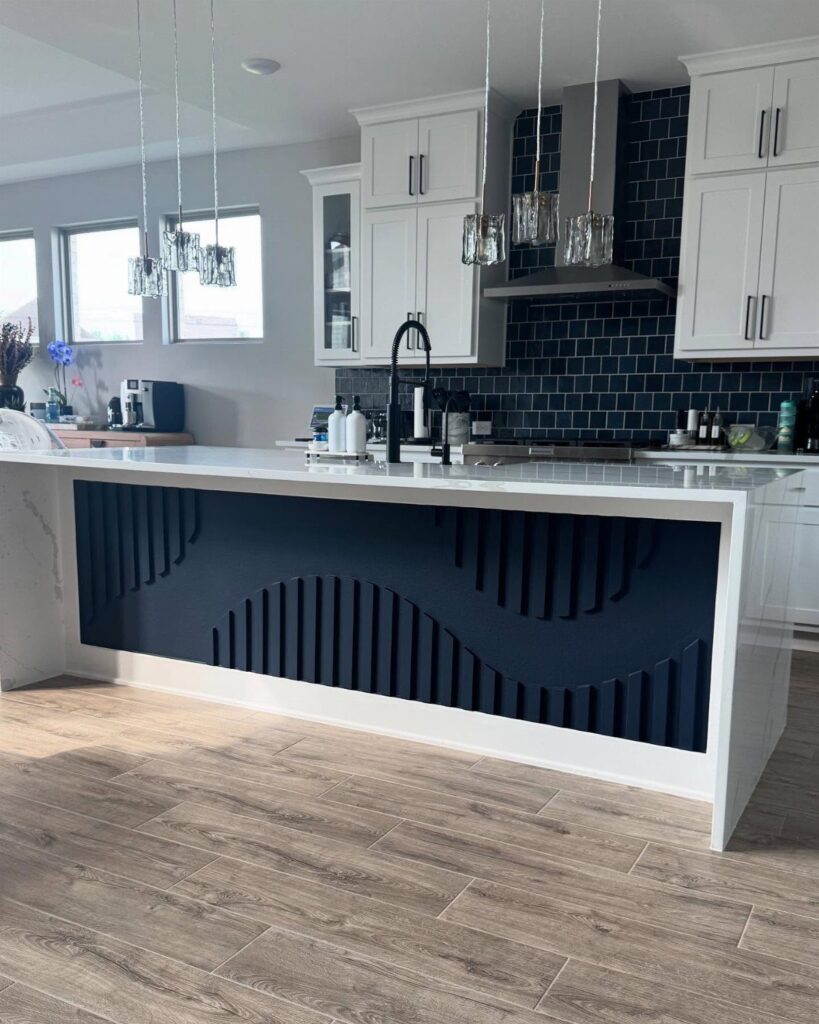
Island back panels run from molding and beadboard you can cut, glue, and caulk in a weekend to waterfall stone that needs a fabricator and precise templating.
Before you pick a panel, measure the clearance on the seating side and decide how much of the installation you want to handle yourself, since a panel that catches every stool user’s shins costs more than it saves.
Even the simplest pick, painted picture-frame trim, only reads as built in when it matches the perimeter cabinets.
1. Applied Molding Panels
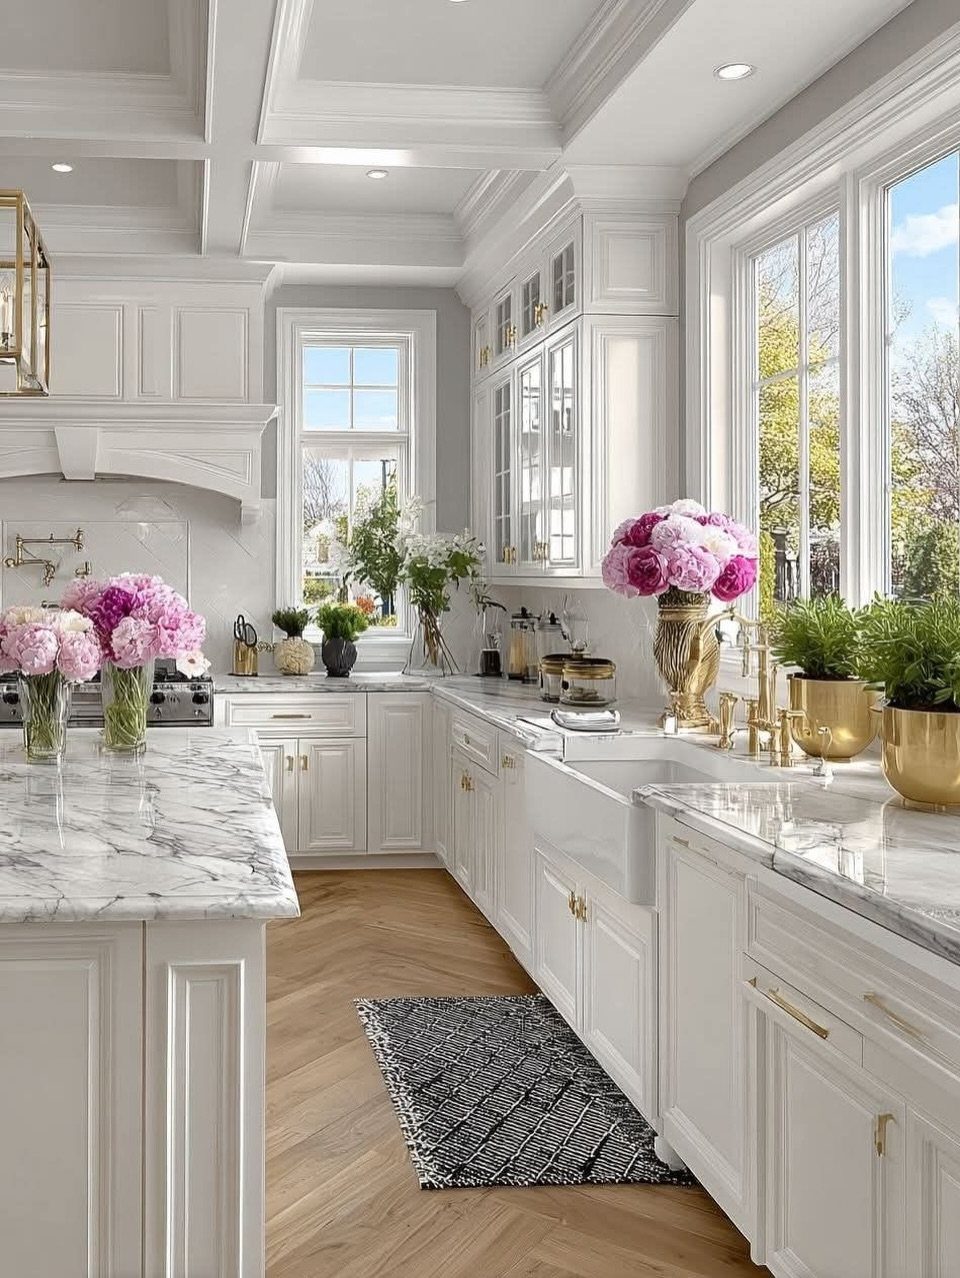
Picture-frame trim on the back of an island is the quickest way I know to make a run of base cabinets read like a freestanding piece of furniture.
Rails and stiles, or simple rectangles of molding, give the flat side a frame-and-panel look that matches shaker-style doors elsewhere in the room.
Paint the island and the perimeter cabinets the same white or a close cousin, so the trim looks built in rather than stuck on.
It suits a weekend update because the work is cutting, gluing, and caulking, not rebuilding the cabinet.
2. Beadboard Paneling
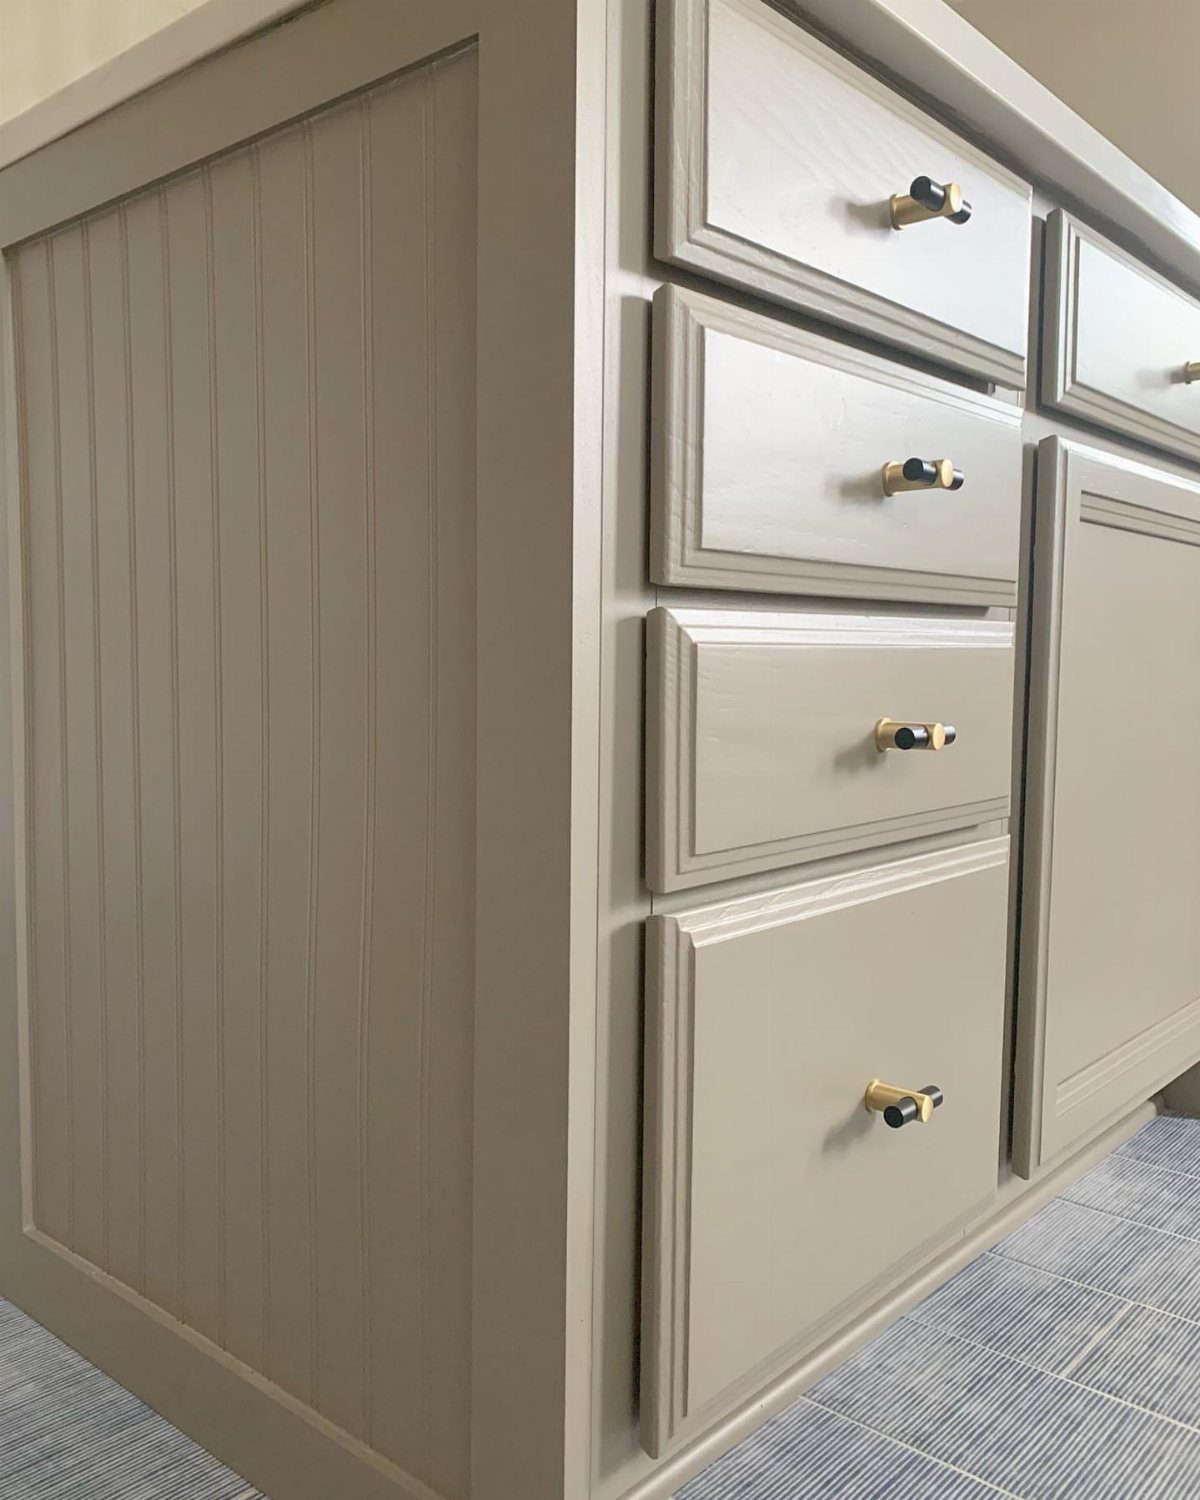
Beadboard puts narrow vertical grooves along the island’s back, and that one move makes a kitchen feel cottage-casual.
A soft gray paint, as visible here, keeps it calm, while gold knobs on the drawers add a small dressy note against the texture.
I’d pick beadboard over fancier trim when the budget is tight and the look is relaxed. Paint it in a satin or semi-gloss sheen so the grooves wipe clean easily.
3. Waterfall Stone
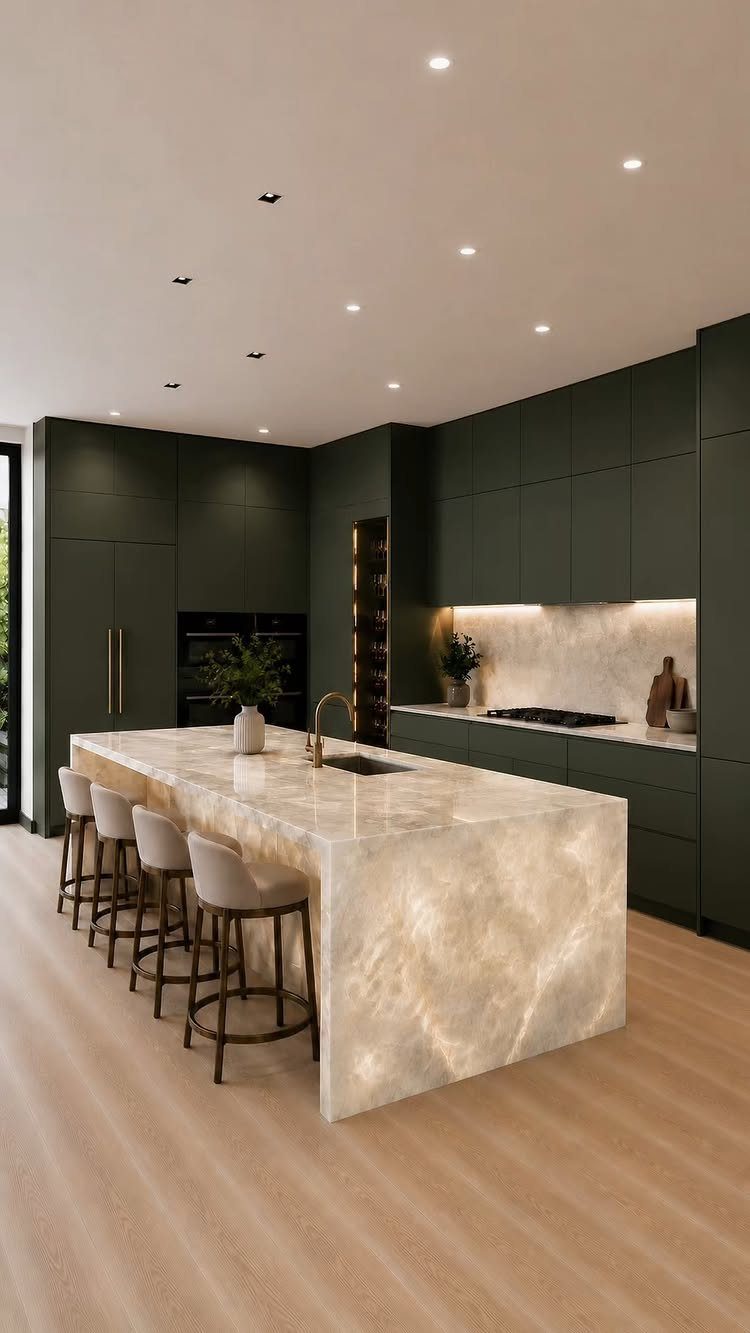
A slab that runs from the countertop straight to the floor makes the island look carved from one block.
Veined stone that wraps over the edge and down the side makes the island the focal point of the kitchen, and the effect is strongest against dark green cabinets.
This is the splurge entry on the list.
Stone is heavy and the edge cuts need precise templating, so plan on a fabricator and a real budget. If that is too much, a thinner look-alike surface wrapped on the sides is the compromise.
4. Open Shelving
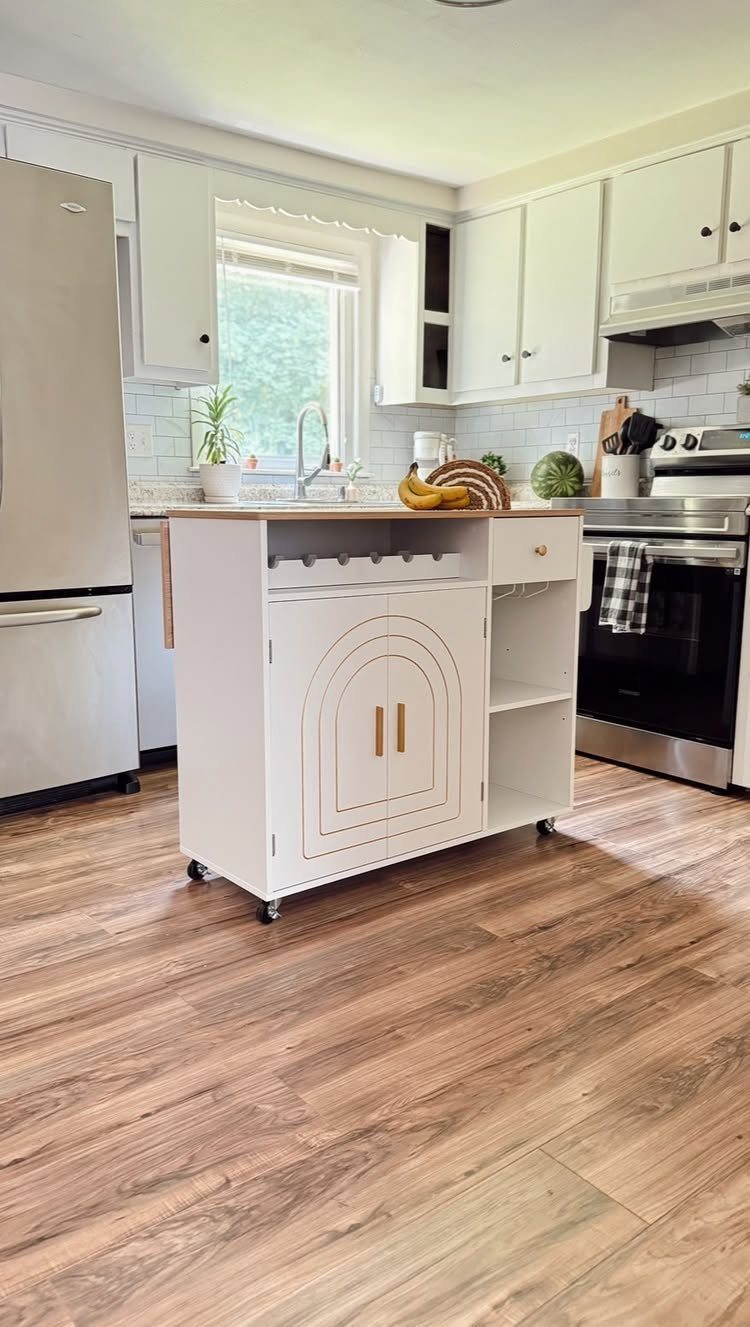
Shelves cut into the end of an island give you storage that never needs a door opened, which is why I like them for cookbooks, baskets, and the bowls you reach for daily.
On a mobile island like this one, they also lighten the bulk of a closed cabinet.
Keep the contents edited, because everything on an open shelf is on display. Baskets help hide the clutter, and stacking a few matching bowls looks better than a jumble of mismatched ones.
5. Fluted Panels
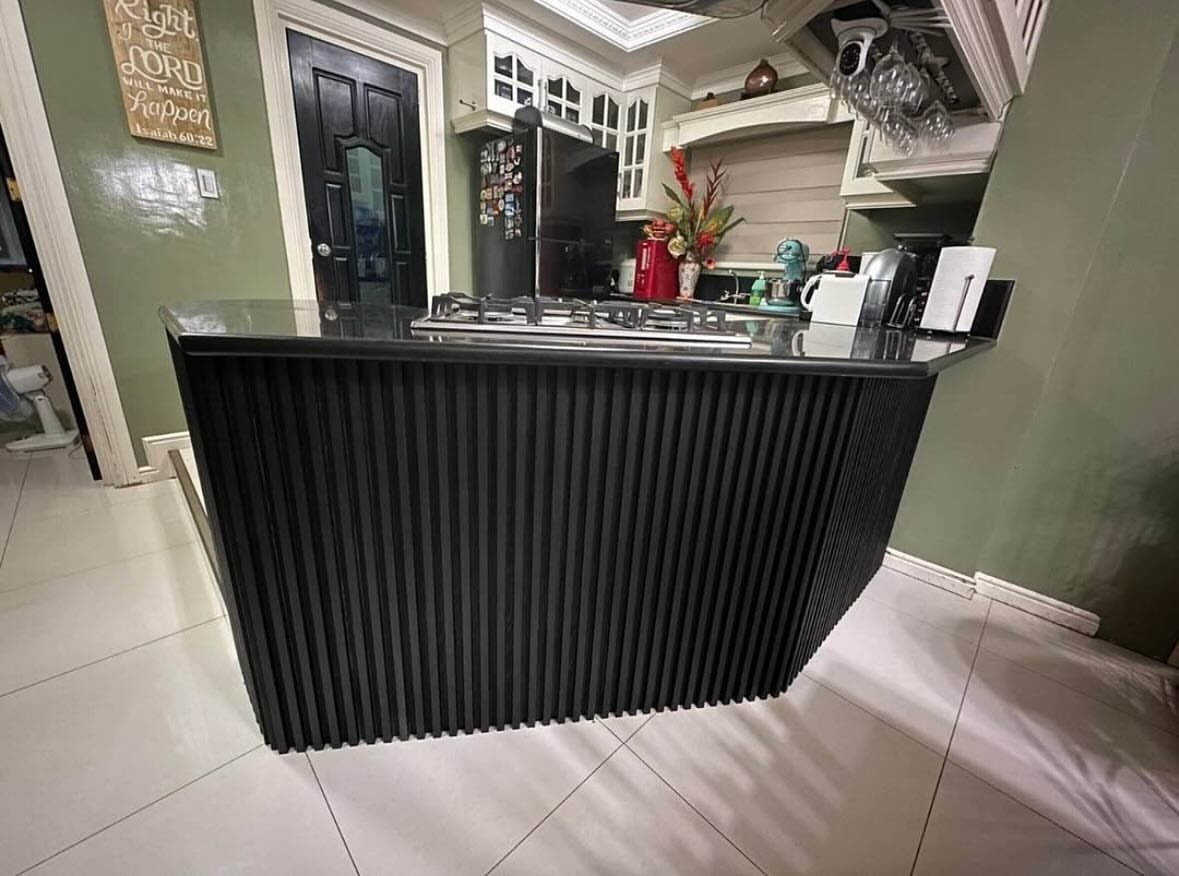
Black can swallow detail, and fluting is what rescues it. The vertical grooves catch light and throw shadow, so a dark island back has depth even when the paint and countertop are close in tone.
You can buy fluted panels in strips or sheets and fasten them to the cabinet side, then paint everything one color.
I’d choose a matte or satin finish, since gloss shows every fingerprint on those ridges. The effect is dramatic without needing a contrasting color.
6. Finished Plywood Panel
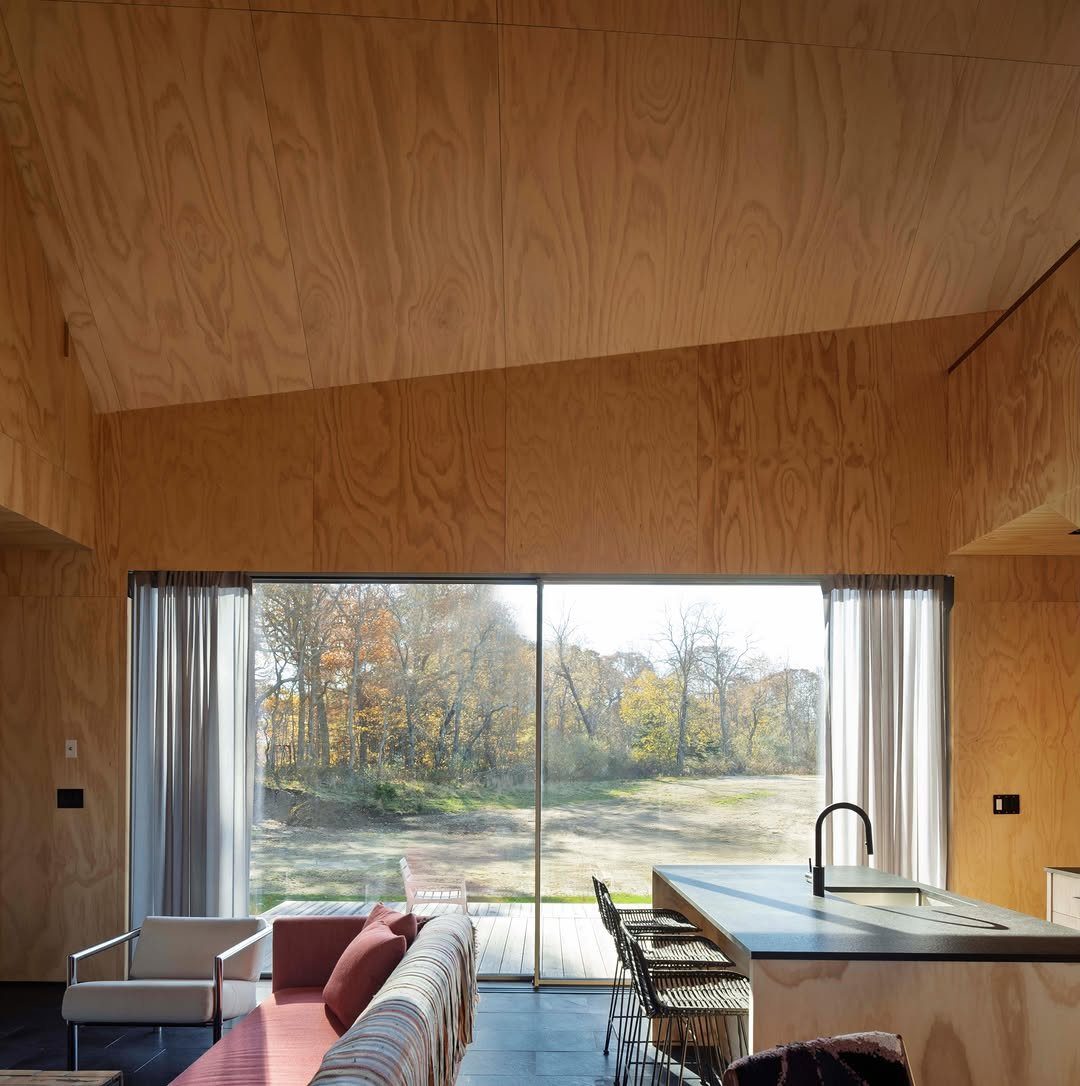
Plywood is the budget pick that still looks intentional, particularly in a room where the walls and ceiling are already wood.
A plywood sheet or veneer on the island base ties it to the cabinetry around it, and a pale grain sits comfortably under a dark countertop.
Kitchen wear is hard on raw wood, so start with a plywood sheet that has a clean face, sand it smooth, and brush a clear sealer over both the surface and the cut edges.
Cost stays low compared with stone or tile, and the cutting is simple enough for a confident DIYer.
7. Tile Panel
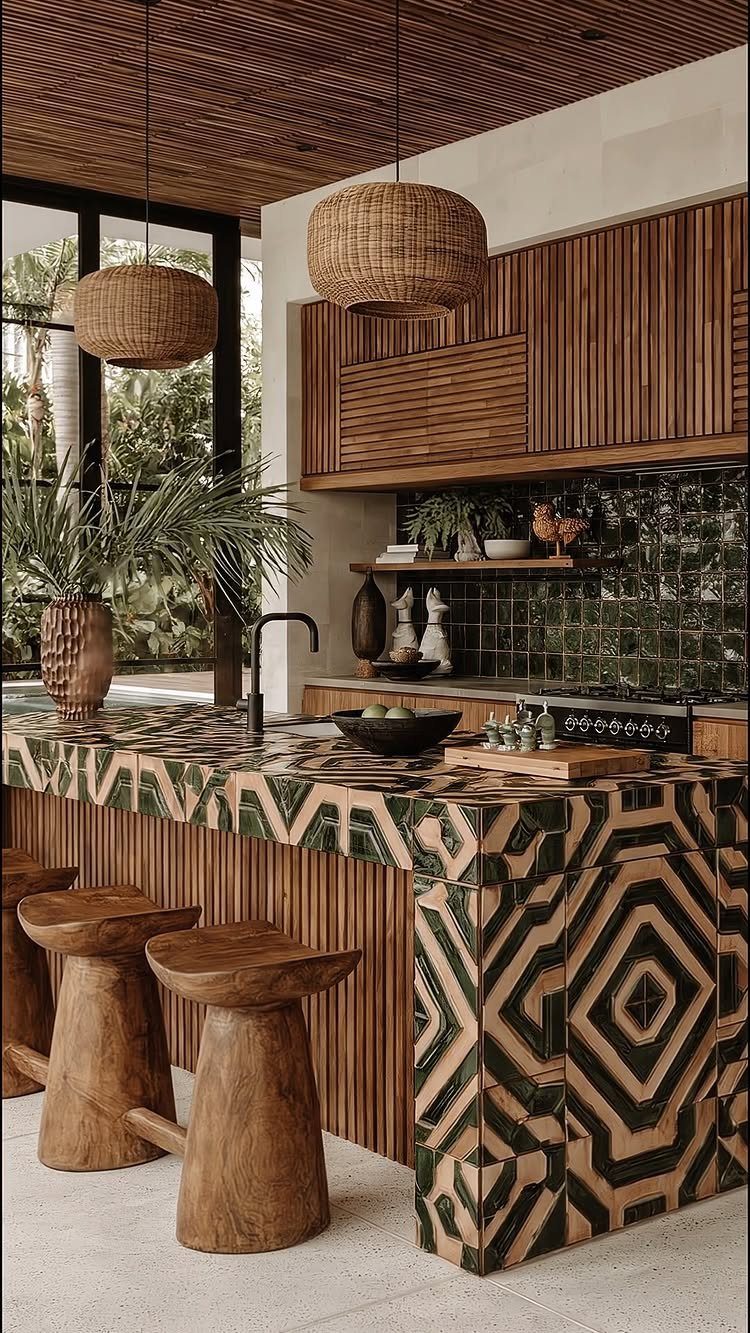
Tile is the one back-panel material that can carry real pattern, and a geometric layout in green and tan gives a plain cabinet side the look of a rug standing on edge.
The same tile runs across the top here, which ties the island together.
Pick two or three tones from the room, like the wood of the stools and ceiling, so the pattern feels chosen. Tile asks for more patience than paint, so I’d keep the pattern simple if you’re setting it yourself.
Paneling is a more traditional way of detailing the sides of an island and less costly than a waterfall side panel. There is usually ample space for outlets on the side that can be blended in to match the finish pretty well.
8. Board and Batten
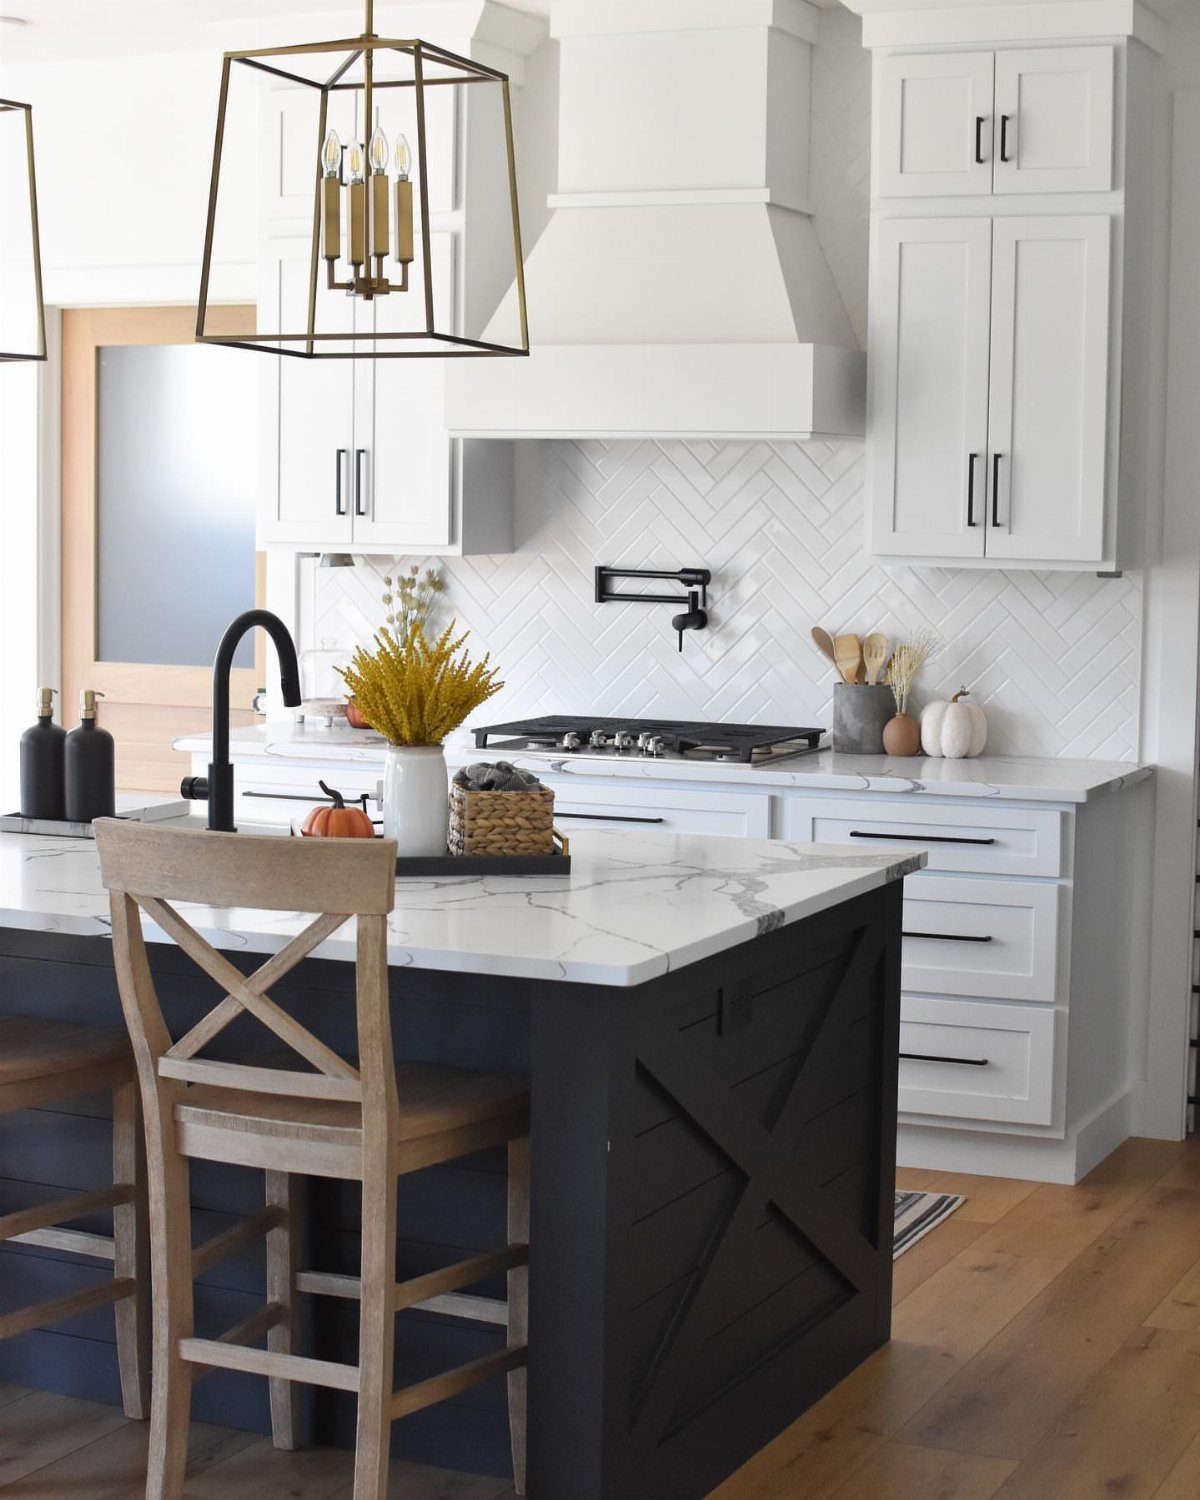
Raised strips laid over flat boards cast thin shadow lines, and an X-shaped layout gives that traditional detail a farmhouse accent. Against a dark navy island with a marble top, the lines read crisply without any added color.
I’d paint the boards and strips together in one shade, and let the shadows draw the pattern rather than a color contrast. An X-back stool at the counter repeats the crisscross, so the two look related.
9. Faceted Geometric Panels
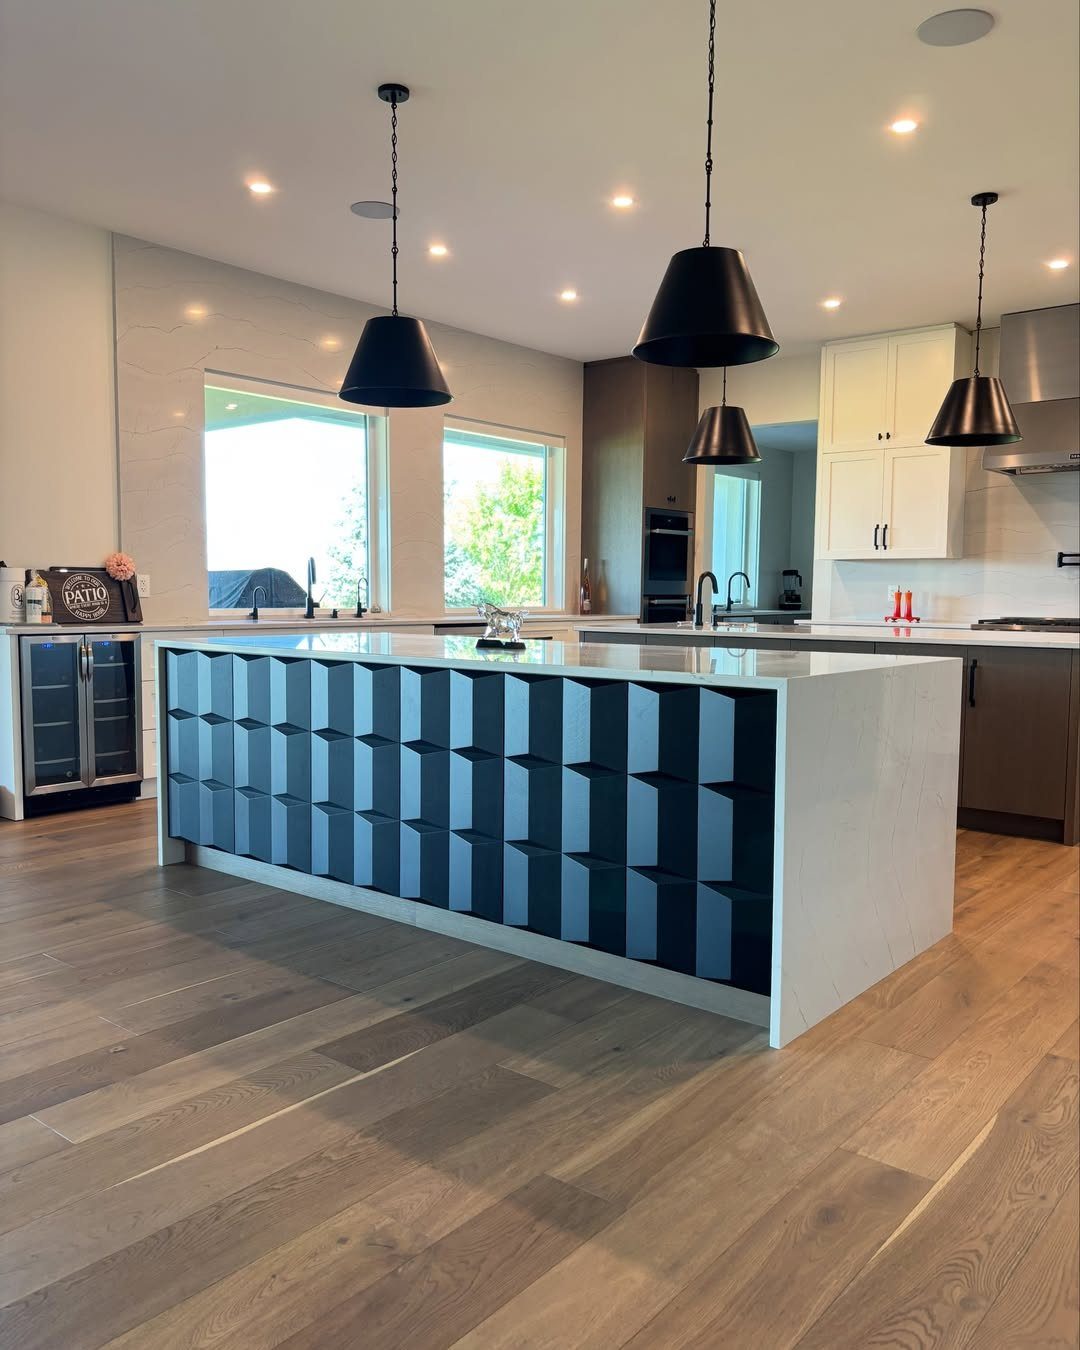
Angled planes turn a flat island end into something closer to sculpture, and dark blue is a smart choice because the facets create their own highlights and shadows.
Against a white island body, the panel becomes the one bold move in the room.
Keep everything else quiet: simple pendants, a plain countertop, and no competing texture nearby. This is a statement piece, so I’d use it on one end only rather than wrapping the whole island.
10. Decorative Panel Kit
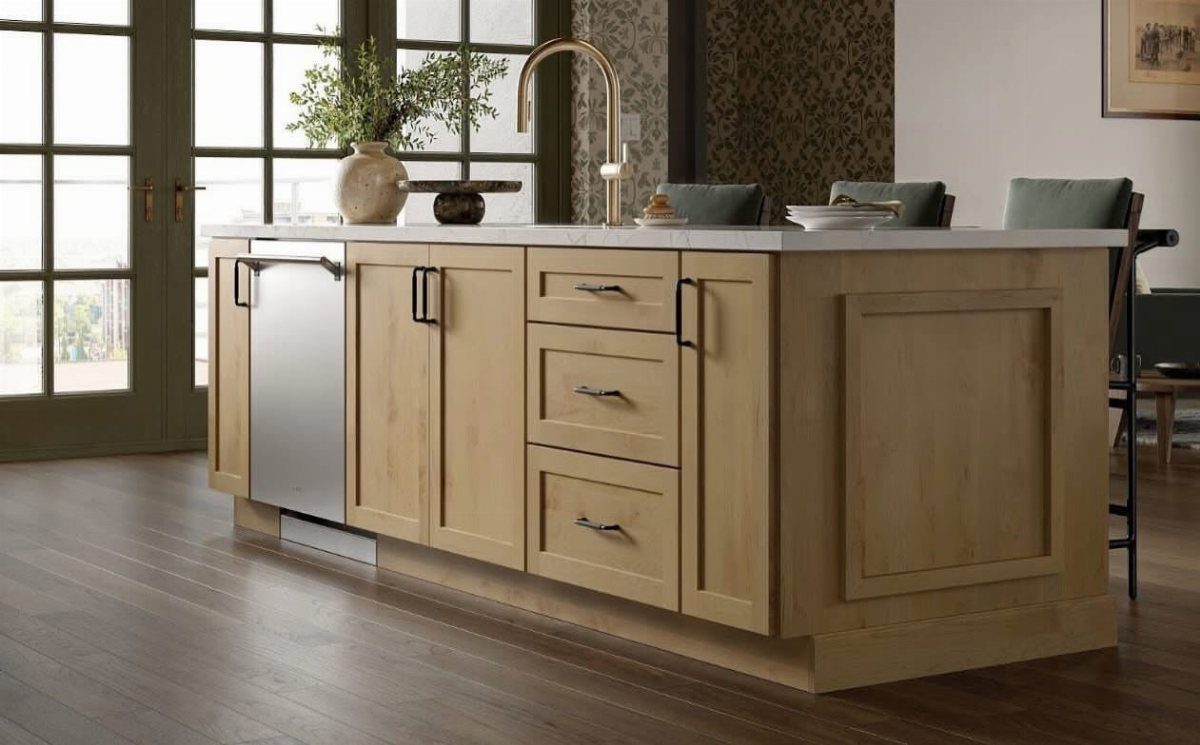
A recessed decorative panel on the island side lets you match the look of your cabinet doors without building new cabinets.
Pick a panel profile that matches the doors elsewhere in the kitchen, so the island looks like it came with the rest of the cabinets.
I’d order a panel sized for the full side so you aren’t piecing sections together, then fasten it and finish the edges to match.
11. Integrated Inset Panel
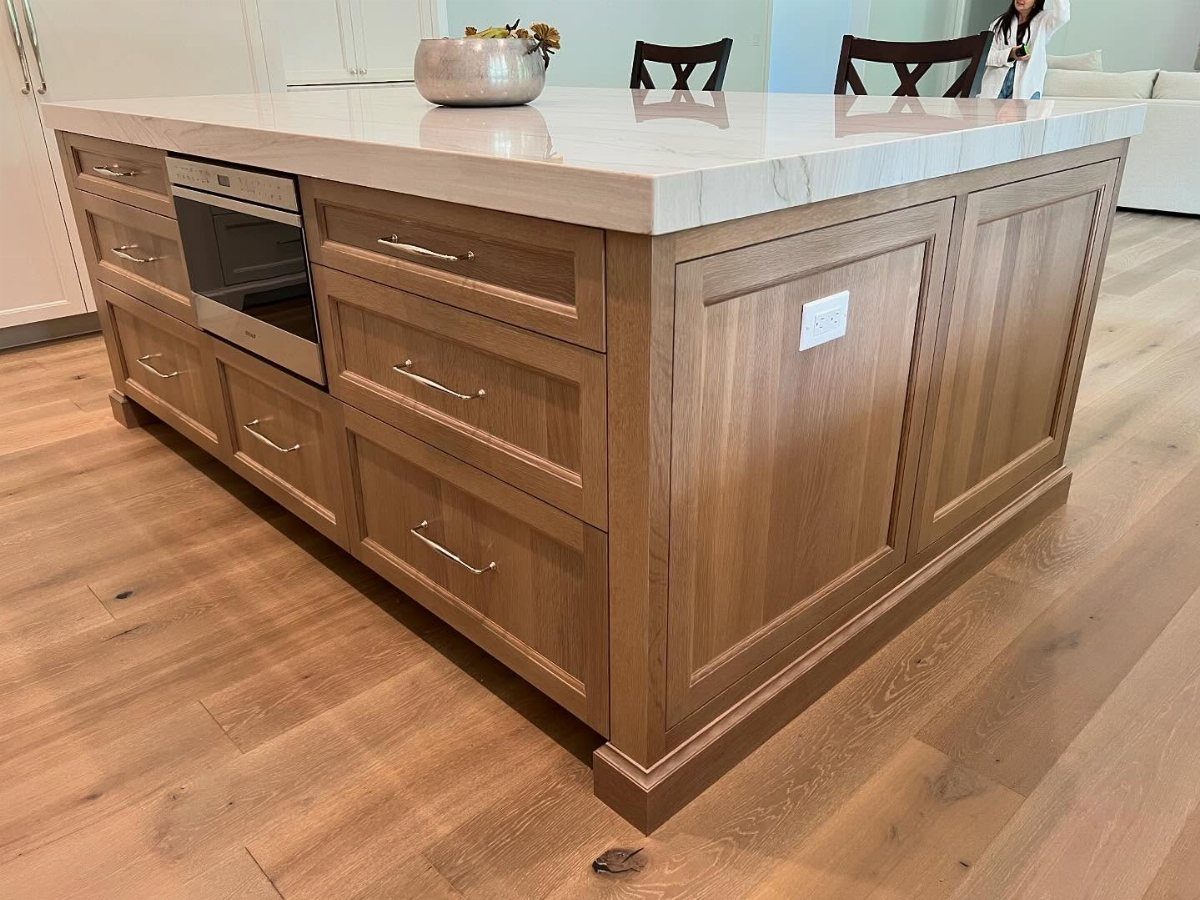
The reveal around each piece is what makes it feel built in.
This is carpentry rather than a weekend add-on, so plan on a cabinetmaker or a confident woodworker. Light wood with a marble top is a classic pairing, and I’d keep the hardware plain so the joinery gets the attention.
12. Tongue-and-groove Boards
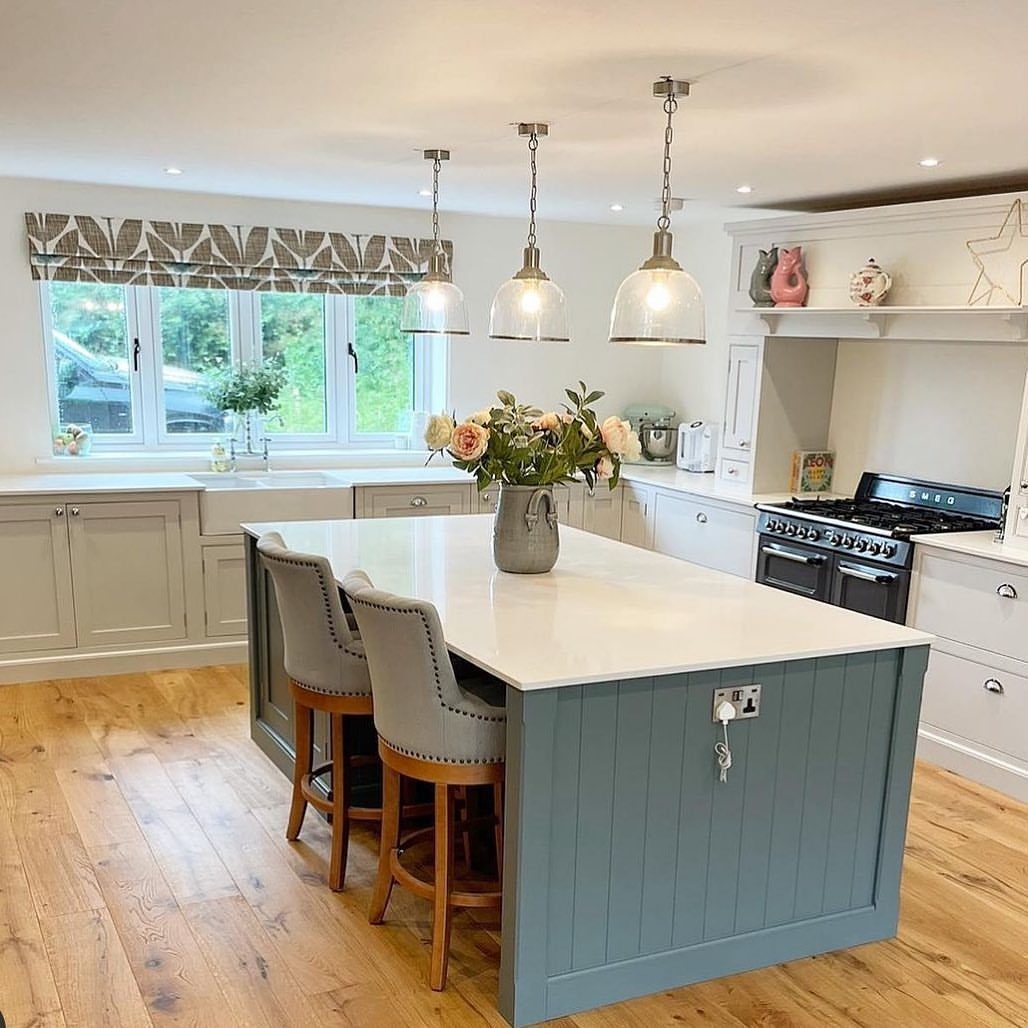
Vertical tongue-and-groove boards give a blue island a clean, linear look, and the wood warms up a kitchen full of white cabinetry. Vertical boards draw the eye upward, which adds a little visual height to the island.
Painted, the seams stay crisp.
Horizontal boards do the opposite, stretching the island out so it feels longer and lower. I’d go vertical in a room with a lot of straight lines, since it matches the cabinet fronts.
13. Waterfall Ends, Quiet Center
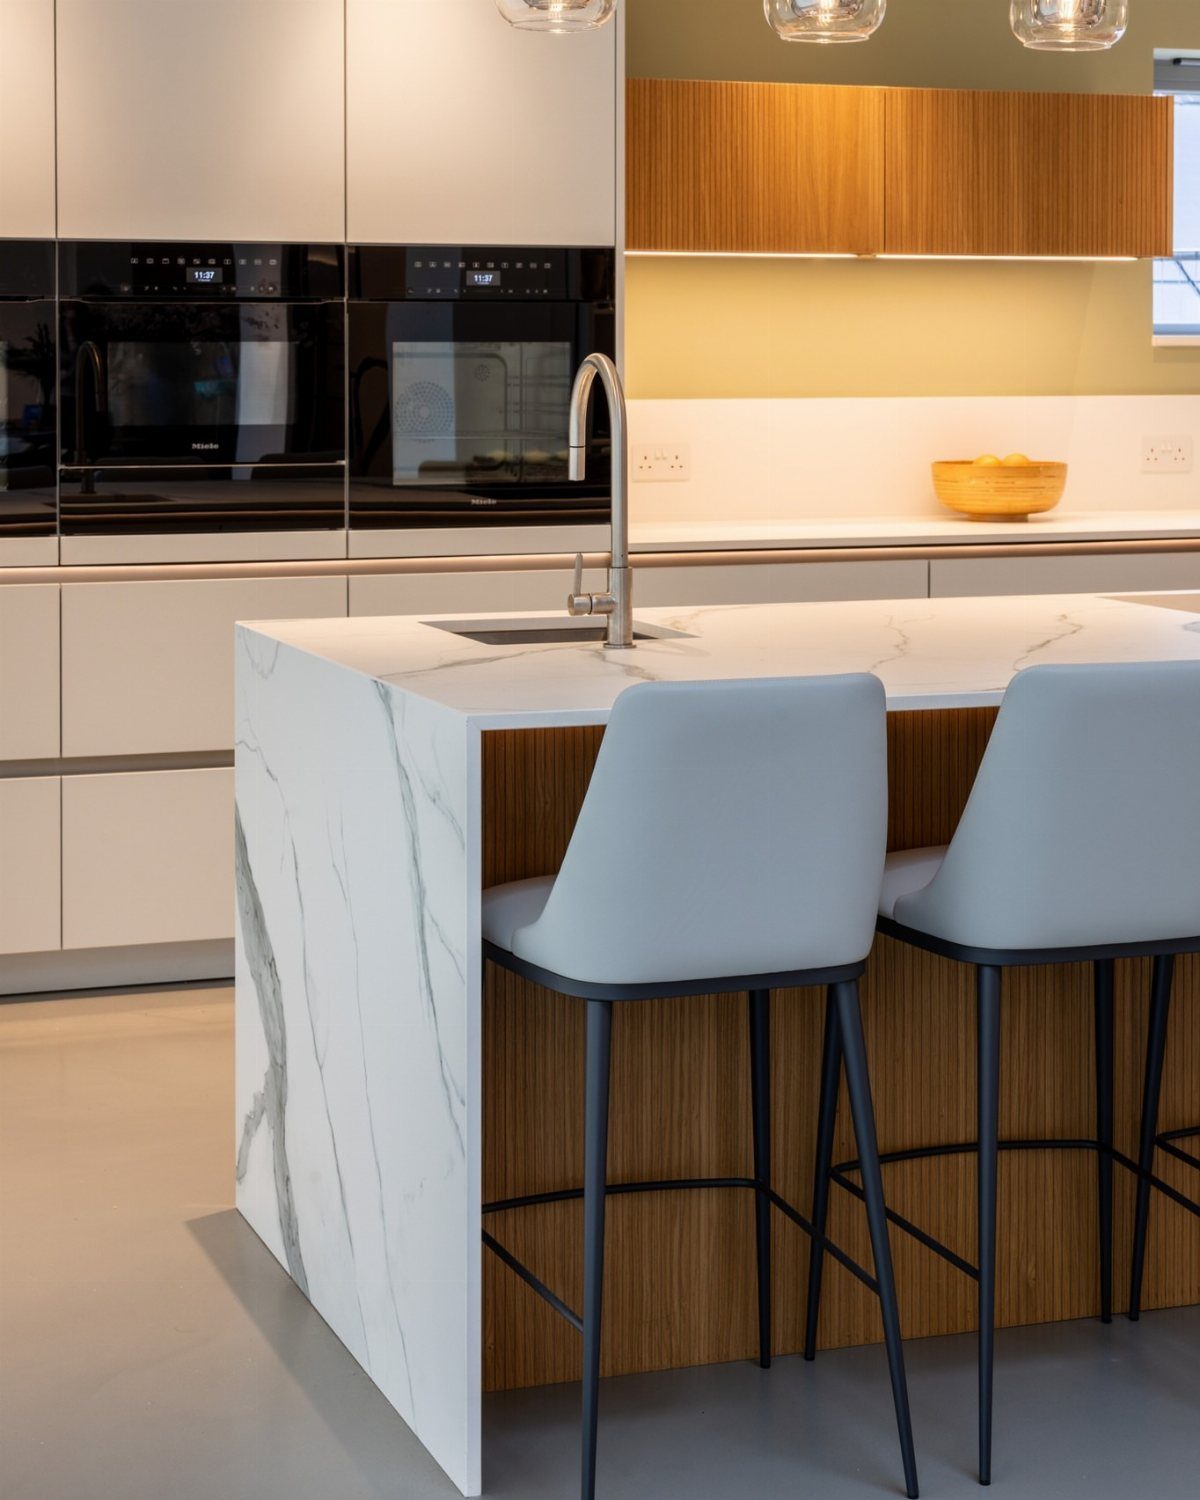
Stone on both ends with wood between them gives the island a frame, and the quiet center is what keeps the marble from taking over.
The white veining stays the star, while the natural wood panel adds warmth on the side people see most from the stools.
I’d keep the wood plain, with no trim or grooves, so the panel becomes a calm field between the 2 slabs. A clear finish lets the grain show.
Plan Installation and Finish Details
Take three measurements along the back of the island, at each end and at the center, since a panel cut to just one of them will leave a gap wherever the floor wanders.
Snap a level line first and build off it instead of trusting the floor or the countertop edge.
Decide how the panel meets the toe-kick before you cut. Either run the panel flush with the kick or end it at a clear, deliberate step, because a slight drift looks like a mistake.
Plan every place the material ends: exposed cut edges, seams, and corner trim. Put seams under a trim piece or at a natural break, and with wood, have the grain wrapped around outside corners so it doesn’t break there.
Check what the panel fastens to. The cabinet side needs a sound substrate, and the finish system has to suit the material and indoor conditions, since wood moves and unprotected edges absorb moisture.
Keep unfinished decorative sheets away from the sink, dishwasher, and any spot that gets mopped. Difficulty ranges widely by material and skill, so hire out any cut you can’t redo.
Check Seating and Circulation
Before adding thickness or projecting trim, protect the knee and foot space at the seating side. A panel that looks great and bumps every stool user’s shins is a poor trade.
Painter’s tape on the floor will outline the island’s footprint, and each stool can be drawn in at the width it will really take up.
Draw the swing of every nearby cabinet, drawer, and appliance door on your plan.
In a compact room, a few inches of added depth can eat that margin quickly.
Also confirm the countertop support still works with whatever you add to the back.
Coordinate Services and Structure
Settle outlets, plumbing, appliances, and access before anything covers the back of the island. Every island needs an outlet, and a decorative panel should never bury one without a plan for access and code compliance.
A panel doesn’t anchor an island.
Extra weight matters with thick tile assemblies and masonry-look products.
For a checklist covering cabinetry, storage, seating, electrical, lighting, and systems coordination, the National Kitchen & Bath Association’s planning guidelines are a solid reference.
Frequently Asked Questions
How to decorate a kitchen island with a sink?
Choose a back panel that is painted or sealed, because moisture is what the panel has to survive.
Beadboard in satin or semi-gloss paint is an easy fit since it wipes clean. Before anything gets glued or nailed over the panel, mark where the plumbing runs.
What makes your kitchen look cheap?
Sloppy edges and transitions give an island away faster than the material does.
A panel that drifts slightly at the toe-kick, a gap where the floor wanders, visible seams, and wood grain that breaks at an outside corner all read as mistakes.
Measure the island back in 3 places, snap a level line, and hide seams under trim or at a natural break.
How to attach back panel to kitchen island?
For a heavy panel, construction adhesive plus finish nails holds well.
For a lighter one, wood glue and a brad nailer work, and the tiny nail holes get filled with wood putty and sanded before painting. Screws driven from inside the cabinet box will hold a door-style overlay panel in place.
What is the most durable kitchen island back panel?
No single material wins; the right pick depends on how much contact, cleaning, and repair that side of the island will get.
Raw wood needs the most care: seal the face and the cut edges, because unprotected edges absorb moisture. Keep unfinished sheets away from wet spots, and match the sheen to the use, since gloss shows fingerprints on ridged surfaces.
What is the easiest island back panel to clean?
A painted panel is the easiest, especially in satin or semi-gloss, which wipes clean.
Beadboard painted this way is a good example, because the narrow grooves wipe out easily. Tile also wipes down well, but the grout needs more care.
Can I tile directly over an existing island panel?
Only if the panel is a sound, properly prepared surface for tile. A flimsy or badly prepped cabinet skin may not hold tile, so look at what the panel is fastened to before you buy any.
Can I add storage to the seating side of an island?
Yes, but protect knee and foot space first. Tape the island’s outline on the floor and mark each stool at its true footprint; even a few extra inches of depth can use up the clearance in a small kitchen.
Storage usually works better on a side without stools, and the countertop support has to still work with whatever you add.
Are wood slats practical behind counter stools?
They can be, with some trade-offs.
The grooves collect dust, touch-ups are hard to do, and sharp-edged slats are uncomfortable against knees. Rounded reeds are easier on the back of anyone seated, and I’d hold a full-size sample at seat height before buying.
Should the back panel match the kitchen cabinets?
Matching gives the quietest, most built-in look; painting the island and the surrounding cabinets the same white or a close cousin makes the trim read as part of the cabinetry.
Pick a contrasting color or texture and the island becomes the thing people look at first. If you go bold, keep everything else calm, and use the statement treatment on one end rather than wrapping the whole island.
Can I cover an island outlet with a decorative panel?
Not without a plan. Settle outlet locations and access before the back is covered, and have a licensed electrician and your local building authority confirm the plan against the electrical code your area has adopted.
How can I update an island back panel on a limited budget?
Painted beadboard is my pick when money is tight and the look is relaxed, and finished plywood is the other low-cost route, costing far less than stone or tile.
A plain painted flat panel costs even less. Plan for any substrate repair, electrical relocation, and edge finishing, and spend where it shows: straight alignment, clean corners, and durable edges.
How do you finish the back side of a kitchen island?
Match the material to the look you want. Painted beadboard gives a casual cottage feel, picture-frame trim makes base cabinets read like furniture, and sealed plywood is the cheapest option that still looks intentional.
Fluted panels, vertical wood slats, and tile look the most custom, but tile asks the most skill, so I’d choose it only if you’re comfortable setting and grouting.