1. Modular Shelves
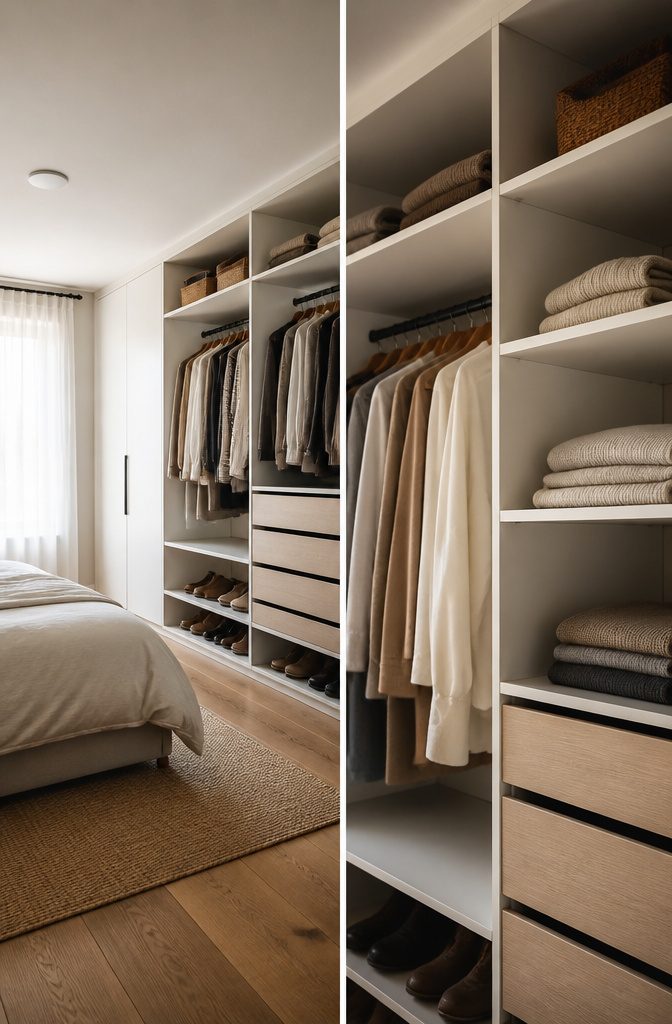
Modular shelving systems are the most adaptable approach to a built-in wardrobe if you rent or your storage needs shift with the seasons.
Wire or wood shelves can be reconfigured without much investment, which matters when you are working with a few hundred dollars and a single weekend.
I have moved these systems between apartments twice. The first setup, a straight run of shelves with a double hanging rod beneath it, gave me full-length storage for dresses and coats.
When I switched to a smaller bedroom, I broke that down into a shorter hanging section plus three stacked shoe shelves that turned what had been dead wall space into usable storage for twelve pairs.
The flexibility is not just vertical. Divided sections let you separate work clothes from weekend clothes without buying new furniture, and adjustable shelves keep bags from getting crushed when you swap them for bulkier sweaters in fall.
The tradeoff is visual: modular systems read as storage, not built-in furniture.
If you want the wardrobe to look like part of the wall, wood shelves win over wire, but either one lets you take the whole system with you when the lease ends.

MODULAR CLOSET ORGANIZER: Stackable shelf unit features two adjustable interior shelves and stackable design (hardware included)

Stackable Closet Organizer with Heavy-Duty Wood & Metal Frame:This stackable closet organizer uses thick wood shelves and a reinforced metal frame to support clothes, shoes, bags, and daily storage without bending or wobbling
2. Adjustable Rods and Shelves
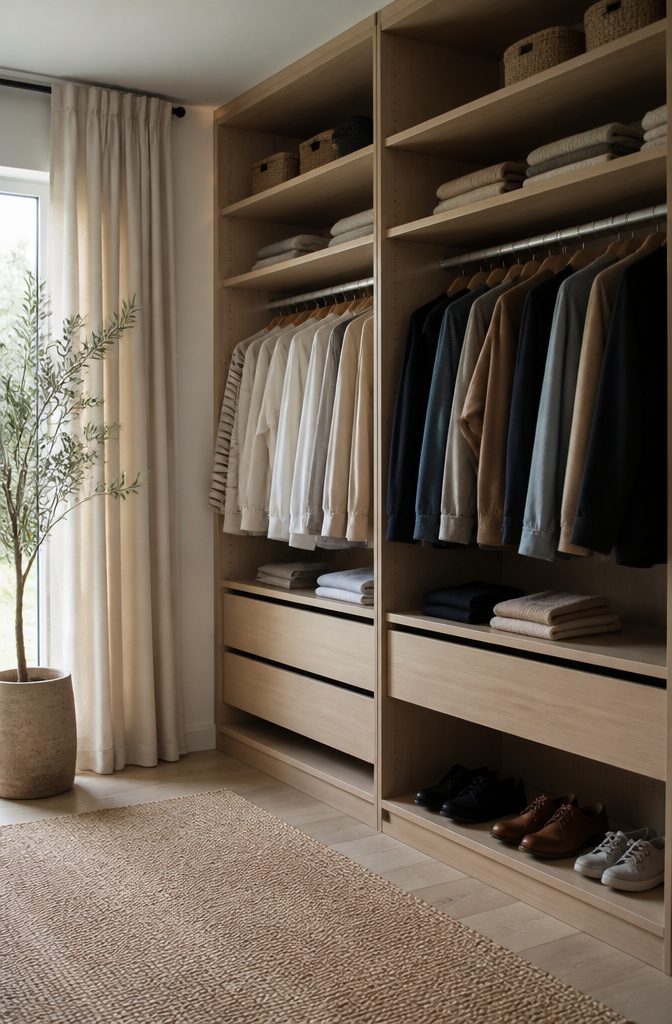
The standard depth for hanging clothes runs 22 to 24 inches, and that extra two inches matters more than most people expect when rods start competing for the same vertical space.
Height-adjustable brackets solve this by letting one person keep long dresses at full length while the other drops their rod to double-stack shirts and pants.
Shelf brackets that move on the same pin system handle the same problem for folded stacks: sweaters in January need half the height of T-shirts in July.
I installed an Elfa system from The Container Store in a closet my partner and I split, and the adjustability got tested almost immediately.
They needed the top rod higher; I needed a second rod added below for skirts. No new holes, no new wall hardware.
The pin spacing is tight enough that shelves sit level even when you shift them by a single notch, which matters because a bracket that tilts under weight will scar the wall behind it.
The real limit is the depth itself. At 22 inches, suit jackets brush the back wall; at 24, you gain breathing room but eat into the bedroom floor space.
I went with 24 and do not regret it, though the door swing is tighter than I would like. Measure your door arc before you commit.
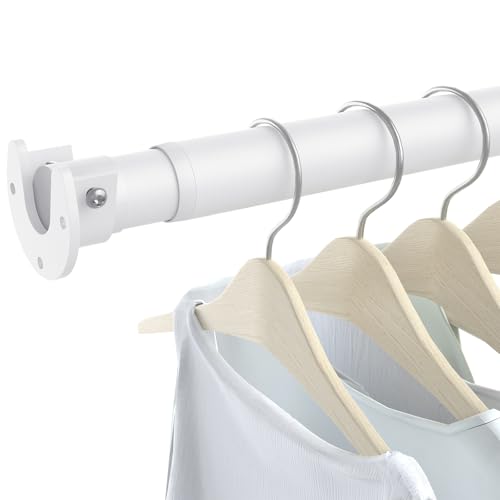
Stepless Adjustable Closet Rod: Closet rods feature a stepless design for precise adjustments without cutting. The stepless design means you won't be stuck with preset holes, and you can absolutely adjust the length of the closet hanging rod to fit your space.

Stepless Adjustment Closet Rod: The upgraded Supforce closet rod features the stepless adjustment design, allows you to precisely adjust according to your closet's specific size; Without any size gaps, No manual cutting is required.

Stepless Adjustment Closet Rod: The upgraded Supforce closet rod features the stepless adjustment design, allows you to precisely adjust according to your closet's specific size; Without any size gaps, No manual cutting is required.
3. Bi-Fold Doors
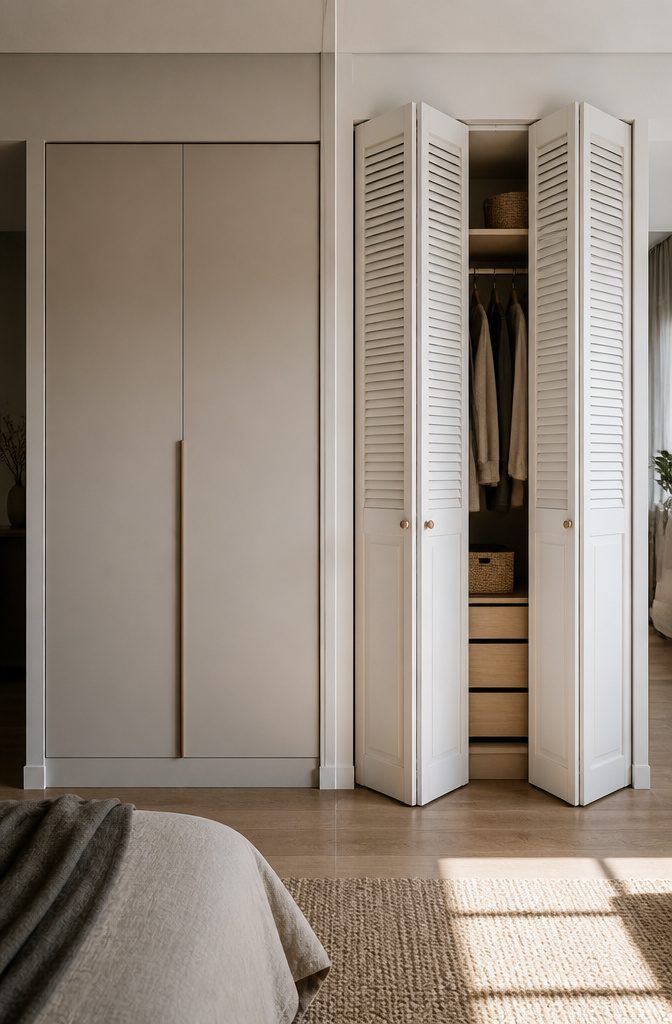
Bi-fold doors fold back on themselves instead of swinging into the room, which makes them the default choice when a bed or nightstand sits close to the wardrobe.
The clearance you need is roughly the width of one panel, not the full door swing, and in a ten-foot bedroom that difference matters.
I have seen them work well in guest rooms where the wardrobe faces the foot of the bed and anything wider than thirty inches of walkway would mean bumping your shin on the frame.
The frustration sets in with the top track. Dust and the lint that sheds off clothing collect in the runner, and after a year or two the doors start to jump or stick.
A silicone spray helps for a month, then the grime mixes with it and the glide gets worse.
The fix is pulling the doors off the track to clean the wheels and the channel with a rag and dish soap, which takes twenty minutes and some awkward lifting.
Renters should check whether the track is screwed into a header board or directly into the wall; the second type leaves holes that are hard to hide.
Bottom-rolling bi-fold hardware puts the track on the floor instead, which solves the dust problem but introduces a ridge you will feel with bare feet and a vacuum will thump against.
For a weekend project with hand tools, the standard top-hung kit is the safer bet, but budget an hour every spring for track maintenance or the doors will punish you for skipping it.

Blend function and modern design to add a new storage option to any closet

SPACIOUS STORAGE: This shoe rack offers plenty of space to accommodate your everyday footwear, including sneakers, heels, and slippers. It's designed to meet all your storage needs efficiently.

Adjustable Dividers for Customized Storage:The closet purse organizer with removable, repositionable dividers let you create custom-sized compartments to fit handbags of all shapes and sizes—from small clutches to large totes. No more cramming or squishing your favorite bags
4. Vertical Layers
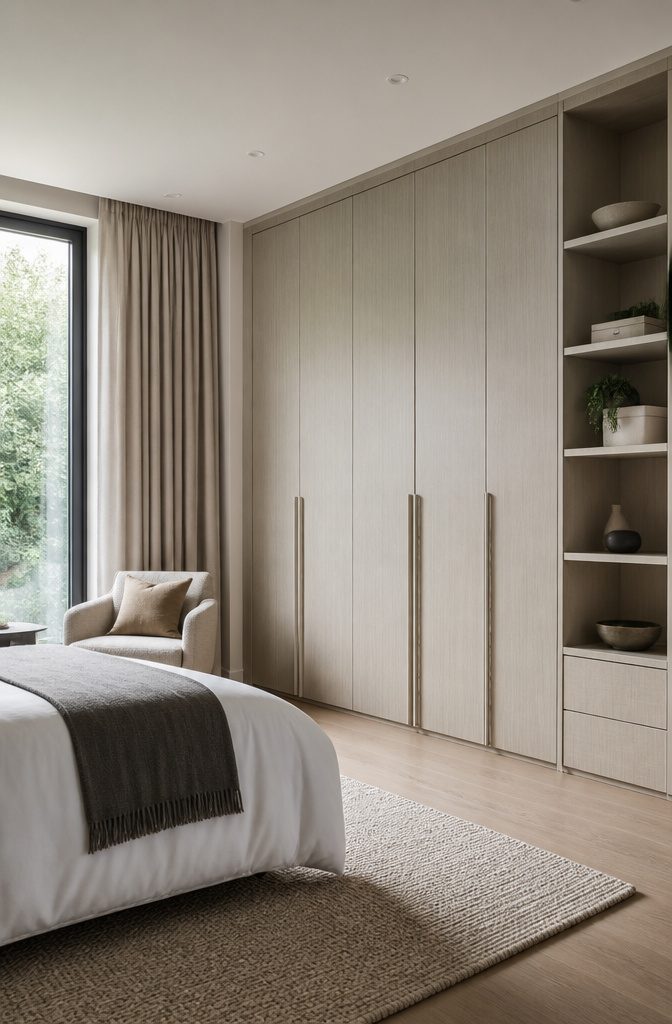
The full height of a built-in wardrobe rarely gets used well. Most people install a single rod and a shelf, leaving two feet of dead air above and a tangle of shoes below.
What worked in the room I was working with was splitting the wall into four zones, floor to ceiling, based on how often the hand reaches for something.
The bottom 18 inches hold shoes in pull-out trays or flat boxes; anything deeper becomes a black hole where single boots go to die.
From 18 inches to about 66 inches, that is daily-use clothing: shirts, pants, the things you grab without thinking. Above 66 inches to roughly 84 inches sits out-of-season storage, the spare bedding, the coat you wear twice a winter.
Everything from 84 inches up is the long-term archive: luggage, archive boxes, the dress you are saving for a wedding that may not happen.
In a room with standard 8-foot ceilings, that top zone is still reachable with a basic step stool.
Push to 9 or 10 feet and a rolling library ladder hung on the side when not in use starts to make sense, especially if you are already committed to full-height joinery.
For a genuinely small bedroom where even a standard wardrobe footprint eats the walking path, the over-bed approach changes the math.
The bed sits inside a U of storage: cabinets or closets on both sides and a full-width cabinet bridging above the headboard. The sides function as bedside tables with drawers or open shelves for the phone and the book.
The bridge above takes the archive load, the things touched least often, since climbing onto the mattress to reach it is not the daily workflow.
What frees up in the rest of the room is wall space and floor space; the eye reads the bed wall as furniture rather than as a separate wardrobe intrusion.
This layout works best where ceiling height is available but the floor plan is narrow, roughly under 10 feet in the short dimension.
The proportions that held together in practice were side cabinets about 24 inches deep, matching standard closet depth, with the bridge cabinet at 16 inches deep so it does not dominate the bed visually or whack the forehead on sitting up.

Metal Material: This metal backplate reinforces cabinet hardware by adding support behind knobs or handles, helping to protect the surface finish of wardrobe doors, drawers, or cabinet panels during everyday use

Vertical grain, high-quality doors

Our folding door hardware is designed so the two doors fold together, saving you space when opening. It's perfect for closet doors, louver doors, laundry closets, and pantry doors.
5. Customize Existing Storage Space
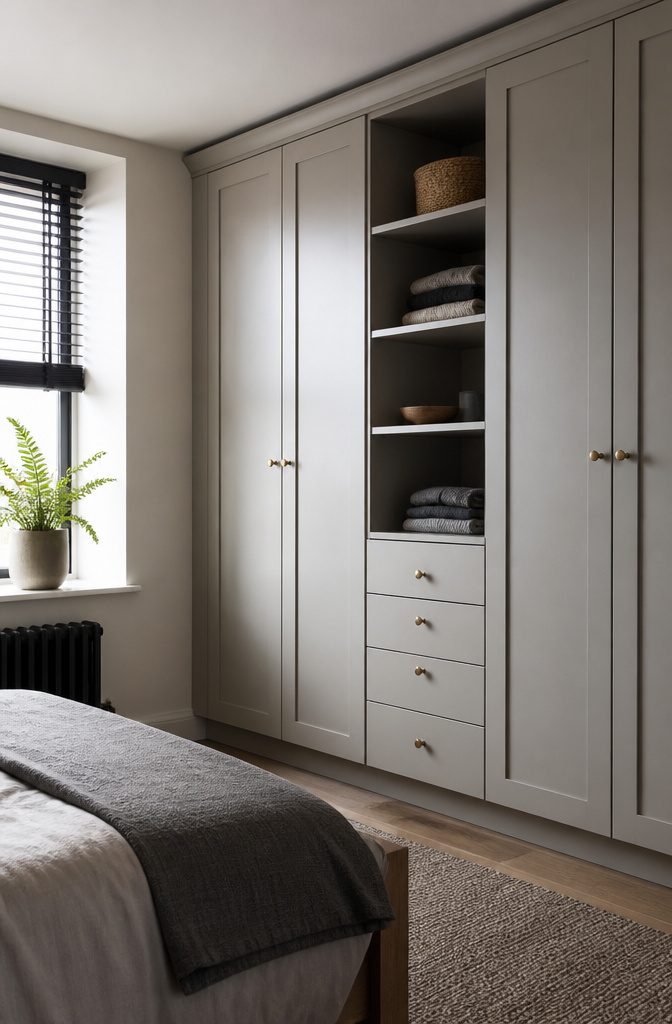
The closet in my last rental was a 4ft by 2ft box with a single shelf overhead, the kind of space that looks too shallow to bother with.
I treated it like a lost cause for months until I realized the carcass was already there; I just needed to stop thinking about ripping it out and start thinking about hacking what existed.
Ordering only the carcass from a larger system and designing the fronts yourself cuts both the timeline and the bill, and for a few hundred dollars you can get that English cottage built-in look with custom doors and trim rather than staring at a blank box.
A fitted wardrobe with over-bed storage is the move when every inch counts in a small bedroom.
The same alcove that holds a freestanding dresser can be retrofitted with bedside tables integrated into the wardrobe run, turning dead wall into something that reads intentional.
The key is working with the room’s existing bones instead of against them: add millwork where the walls already step back, fit drawers into the void beside a chimney breast, run shelves across a doorway’s leftover gap.
You are not building new architecture. You are making the storage look like it was always meant to be there.

EASY TO INSTALL: No tools needed, no damage to your decorative wall, adjustment to the length you need within the expandable range, then extend the suitable length, next tighten the screw, finally adjust fine-tuning feet, shake the product and confirm that it is fixed, just select strong sides ,such as tiles, walls, wardrobes, etc.

【Durable Material】Pegs for shelves made of high quality zinc alloy and polished nickel,good quality and durable for long using life,surface is smooth without metal burrs,can meet your daily shelving needs.

Secure Shelf Support:These clear shelf support pegs feature a durable plastic construction with a 5mm (0.2 inch) diameter, providing reliable hold for cabinet shelves, closet shelving, and bookshelf organizers without slipping.
6. Glass-Fronted Drawers
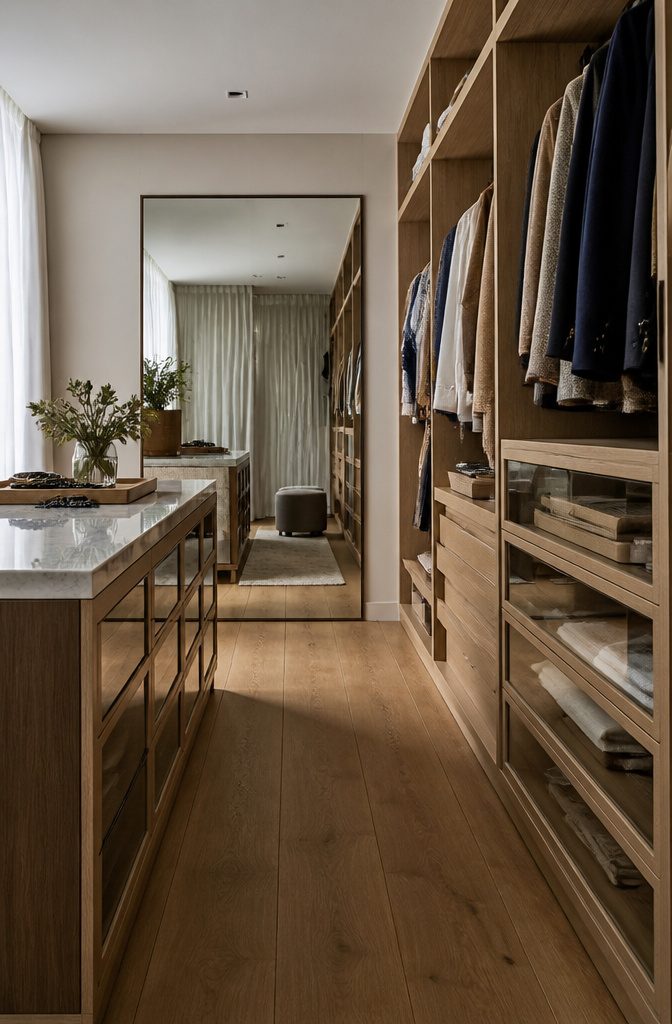
Glass-fronted drawers in a built-in wardrobe put your jewelry and small accessories on display instead of burying them behind solid wood.
You see what you own at a glance, which cuts the morning hunt through tumbled chains and missing earring halves. The catch is that the same transparency exposes the mess when you skip folding scarves or let bracelets tangle.
One source frames this as motivation, but in practice it reads as pressure: every drawer becomes a stage set, and the five minutes of tidying to make it presentable is time you do not get back.
For material, standard annealed glass will chip at the edges where drawer pulls mount or where something hard gets dropped against the front.
Tempered glass holds up to the knock of a belt buckle or the scrape of a brooch pin, and if it does break it crumbles rather than shards, which matters in a bedroom with bare feet.
The cost gap is real, but so is replacing a cracked panel that lets dust into the drawer below.

MODERN MINIMALIST DESIGN: This 5-tier closet organizer uses an open-shelf vertical tower to add closet organizers and storage in a wardrobe closet, bedroom, or living room, making the closet organizer both versatile and space-friendly

[ Space-Saving Narrow Design Closet System ]- With a slim 21.3" width and 11.8" depth, this small closet system is specially designed for tight spaces where every inch counts. Fits perfectly between beds, desks, or in narrow nooks. The compact footprint maximizes vertical storage without sacrificing floor space — ideal for small apartments, dorm rooms, and walk-in closets.

【Stackable & Top board】This 3-tier closet organizers and storage is designed to be easily stacked upon one another, and not sliding.Use the cube organizer bottom for storage and the sturdy wooden top for bags, hats, or decor, giving you double the storage space in a neat, compact setup.
7. Gliding Shelves
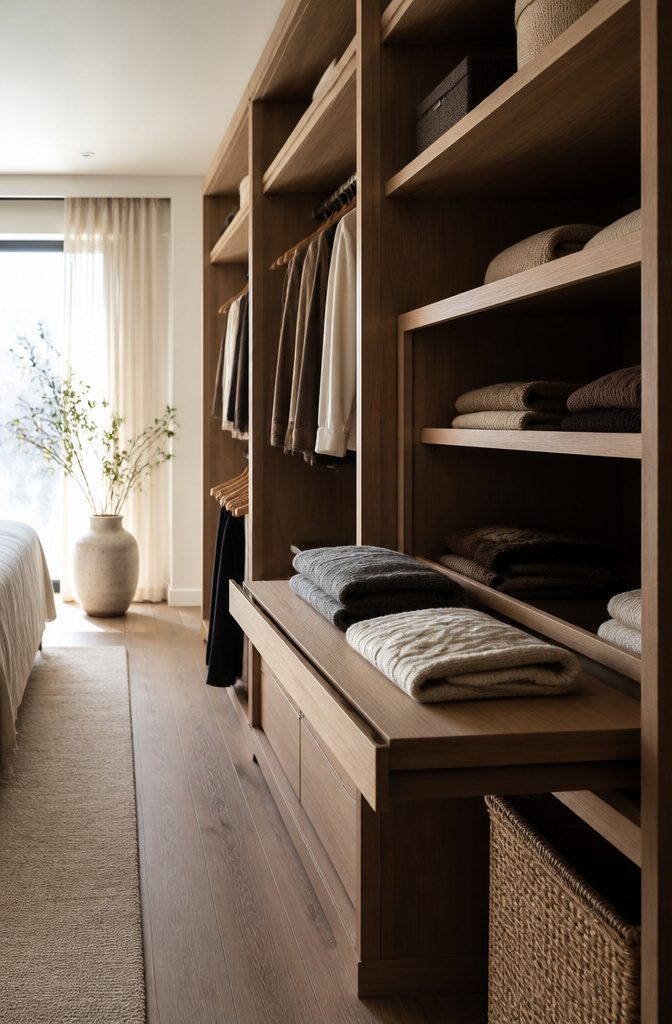
Deep wardrobe sections look generous on paper until you realize half the shelf sits past your reach. Gliding shelves solve this by bringing the back row to you, which matters more than the extra square footage ever did.
I learned the hard way that not every pull-out mechanism is equal.
The first set I installed used a bottom-mount track rated for about 35 pounds, and six months of stacked sweaters and a heavy wool coat later the front wheels lifted off the runner every time I extended the shelf.
The track had flexed just enough to throw off the geometry.
A side-mount ball-bearing slide with a 50-pound minimum load rating would have stayed flat under the same weight; the difference is in how the rail is anchored and whether the carriage distributes load to both sides.
Most wardrobe depths run 24 inches, and a full-extension slide gets you almost every inch of that back wall.
Check the slide length against your cabinet box before you order, though. A slide even an inch too short leaves dead space at the rear, which defeats the point of paying for the hardware at all.


18-Level Push-Button Adjustment: 18 preset positions with 0.6-inch increments provide precise sizing for this closet rod. The button-lock mechanism stays secure over time and provides added stability compared to traditional twist-lock closet poles

Adjustable Design: Expands from 18 to 30 inches to accommodate a wide range of closet sizes and layouts, offering flexibility for custom storage solutions
8. Shoe Rack
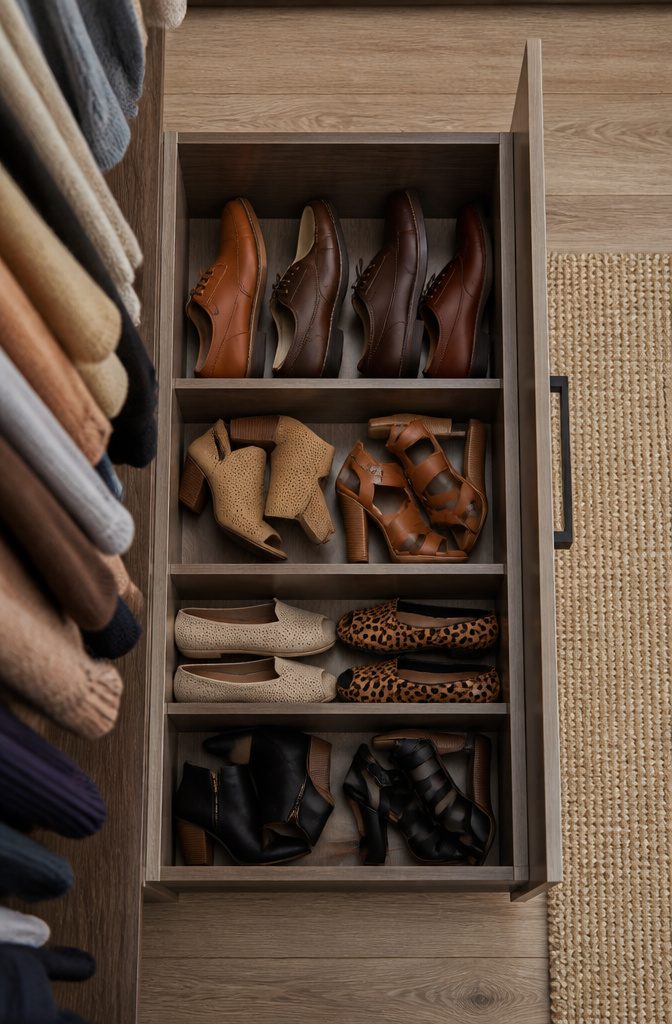
Shoe storage inside a built-in wardrobe lives or dies on shelf angle. Flat shelves waste the full depth of the cabinet because shoes sit at the front and leave a dead zone behind them.
Angled shelves, pitched back about 15 to 20 degrees, let you read labels and grab pairs without shifting everything forward, but they eat vertical space.
A flat shelf needs roughly 6 to 7 inches of height per pair; the same pair on a slant needs closer to 8. Stack that difference across four rows and you have lost one full shelf.
Depth is the harder limit. Men’s sneakers in size 10 need about 12 inches front to back; women’s heels can live on 10, but winter boots push past 14.
I would not build a shoe bay under 12 inches deep unless the closet is strictly for dress shoes, and even then you will regret it the first time you try to park ankle boots there.
For capacity, a 24-inch wide bay holds roughly eight to ten pairs on flat shelves, four per row with slight overlap, or six to eight on angled shelves because the tilt steals lateral room.
Open shelves keep air moving, which matters in humid climates where leather traps mildew.
Closed fronts or pull-out drawers hide the clutter and protect against dust, but they cost more and can smell like a shoebox if you put damp running shoes away straight from your feet.
In dry climates I skip the door; anywhere the windows fog in July, a louvered front pays for itself.

Expandable Shoe Rack: This shoe rack can be extended from 18.6" to 30.5" and hold up to 8 pairs of shoes on the shelves, which is perfect space solution for shoes organization of small place, garage, entryway, closet and living room.

Blend function and modern design to add a new storage option to any closet

Sized for Women's Shoes: These shoe shelf dividers fit US women's size 8.5 and under; the 10 x 8.7 in base takes soles up to 9.8 in long, so this shoe organizer for shelves suits flats and sneakers
9. Built-In Laundry Hamper
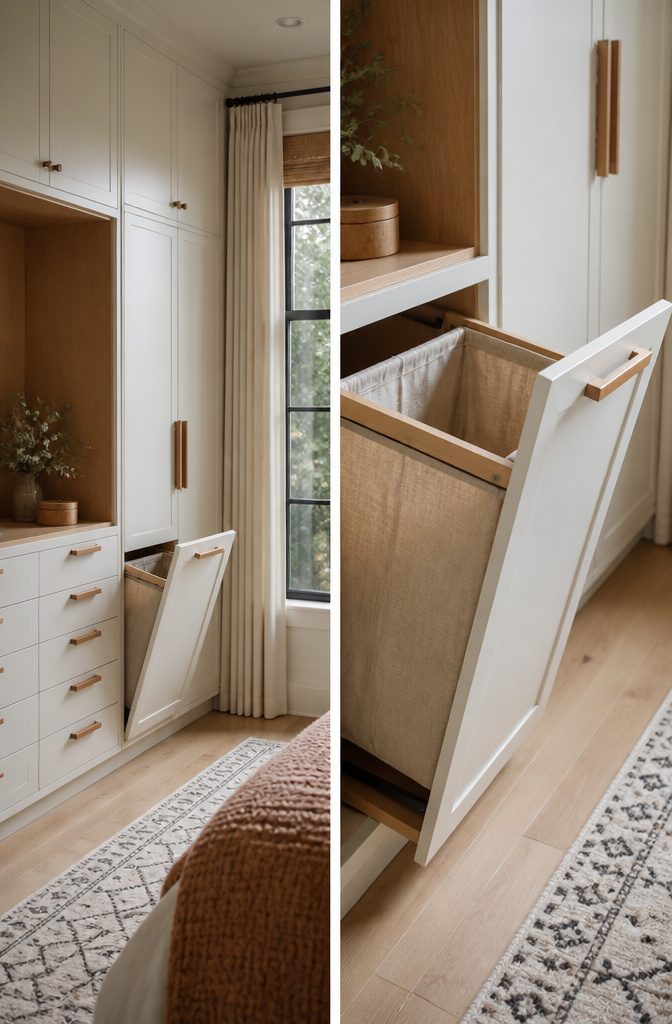
A tilt-out hamper hinged at the bottom keeps dirty clothes off the floor and out of sight, but the convenience only holds if you solve for air.
I looked at pull-out versions too, divided into lights and darks, and the sorting is genuinely useful if you actually separate before wash day. Most people don’t.
The odor question is real. A wood box with a solid front traps humidity; without ventilation gaps or a liner you can pull out and launder itself, the whole wardrobe starts to smell like a gym bag.
Mesh liner bags that lift off hooks solve this, though they read more dorm room than master suite.
What convinced me, reading through a dozen of these setups, is that the tilt-out works best when it is not daily storage but overflow: the two-day buffer before you carry a load downstairs.
For that role, a cabinet-style pull-out from a closet organization line runs about $80–$150, or you can retrofit a standard base cabinet with a tilt-out frame kit for roughly $40 plus a plywood box.
A fitted wardrobe or a customized one can at many times turn out to be more expensive than a prefab cabinet. While a retail-store cabinet could cost somewhere between $500–$200, a built in wardrobe could range from $1000–$3000…sometimes even more.
For a renter or first-home owner, that price gap means the hamper is smarter as an add-on to an existing prefab unit than as a custom built-in. Spend the savings on a ventilated liner and a schedule to empty it.

Packaged Set Component - 2 pack bifold door hardware kit includes 2 x top metal pivots, 2 x top plastic pivots, 2 x bottom pivots, 2 x 7/8” plastic guide wheels, 2 x bottom pivot brackets, 2 x top pivot brackets, 6 x installation fasteners, and 1 x installation manual. The folding door hardware kit can repair doors weighing up to 50 lbs and with thicknesses ranging from 1" to 1-3/8", suitable for 7/8"-1" wide track. (Please note: Track and hinges are not included.)

Ideal Use: Repairs worn, damaged, or missing bi-fold door hardware to restore smooth operation and proper alignment on closet doors

Product Info: 2x Door, total door Width: 29-1/2 ", Height: 78-3/4", Door thickness: 13/16", 1x hardware kit. Suitable for opening: 30"x80-3/4". (Note: Door is an assembled finished product and just need to assembled the hardware)
10. Pull-Out Ironing Board
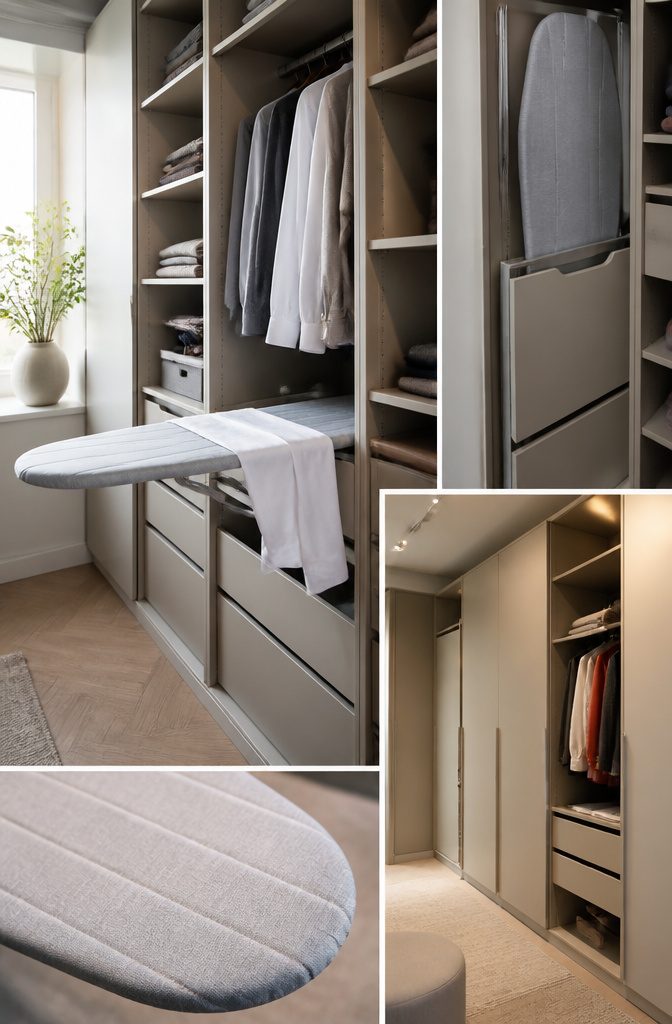
A pull-out ironing board tucked into a built-in wardrobe sounds like one of those ideas that solves two problems at once: it hides the bulk of a full-size board and it keeps the bedroom from becoming the laundry room.
The reality is more cramped. Most boards need roughly 14 inches of cabinet depth to fold flat, and another 18 to 24 inches of clear floor space in front so your elbows don’t knock the doors while you work a shirt collar.
I think the convenience holds up only if you iron weekly or more. For occasional use, the setup and takedown inside a narrow wardrobe footprint feels more awkward than carrying a lightweight board to the bed or a doorway.
The boards that swivel as well as slide help, but they also need more width inside the unit, which eats the same shelf space you installed the wardrobe to gain.
If ironing is already part of your routine, the pull-out saves real square footage.
If you are buying the idea to start ironing more, it will likely stay folded and become a reminder of good intentions. Budget the depth first, then decide if the habit justifies the hardware.

【Durable Material】Pegs for shelves made of high quality polished nickel,good quality and durable for long using life,surface is smooth without metal burrs,can meet your daily shelving needs.

ADJUSTABLE WIDTH DESIGN: Expandable shelf extends from 15 to 25.6 inches wide, allowing customizable fit for various cabinet sizes and maximizing storage space in kitchen, pantry, or bathroom cabinets

1️⃣【40 Pieces with Storage Box】- Get 40 Pieces 5mm shelf pins with a reusable storage box. Perfect for multiple furniture upgrades and spare replacements.
11. Task Lighting
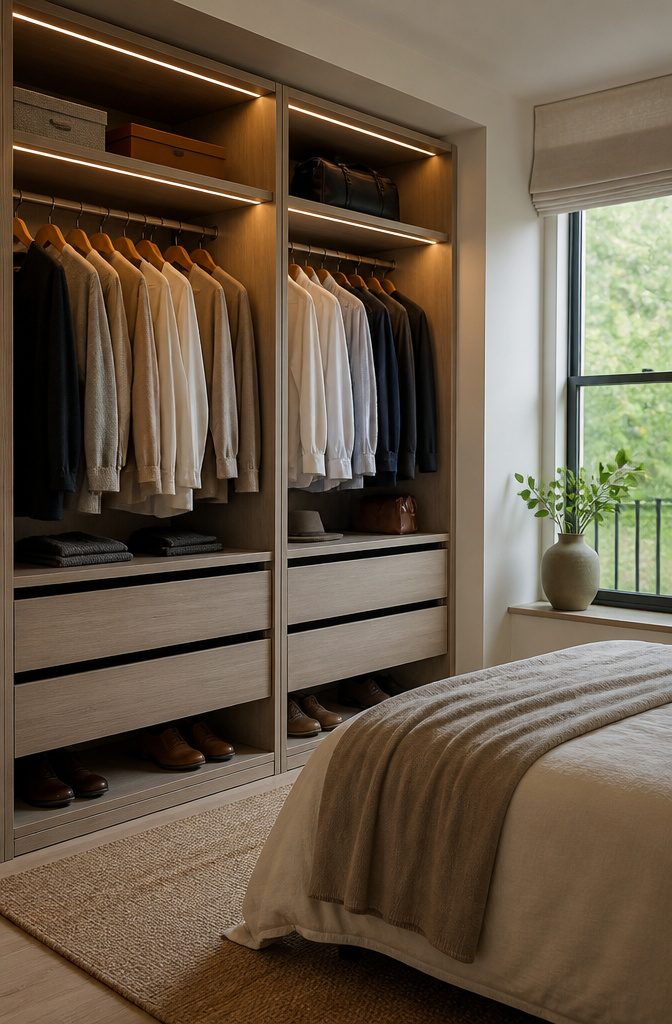
LED strip lighting inside a built-in wardrobe turns a dark cavity into something you can actually use before sunrise.
Battery-powered units install with adhesive backing in about ten minutes, but the replacement cycle gets old fast if you open the doors more than twice a day.
Wired 14-inch under-cabinet lights run around $30 and connect to a wall switch or a door sensor so the glow triggers automatically when you reach in.
That sensor choice matters more than the light itself: a switch you forget to flip defeats the purpose on rushed mornings, yet a hypersensitive sensor that flickers when you walk past the closed doors is worse.
Color temperature is where most people stall. Warm light flatters skin but shifts clothing colors toward yellow; 4000K–5000K neutral white shows a navy versus black decision accurately without the clinical feel of daylight bulbs.
Track-style LEDs along a clothing rod give even coverage across a whole run, while recessed puck lights aimed at a shelf of shoes or bags create the showroom effect Workshop APD used, with strips set flush to the paneling so the source itself disappears.
For a weekend install, stick with plug-in under-cabinet bars and a basic cord concealer; anything hardwired behind drywall is a job for an electrician unless your lease or insurance is unusually forgiving.
12. Fresh Materials
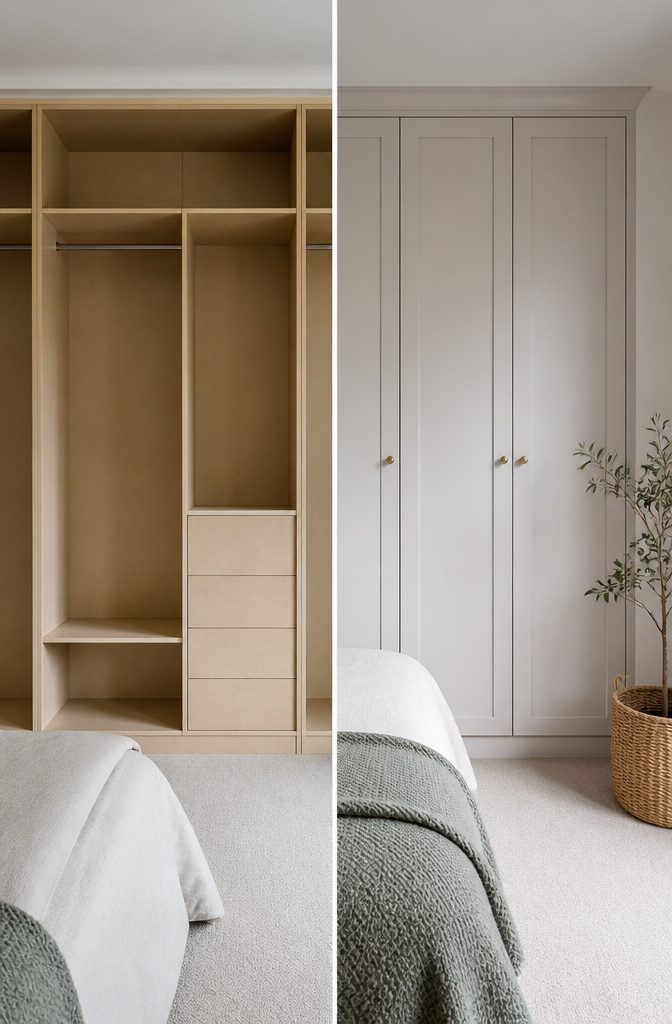
Fluted and ribbed door detailing on built-in wardrobes looks expensive in photographs, but the real cost gap between that finish and a standard flat panel is steeper than most weekend budgets allow.
Full-height units in navy or charcoal read as bespoke in magazine spreads; in practice, the deep color shows every fingerprint and dust trace, and touch-up paint is rarely an exact match once the original batch runs out.
The construction underneath matters more than the surface trend. Two wardrobes can wear identical charcoal fronts while one warps at the joints and the other stays square for years, depending on whether the carcass is MDF or something sturdier.
Integrated LED lighting and open-shelf display sections add cost fast, and the lighting strips are often the first component to fail.
If the budget sits at the lower end, the safer play is a simple flat door in a mid-tone color that forgives daily wear, with money reserved for the frame and hardware that actually hold weight.
13. Glass Partitions
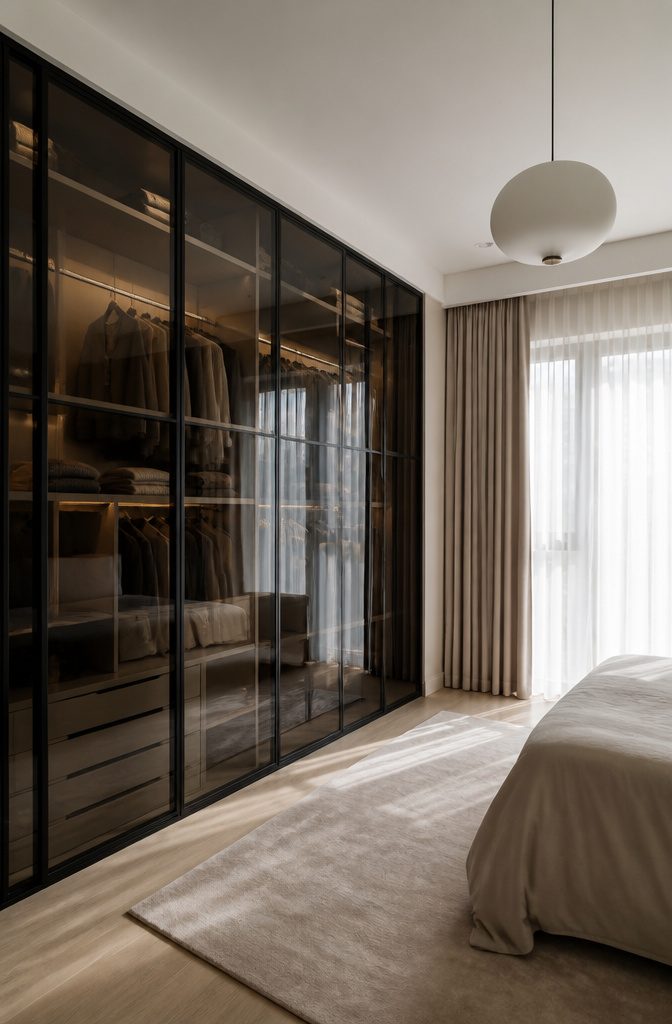
Glass partitions in a built-in wardrobe split the difference between a solid wall and open shelving.
Frosted glass hides the clutter of folded sweaters and keeps morning light from catching on every hanger, while clear glass turns the wardrobe itself into a display case.
Frameless panels read cleaner and more contemporary, but the slim aluminum frames I see in most apartment builds are what actually survive daily use; frameless edges chip where the door meets the jamb.
The real payoff is spatial. In a small bedroom, a solid built-in wardrobe eats a full wall and turns the room into a box.
A frosted glass front bounces light back into the room and lets the eye travel past the wardrobe face to the wall behind it.
The closet stops reading as a mass and starts reading as a layer, which in a ten-foot-wide bedroom is the difference between tolerable and tight.
Clear glass does this even more, but only if you are the sort who keeps color-coordinated rows.
I am not, and the two weeks I tried clear glass panels taught me that the visual noise of my actual wardrobe cancelled out any gain in perceived depth.
14. Corner Closet
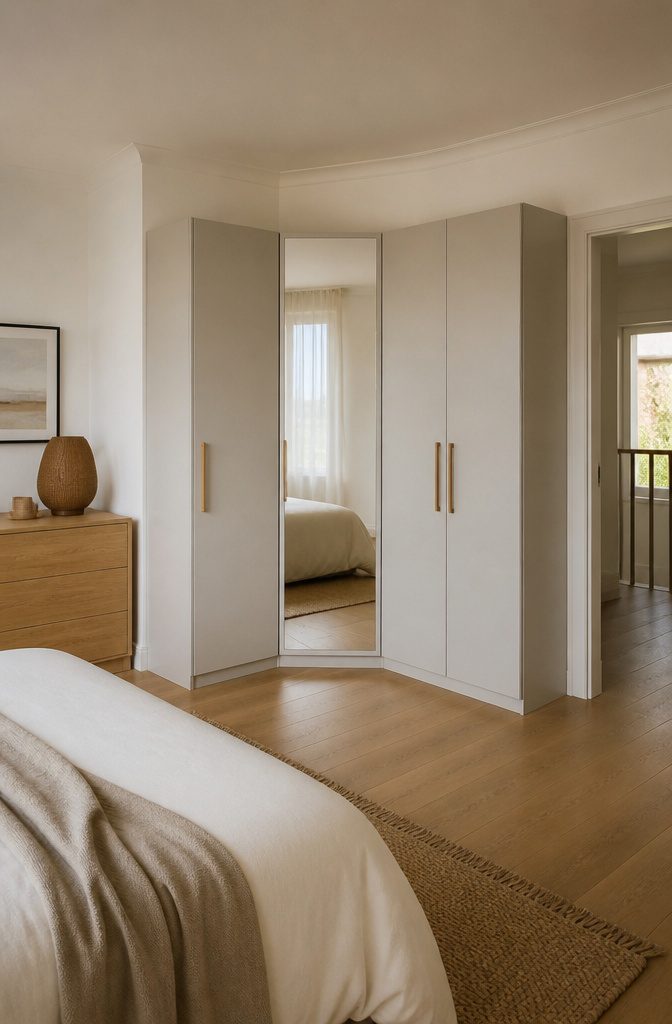
Corners look like free real estate until you try to hang a shirt there. A standard rod running wall-to-wall leaves a dead triangle behind it where nothing fits, and the hanger tips scrape drywall on both sides.
The fix is a diagonal rod at 45 degrees, which turns that wasted angle into usable length for short items or folded pants.
If the closet wraps two walls, a carousel unit makes the corner reachable.
The shelves spin, so the back corner isn’t a black hole for single socks. Custom shelving follows the same logic: a deep shelf set back at the angle, with shallower shelves stepping forward along each wall.
The sources note this as a wrapped layout, and it only works if you have at least 24 inches of clear depth from the corner on both walls. Less than that, and the carousel or diagonal rod starts bumping door frames.
For a small corner wardrobe, keeping the footprint tight actually makes the bedroom read larger.
One approach pairs a short hanging section with two small drawers underneath for shoes or undergarments, then adds shelving above the rod. The TV niche some builders include is optional; skip it and you keep more linear feet for clothes.
Either way, measure the corner angle before ordering anything. A true 90-degree corner is rare in older construction, and shelving built square will gap or bind.
15. Wrapped Closet
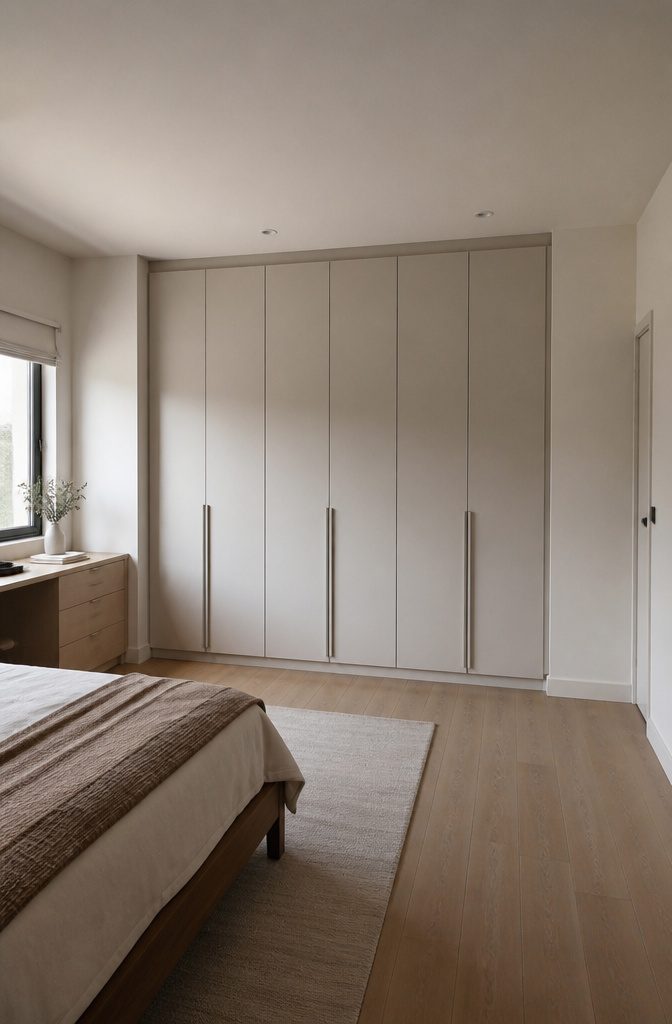
A wrapped closet runs two walls or more, turning a corner instead of sitting in one recessed pocket.
That corner joint is where the complexity lives: the back panels meet at an angle, the hanging rods need support from both sides, and the doors must align across the turn so nothing binds.
In a rectangular bedroom with the entry on the short wall, wrapping the long wall and its neighbor let me keep the bed center without losing six feet of storage to a single straight run.
The cost gap is real. A single recessed closet is essentially a box with trim; a wrap adds corner hardware, angled shelving or a lazy-Susan style carousel, and labor to keep doors square across the turn.
UK pricing starts around £500 for basic fitted work and climbs past £5,000 for bespoke builds with finishes and lighting.
Stateside, the same spread applies in dollars, with wrapping landing in the upper half of any quote because of the extra panel cuts and install time.
16. Mirror Sliding Doors
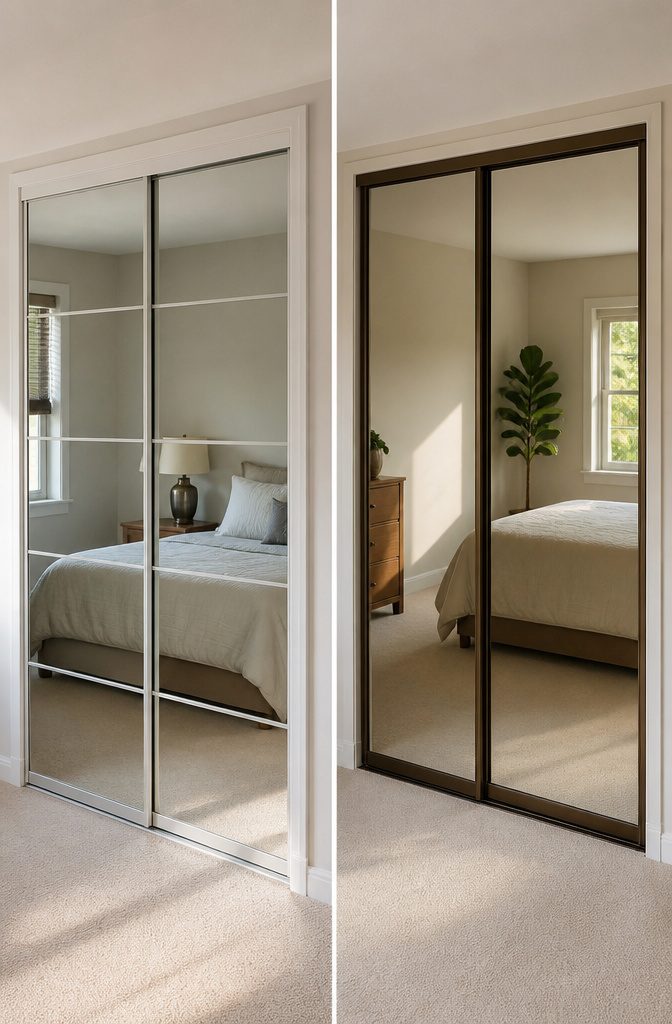
Mirror sliding doors earn their place in a small bedroom by doing two jobs at once: they open without swinging into the room, and they bounce light back from whatever wall faces them.
The track system matters more than most people expect.
A bottom-guided rail keeps the door steady, but it collects dust and hair that will jam the rollers by month three if you do not vacuum the channel when you clean the floor.
Top-hung tracks hide the hardware better and leave the threshold clear, yet they need a solid header to bear the weight.
Most kits run around $14 for basic 8-by-8-inch mirror tiles, but a full wardrobe door wants thicker glass, typically 4 millimeters or more, so it does not flex and distort the reflection.
The visual expansion effect is real, but only if the mirror reflects something worth seeing. A mirrored door facing a blank wall or a cluttered dresser just doubles the clutter.
Interior designer Hélène Pinaud, whose mirrored wardrobe work is often cited, places hers to expand views into a window or an open doorway; without that borrowed scenery, the room feels busier, not larger.
Handleless, flush designs help, since a pull or knob breaks the surface into visual fragments.
Cleaning is the trade nobody mentions.
Fingerprints show on every touch, and the sliding motion means you handle the mirror more often than a fixed one. A squeegee after morning use takes thirty seconds and keeps water spots from etching the backing.
Skip that habit, and the mirror clouds at the edges within a year, especially in bathrooms or humid climates, even though bedroom humidity is lower. The reflection stays crisp only as long as the maintenance does.
17. Wicker Baskets
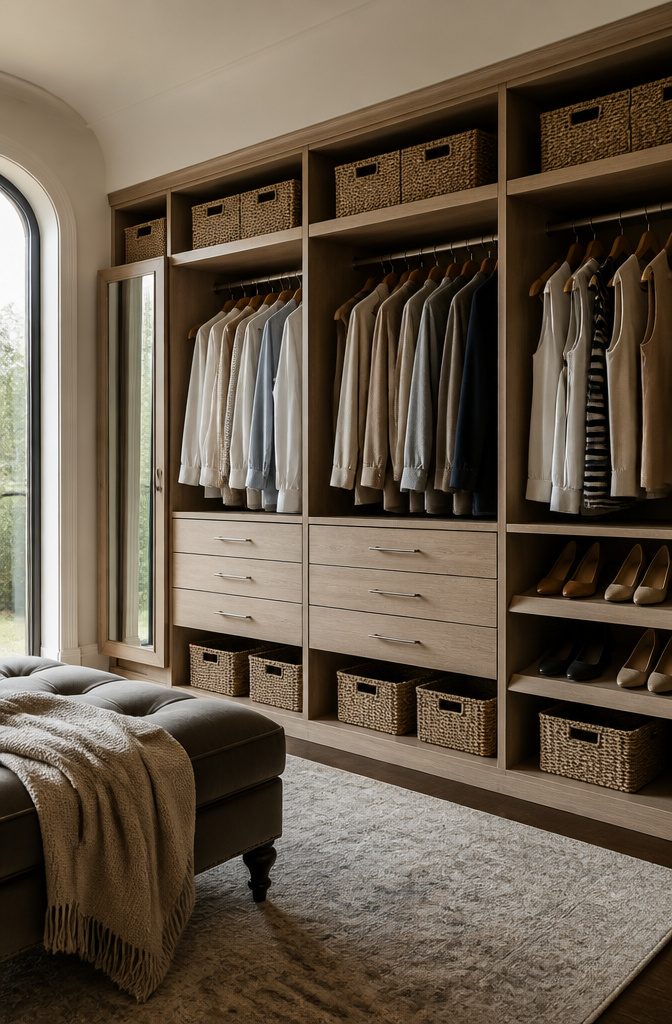
Wicker or rattan baskets slide into built-in wardrobes like they were made for the space, and in some ways they were.
The weave lets air move through sweaters or linens so nothing sits musty through a season, and the texture warms up the hard edges of painted shelving in a way plastic never manages.
I keep a set under the hanging rod for folded jeans and another on the upper shelf for out-of-season scarves, and a 12-inch cube fits most standard 14-inch shelf depths with room to pull out by the lip.
The portability cuts both ways. You can lift the whole basket to the bed to sort through it, but that same lightness means the sides start to sag if you load them with heavy denim or winter wool.
Delicate knits snag on the rougher weave, so I line mine with a thin cotton drop cloth for anything that pills.
Dust settles into the gaps too, which means a vacuum with a brush head every few months or the baskets themselves start to look grimy.
For what they cost, I replace mine every three years or so once the corners soften and the stack goes slightly lopsided. They are not a permanent solution, but they are the right one for anything that needs to breathe.
18. Dividers
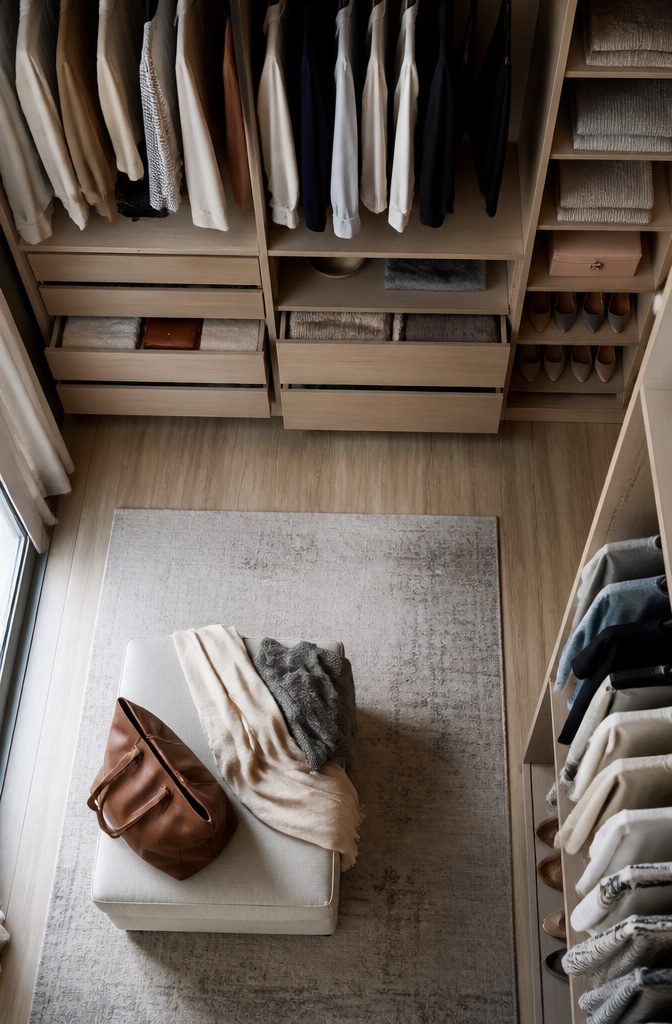
Built-in wardrobes look finished when the drawers actually stay sorted after the first month. Drawer dividers are what make that happen, and the material you choose determines how long they keep their shape.
Adjustable acrylic dividers run about $8–$15 per drawer and hold up well against daily shoving. Wooden dividers cost closer to $12–$20 per drawer; they look better in a stained interior but warp slightly if your closet runs humid.
Fabric dividers are the cheapest at $4–$8 per drawer and work fine for socks or folded tees, though the sides collapse after a year of heavy use.
A DIY version from foam board or thin plywood saves half the cost and holds up if you cut the slots tight enough that the dividers stand without glue.
The mistake most people make is leaving them loose, so everything tilts by month three. I would skip fabric entirely unless you are storing lightweight accessories and plan to replace them annually.
What Built-In Wardrobes Cost in the US
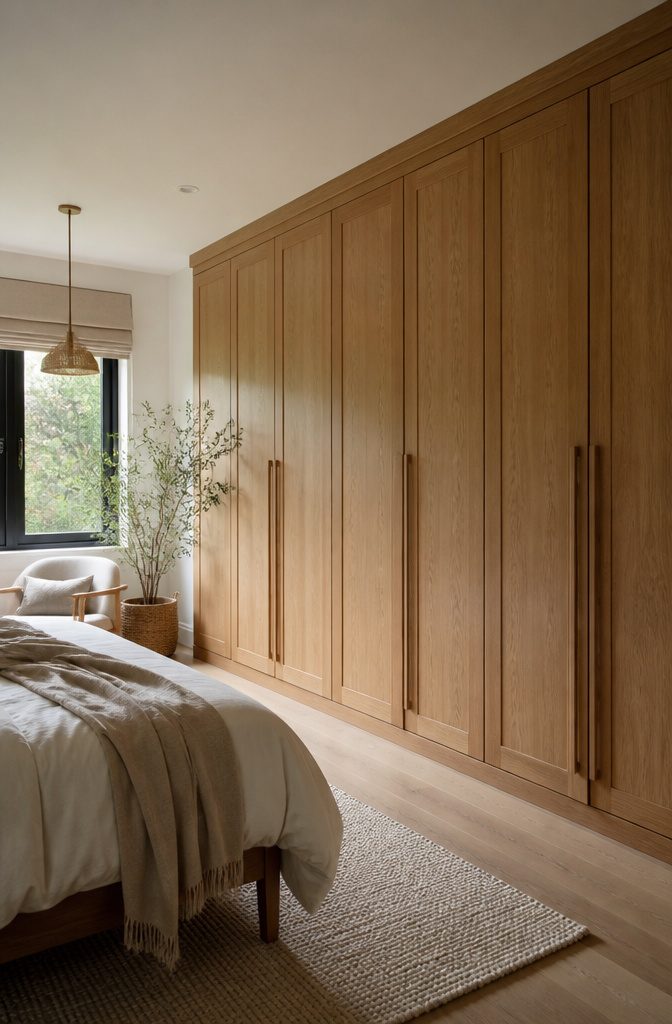
A basic DIY built-in wardrobe built from stock cabinets and melamine panels can land between $300 and $800, which is where most renters and first-home owners actually live.
That buys you a straight run against one wall, maybe 6 to 8 feet, with fixed shelves and a single hanging rod.
You will cut the panels to fit the alcove or recess, level everything with shims, and paint or edge-band the exposed ends yourself.
The result looks built-in because it is anchored to the wall and trimmed out with baseboard, not because the components were made for that spot.
Semi-custom systems, the kind where you measure the space and a retailer sends you pre-cut pieces with finished edges, start around $1,200 and run to $3,500 for a typical bedroom wall.
The jump from DIY is mostly in the finished look: soft-close drawers, a choice of door styles, and panels that actually match. You still install it, or pay a handyman a few hundred more.
Fully custom built-ins, designed and installed by a local cabinet shop, start near $4,000 and push past $10,000 if you add lighting, jewelry drawers, or a full wall of mirror doors.
The UK sources cite £1,000 to £5,000 as a typical range; in US markets the floor is higher and the ceiling much higher, because labor rates and material costs run differently here.
For someone doing one project a year with a few hundred dollars and a weekend, the custom route is aspirational scenery, not a plan.
Open Against Closed Storage
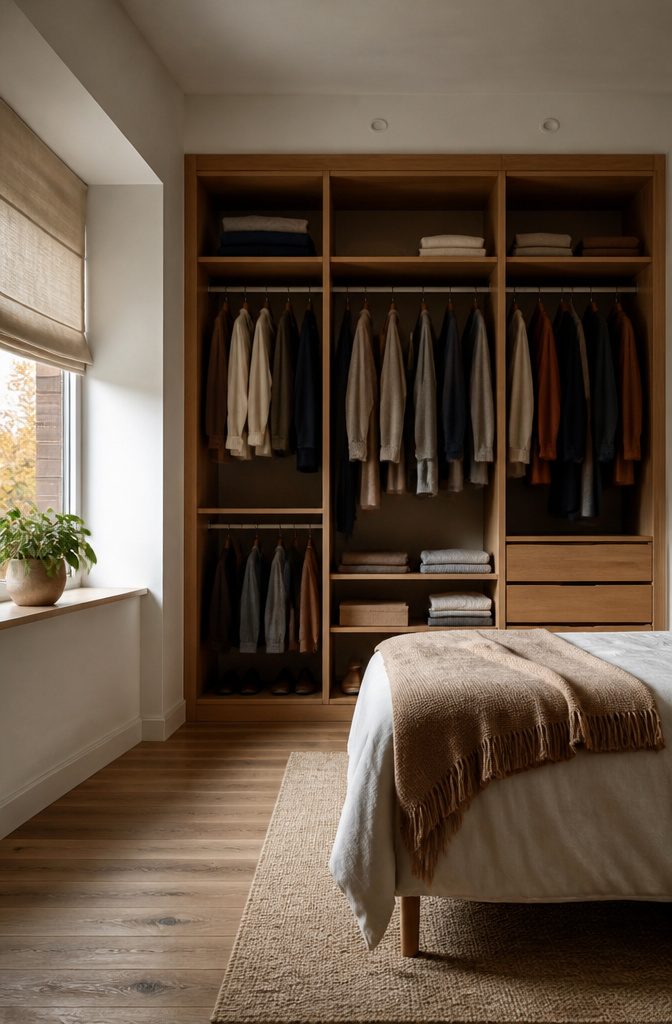
Open shelving in a built-in wardrobe turns your clothes into the room’s décor. Everything sits visible, which rewards careful folding and color coordination with that boutique-display effect.
The catch is the dust. Fabric collects it faster than you’d expect, and what reads as "curated" on day one drifts toward "cluttered" by Thursday if the laundry pile wins.
Closed cabinetry hides the chaos. Doors keep dust off, and in a small bedroom that visual wall of uniform panels pushes the walls back a few perceptual feet.
The trade is speed. You lose the grab-and-go of open storage; every shirt retrieval adds a door swing.
I split the difference in my own space.
Daily items, the three jeans and six tees in constant rotation, sit on an open middle shelf. Seasonal storage, the coats and spare bedding, live behind shaker-style doors above and below.
The open zone keeps morning moves fast. The closed zones swallow the visual noise that would make an 11-by-12 room feel like a warehouse.
For renters or first-home owners working a weekend timeline, this mixed approach costs nothing extra in materials.
You are simply leaving some bays doorless while fitting others. The real decision is honest: are you the person who refolds after laundry day, or the person who shoves and shuts?