

I’ve drilled crooked holes in more Shaker doors than I care to admit, and those little metal discs meant to cover mistakes are basically tiny tombstones for my pride. For upper cabinets, place pulls two-thirds down from the top edge, about 20 inches on a standard 30-inch door, so your hand falls naturally without that awkward tip-toe reach. On drawers, center them on the recessed panel for traditional charm or the top rail for modern edge, but pick one and stick with it. Wide drawers get two pulls spaced 16 inches apart using the rule of thirds, while tall pantries need pulls at arm height, not dead-center. Use a jig, mark with painter’s tape first, and never rely on eyeballing alone. The difference between a kitchen that functions well and one that looks sloppy comes down to these details.
Place Shaker Door Pulls: Lower Corner or Center Stile
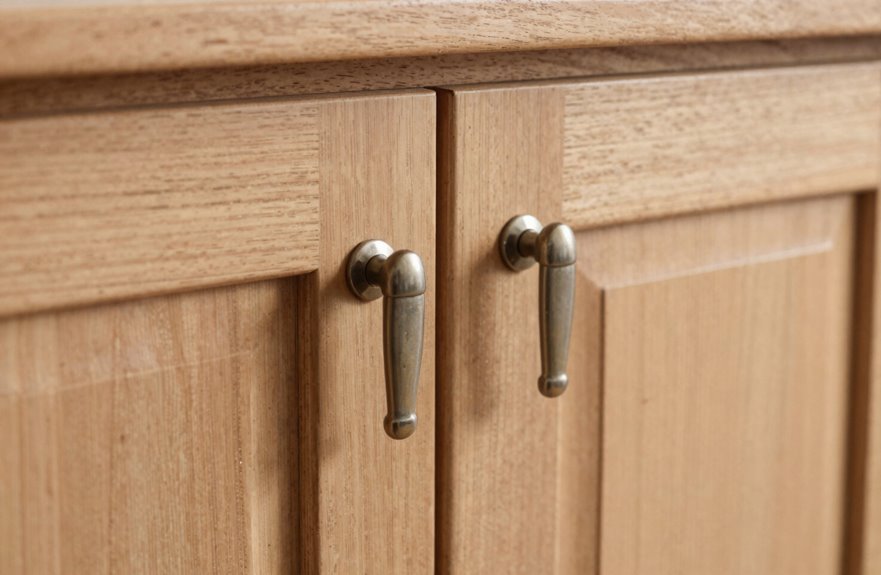
Where do I even start with Shaker door pulls? You’re not alone in feeling stuck over this choice.
For Shaker doors, your hardware placement really comes down to two sweet spots: the center stile or that cozy lower corner. Lower corner placement, about 2–3 inches up from the edge, aligns with natural hand movement and ergonomic reach without awkward stretching.
Narrow face frames demand compromise. Nudge that knob about an inch inward and down, balancing sightlines without losing the look. For traditional vibes, align pulls vertically along that lower stile portion. Your eye craves consistency across adjacent doors, so pick one approach and commit. Bottom edge aligning with the bottom rail provides the cleanest visual result.
Set the Height: The Two-Thirds Rule for Upper Cabinets
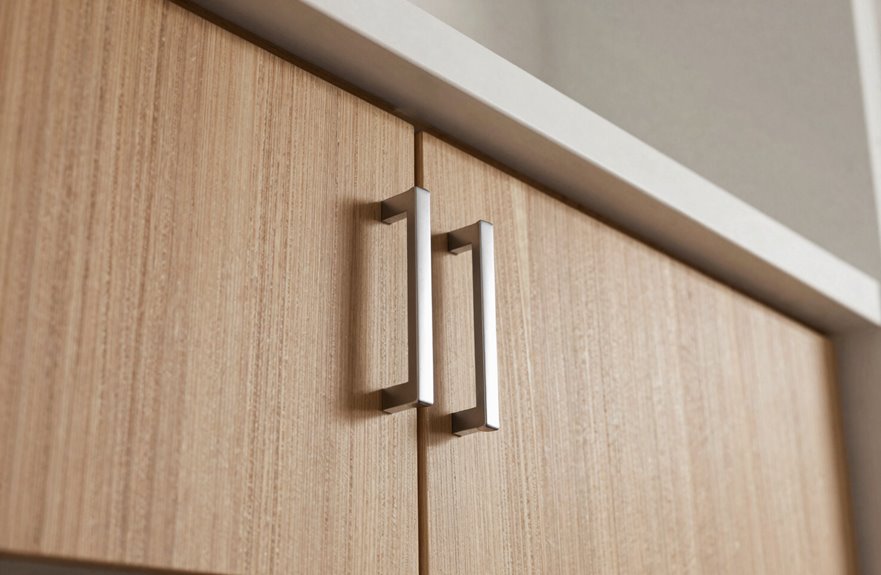
I set my upper cabinet pulls about two-thirds down from the top, which on a standard 30-inch door lands roughly 20 inches below the frame. This is where your hand naturally falls without an awkward tiptoe reach. This positioning keeps everything at eye level so you’re not squinting upward like you’re trying to read a menu at a trendy restaurant with poor lighting. Once you line up a whole run at that same height, the visual rhythm becomes cohesive, and your kitchen will look intentionally designed rather than improvised.
Upper Cabinet Height
How do you know you’ve hit that sweet spot where your cabinet pull feels like it was made for your hand? The two-thirds rule gets you there consistently. For upper cabinet placement on Shaker cabinets, position pulls about two-thirds down from the top edge, roughly 20 inches on a standard 30-inch door. The ergonomics work because your hand naturally gravitates to that location without awkward reaching or shoulder strain. Installing pulls too high creates unnecessary physical strain during daily use. Keeping that consistent height across every upper cabinet creates visual coherence throughout your kitchen, whether you’re using traditional Shaker or modern designs. The two-thirds mark serves as the foundation for placement, though you should adjust for taller doors since cabinet proportions vary.
Two-Thirds Measurement
Most of us have grabbed a cabinet pull in the wrong spot and felt that instant, annoying twinge in our shoulder. That’s why the two-thirds height rule for upper cabinet pulls is worth implementing.
Here’s why this ergonomic placement is effective:
- It puts handles right where your hand naturally falls, eliminating awkward shoulder positioning.
- On a standard 30-inch door, you’re looking at about 20 inches down from the top edge.
- Your fingers align with the door edge, so you pull without overreaching.
- Consistent placement across all doors creates visual uniformity.
When door heights vary, applying this measurement keeps your Shaker cabinet hardware looking intentional and balanced.
Eye-Level Reach
The two-thirds rule gets your hardware in the ballpark, but let’s talk about where your eyes actually travel when you’re reaching for that coffee mug at 6 AM.
Eye-level reach determines your morning flow. For upper cabinets, place that pull about two-thirds down; think 20 inches on a standard 30-inch door. Your hand meets the edge naturally, without awkward stretching or tiptoeing.
When your hardware placement hits that sweet spot, shaker cabinetry feels custom-tailored to your body. Kitchens where every upper door aligns create visual consistency and functional ease. Each pull positioned thoughtfully transforms daily routines into something intuitive, because your kitchen actually works for you.
Center Shaker Drawer Pulls: Panel or Top Rail
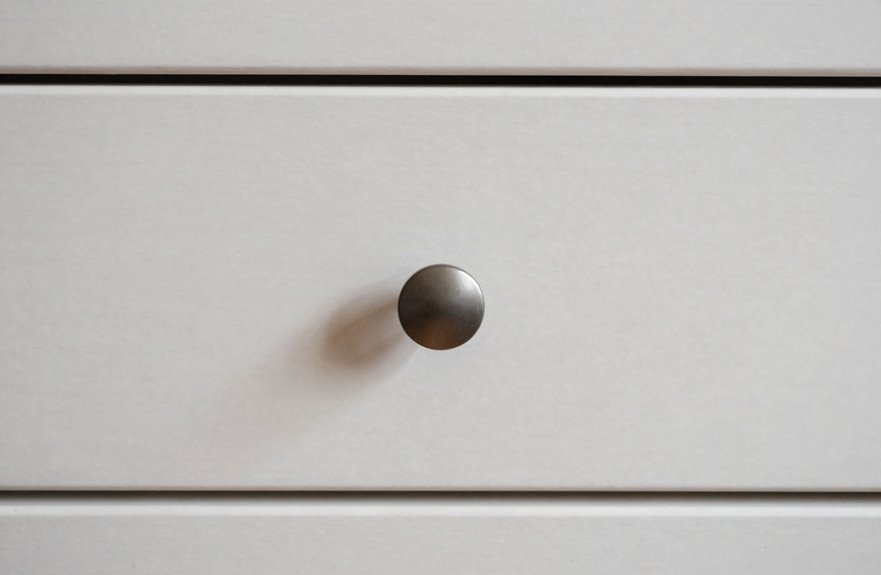
Where exactly should that pull land on your shaker drawer: in the middle of that recessed panel, or on the top rail? Both options have merit.
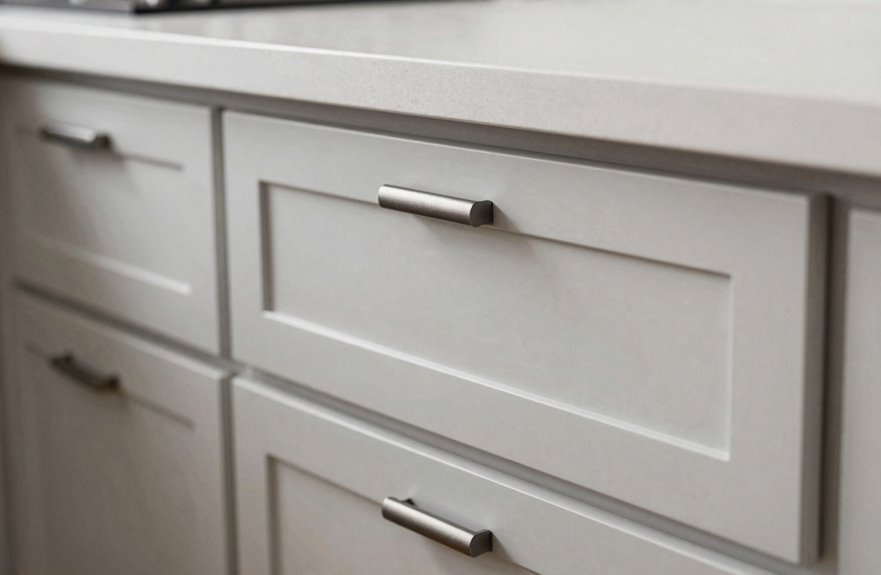
For shaker cabinets, the inset panel works well when centered right there in that recessed rectangle. It’s classic, balanced, and your fingers naturally find it. The top rail placement offers a more modern feel with unexpected visual interest.
When matching a whole run of drawers, follow this approach:
- Pick one style, panel or rail, and stick with it.
- Measure twice to avoid crooked drawer pulls.
- Step back and squint. If anything feels off, trust that instinct.
- Remember, this is your kitchen, not a museum.
Both placements work beautifully.
Space Wide Drawer Pulls Using the Rule of Thirds
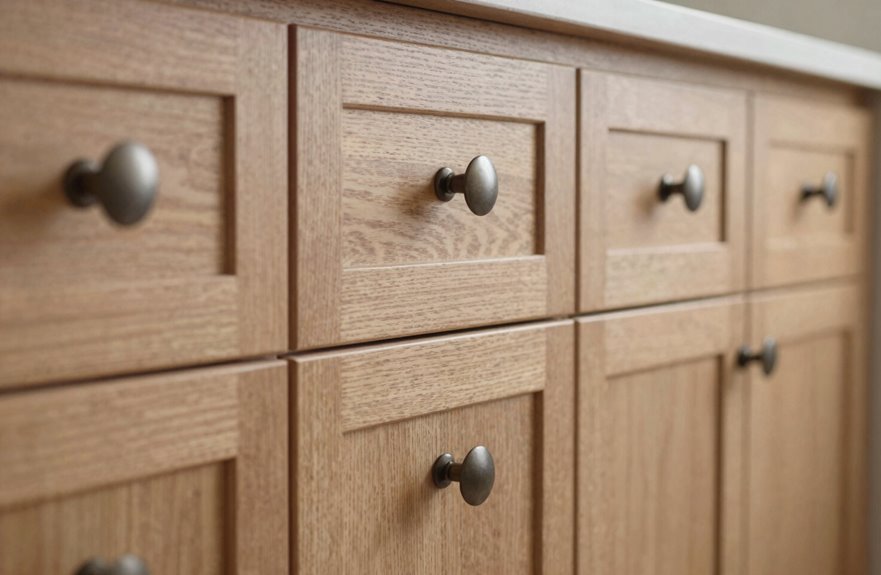
Wide drawers are where things get interesting. For shaker cabinets, the rule of thirds works effectively. Split that drawer mentally into three equal parts, then place your hardware in the left and right sections. This creates visual balance and intentional placement rather than floating elements.
When using two pulls on wide drawers, center each in its respective third, keeping about six to eight inches between them. Pulls spaced too closely look crowded; pulls spaced too far apart require awkward reach. Smaller pulls follow the same principle: left third, right third, distributing weight evenly so your drawer glides function properly.
If you prefer one longer pull, position it at one-third to two-thirds of the drawer width. Align pull placement across multiple wide drawers. Mismatched placement indicates inconsistent spacing and design.
Adjust Placement for Tall Pantry and Appliance Doors
I’ve learned the hard way that placing a pull dead-center on a tall pantry door requires reaching on your tiptoes every morning, coffee in hand, straining to access items at the top. Instead, aim for arm-reach height, around where your elbow naturally falls when standing relaxed. This allows the door to open without the awkward shoulder hitch that creates unnecessary strain.
For appliance doors, especially those panels hiding your dishwasher or fridge, keep pulls far enough from hinges to prevent your knuckles from striking the frame repeatedly. I call this “joint avoidance distance.” This simple adjustment eliminates a daily frustration and reduces wear on both your hands and the door frame.
Arm Reach Height
How often have you yanked open a towering pantry door only to feel like you’re doing an awkward morning stretch you never signed up for? Arm reach height matters significantly for shaker cabinets.
For pull placement that respects your body, follow these ergonomic essentials:
- Position pulls at your extended forearm height when standing
- Keep them on the lower portion of tall doors for daily comfort
- Match alignment across every door in multi-pantry runs
- Avoid that tiptoe-reach that makes you feel like a kid sneaking cookies
When your shaker cabinets line up with natural movement, the kitchen functions as an intuitive space. Consistent alignment serves both aesthetic and practical purposes, ensuring accessibility for people of different heights.
Joint Avoidance Distance
Ever whacked your knuckles on a door frame because the pull sat against the rail? It happens frequently, particularly on tall pantry and appliance doors where your hand’s already reaching and stretching for that handle.
For Shaker cabinets, check your edge distance first. Pulls positioned too close to rail joints cause bruised fingers during daily use. Aim for pull placement that provides adequate clearance, typically keeping the bottom of upper-door pulls roughly two-thirds down from the top edge. Alignment with surrounding cabinets is essential. Mismatched pull heights create an unfinished appearance. Uniform pull placement between your pantry and base cabinets ensures smooth hand transitions and eliminates awkward fumbling.
Knobs or Pulls: How Your Choice Changes Shaker Placement
Why does one tiny hardware choice turn my whole kitchen upside-down? Because knobs and pulls completely change how I approach shaker cabinets.
I learned this the hard way. Knobs give that cozy, traditional vibe. I love them on upper doors, centered right on that recessed panel. Pulls lean modern, and I always orient them horizontally along the bottom edge of uppers for clean sightlines.
Knobs for cozy tradition, pulls for modern clean lines—hardware transforms everything.
Go-to checklist for nailing hardware placement:
- Doors get knobs or vertical pulls about 2.5–3 inches from the edge
- Drawers get pulls centered on the top rail, or two pulls spaced 16 inches apart on anything 24 inches wide
- Mixed hardware needs symmetry across adjacent surfaces
- Always use a jig for consistent center-to-center spacing of at least 3-3/4 inches
Templates prevent costly mistakes during installation.
Keep Hardware Height Consistent Across All Cabinets
When I finally installed my last cabinet pull and stepped back to admire the full run, I nearly cried because one rogue handle sat a half-inch higher than its neighbors, mocking me from across the kitchen like a crooked picture frame I couldn’t unsee. That tiny slip taught me everything about why consistency matters.
For shaker cabinet fronts, keep placement identical across every door. On uppers, align handles two-thirds down from the top edge so your fingers land naturally. Lower cabinets get pulls aligned with the bottom rail; same height, every single one. The recessed panel on shaker doors becomes your guide, centering knobs or pulls while maintaining that vertical line your eye craves.
Grab a level and make a simple template to avoid this costly mistake. Misaligned hardware disrupts the visual flow of your cabinetry and signals poor installation quality.
Mark Hole Locations Without Measuring Twice
I’ve learned the hard way that eyeballing hole placement leads to lopsided pulls and a lot of swearing, so now I rely on my hardware jig to lock the measurements in place. Every door then matches perfectly without guesswork. I’ll mark my drilling points with a pencil and a level first, quickly and with confidence, because there’s nothing worse than realizing your “straight” line is actually a sad diagonal after the bit’s already through. Grab some painter’s tape for a test run, mock it up, make sure it feels right when you reach for it, and then drill once. This approach eliminates rework during installation.
Use a Hardware Jig
How many times have I stood there, tape measure in hand, squinting at cabinet doors like I’m defusing a bomb, only to drill a hole that’s off by a hair and now my pull sits crooked for all eternity? Too many. That’s why I’m obsessed with my hardware jig. It’s a total game-changer for pull placement across all my cabinets.
This beauty, made in the USA with a lifetime warranty, calibrates to .005″ square precision. No more guesswork. Drill guides provide these advantages:
- Fast, repeatable marking on doors and drawers
- Maintains spacing consistency across every piece
- Handles hardware up to 12″ with included case
- Eliminates crooked-pull errors
Secure the jig, level it, and drill pilot holes through the guides. Perfectly aligned pulls will be the result.
Mark With Confidence
My stomach used to drop at this stage. Everything measured perfectly, and then I’d second-guess myself into marking three different spots, none of them right. Sound familiar?
Now I grab my drilling template and lock those measurements down tight. No wiggle room, no panic spirals. I center on face frame stiles for that classic Shaker symmetry, or split wide drawers with the rule of thirds so pulls sit exactly where they belong. Soft pencil marks and painter’s tape as my depth guard prevent splintered edges.
For alignment, I keep bottom screws about an inch from the edge on two-inch rails. Then I level verify with my laser and drill once. One shot produces clean holes with no mistakes.
Speed Up Installation
Why measure twice when you can nail it once and actually finish before midnight? I’ve learned this the hard way, staring at crooked pulls at 2 AM wondering where I went wrong. My system keeps installation straightforward:
- Grab a template, lock those drilling points down tight
- Check alignment with a level, because nobody trusts a wonky handle
- Slap painter’s tape on as your depth guide. No splinters, no tears
- Step back, scan the symmetry, make sure it all breathes together
I always test with painter’s tape first, stepping back to judge the layout. For doors, I align that pull with the rail; drawers, I center on the inset panel. Seeing it all come together means you’ve actually finished.
Which Cabinet Jig Matches Your Project Size?
When selecting a Cabinet Hardware Jig for your kitchen project, consider the scope of your work. The Cabinet Hardware Jig ORIGINAL at $199 delivers .005″ square calibration and a lifetime bushing warranty, making it suitable for most installations. The PRO model at $249 offers rapid door centering for high-volume back-to-back installs.
Both models handle hardware up to 12″, accommodating any shaker cabinet configuration. Both are made in the USA and come packed in a case. The 4.87/5 rating from 627 installers reflects consistent performance across varied project types.
Installation accuracy depends on equipment selection rather than chance. The right jig ensures properly aligned pulls and centered doors throughout your project.
Troubleshoot Common Shaker Placement Mistakes
Even with a solid jig in hand, I’ve still managed to botch placements that looked perfect on paper but wonky on the actual cabinet. I once drilled four holes before realizing my tape measure was flipped to metric. Here’s what I’ve learned about cabinet hardware placement:
Even with a solid jig in hand, I’ve still managed to botch placements that looked perfect on paper but wonky on the actual cabinet. I once drilled four holes before realizing my tape measure was flipped to metric.
- Always run a painter’s tape test before committing. Stick that pull on, step back, and squint.
- Centered hardware means actually centered, not “eyeball close enough.”
- Check alignment across every single door. Symmetry prevents mismatched installations.
- Wider drawers need two pulls, about 16 inches apart, or you’ll get that sad droop effect.
For traditional shaker doors, keep pulls 2.5 to 3 inches from the top. Bottom-row hardware requires four inches up, minimum. Mixed hardware should match bigger pulls to taller doors. This prevents visual inconsistency across your cabinet.




