
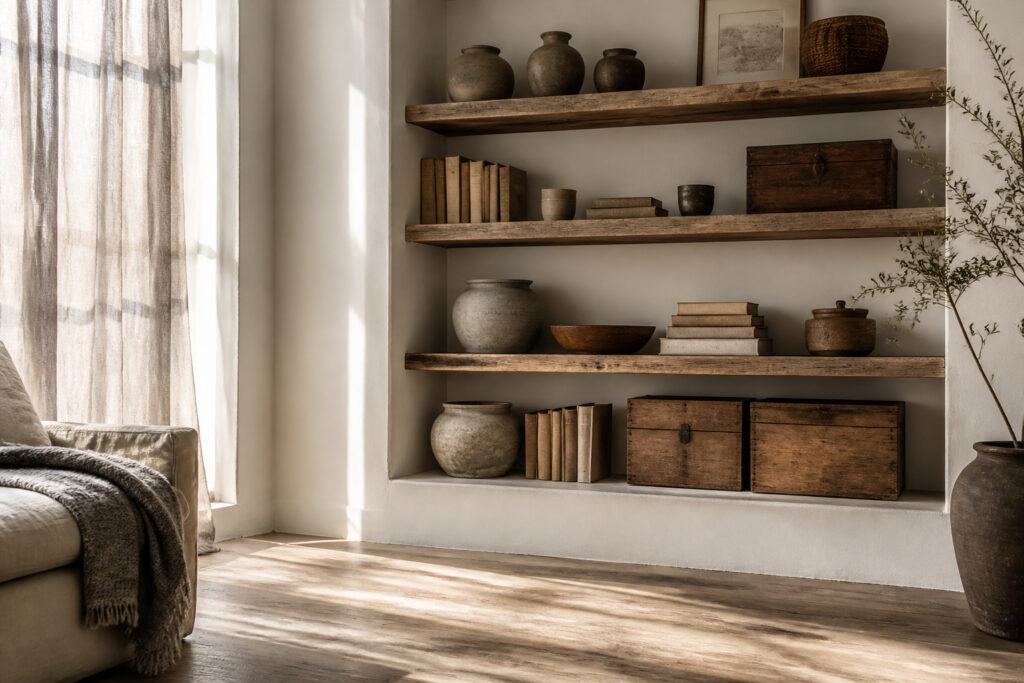
1. Heavy-Duty Utility Shelves
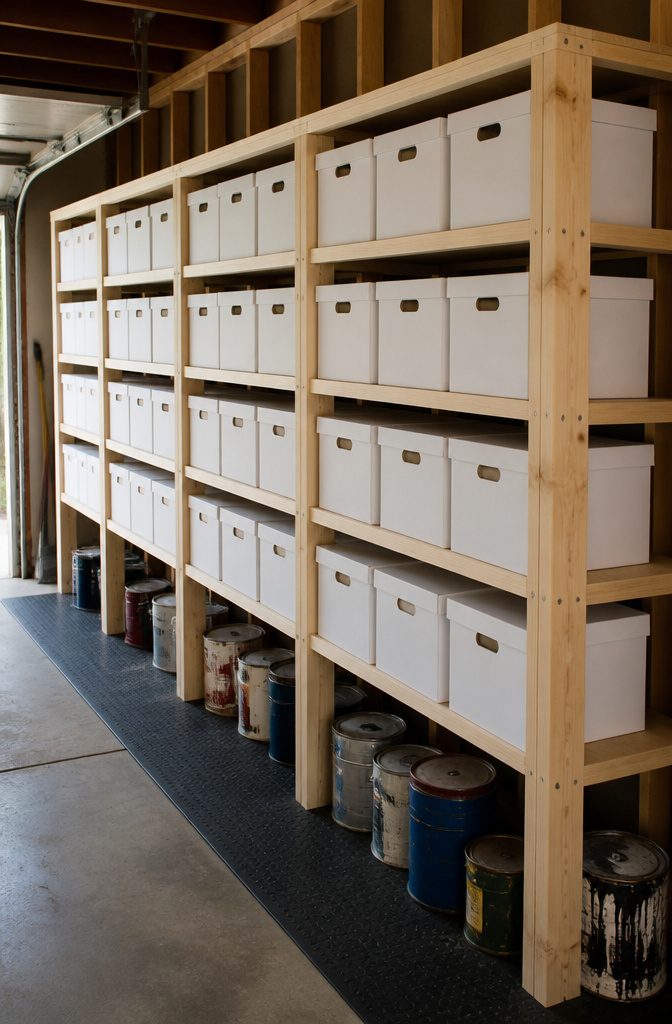
Store-bought utility shelving wobbles under a full paint can or costs enough to make a weekend project feel like a showroom mistake.
2x4s and a sheet of plywood build something that actually holds the weight. I size the shelves 24 inches deep so standard records storage boxes, about $4 each, slide in with no overhang.
The uprights are 2x4s, the horizontals are 2x2s screwed to the back with pairs of 2-1/2-inch wood screws, and the shelf surface is 1/2-inch plywood, MDF, or OSB ripped into strips and screwed across to tie the frames together.
Plywood wins if the space sees moisture; MDF sags under dampness and OSB swells at the edges.
Assembly is right-angle marks and screws, no brackets, no hardware store puzzle. The whole unit anchors to exposed studs if you have them, or to the wall with heavy lag bolts if you do not.
2. Narrow DIY Storage Shelves
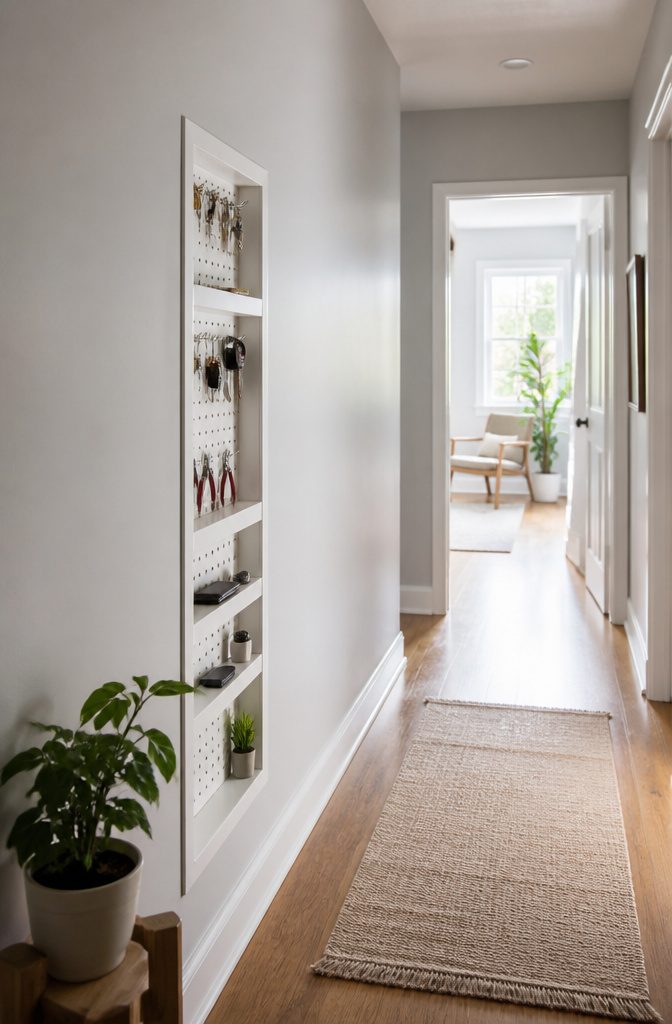
The narrowest storage shelving ideas work by slipping into the wall itself rather than jutting out from it.
A recessed cabinet built from 1x4s measuring 3-1/2 inches wide fits standard 2×4 stud walls finished with 1/2-inch drywall, though you will need to adjust that frame depth if your walls are different.
Measuring the recess starts with locating studs and cutting a 6-inch-square inspection hole to check for pipes or wiring with a flashlight and small mirror.
Once you find a clear cavity, mark the full opening and cut it out, then subtract 1/4 inch from both height and width to get your cabinet’s outer dimensions.
That small gap lets you slip the unit in and level it before nailing trim to the studs.
Shallow depth matters most in hallways and odd corners where every inch of floor space counts. A 3-1/2-inch-deep frame gives you enough room for small items without the cabinet blocking traffic or bumping elbows in tight turns.
I would add a 1/4-inch pegboard back rather than solid plywood, since the holes let you hang keys or small tools on pegboard hooks and turn dead wall space into actual utility.
3. Behind-the-Door Storage
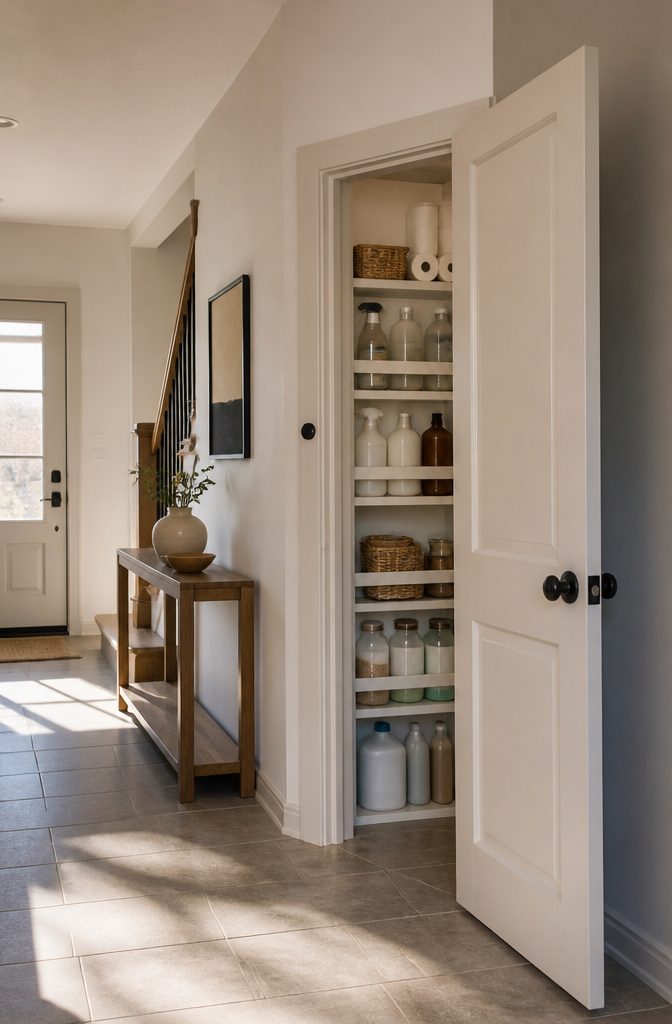
The six inches between a door swing and the wall is dead space until you build into it.
I like shallow shelves here because the door itself becomes a cover: open it, and supplies appear; close it, and the clutter vanishes.
The trick is subtract one inch from the hinge-to-wall distance and treat that as your absolute depth limit. Anything deeper and the door knocks against the shelf edge or the items on it.
A 1×4 frame with 1×2 hanging strips top, bottom, and center gives you a rigid box that mounts straight to studs with 2-1/2-inch wood screws.
Metal shelf standards on the sides let you adjust the height, and a 1×2 trim piece across the front keeps the shelves from sliding off their clips. A rubber bumper on the door frame protects the paint.
Cleaning bottles, pantry overflow, or the bathroom extras that never fit under the sink all sit neatly here.
The shallow depth forces you to keep only what you actually use, which, in my experience, is the only organizing system that survives a weekend install.
4. Joist Storage Space
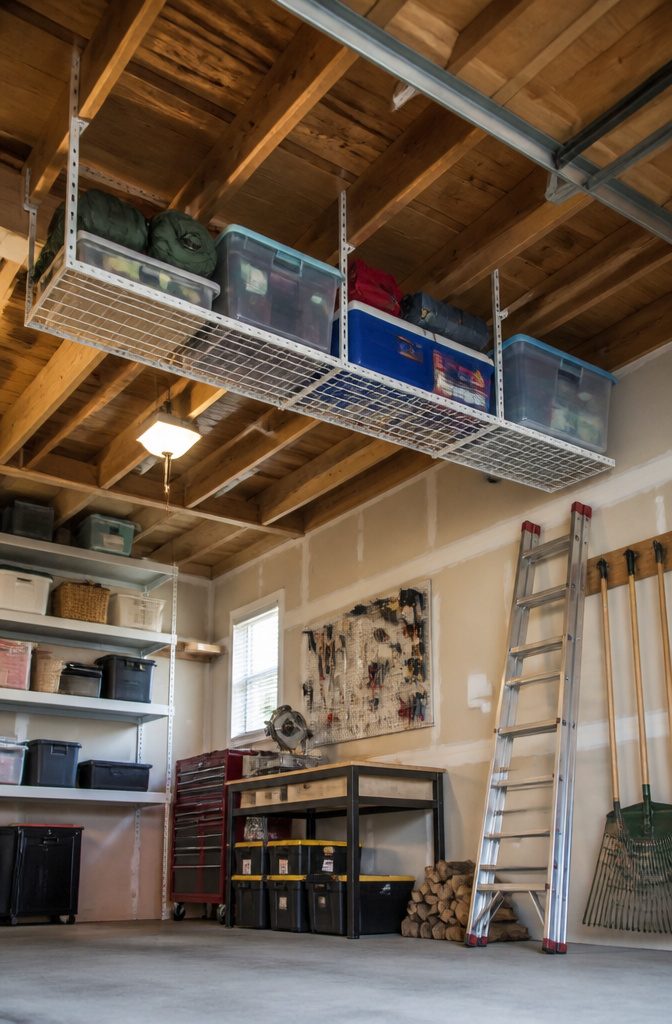
The gap between basement or garage joists is dead space that fills with cobwebs and nothing else.
Wire shelving screwed to the underside of that framing turns it into storage that does not collect dust, since the open grid lets debris fall through instead of settling on top.
An 8-foot by 16-inch length spans most standard joist bays with a pack of plastic clips to lock it in place.
This is seasonal territory, not daily use.
Holiday bins, camping gear, or the spare fan you pull out in July belong up there. The overhead reach and the ladder work required make it a poor choice for anything you touch weekly.
Lightweight plastic bins are the load limit I would trust; a full bin of books or tools is asking the clips and the joist screws to do more than they should.
If the joists are exposed, the install is straightforward.
If they are already drywalled, the project changes completely, and this idea stops making sense. Check before you buy the shelving.
5. Closet Nook Shelves
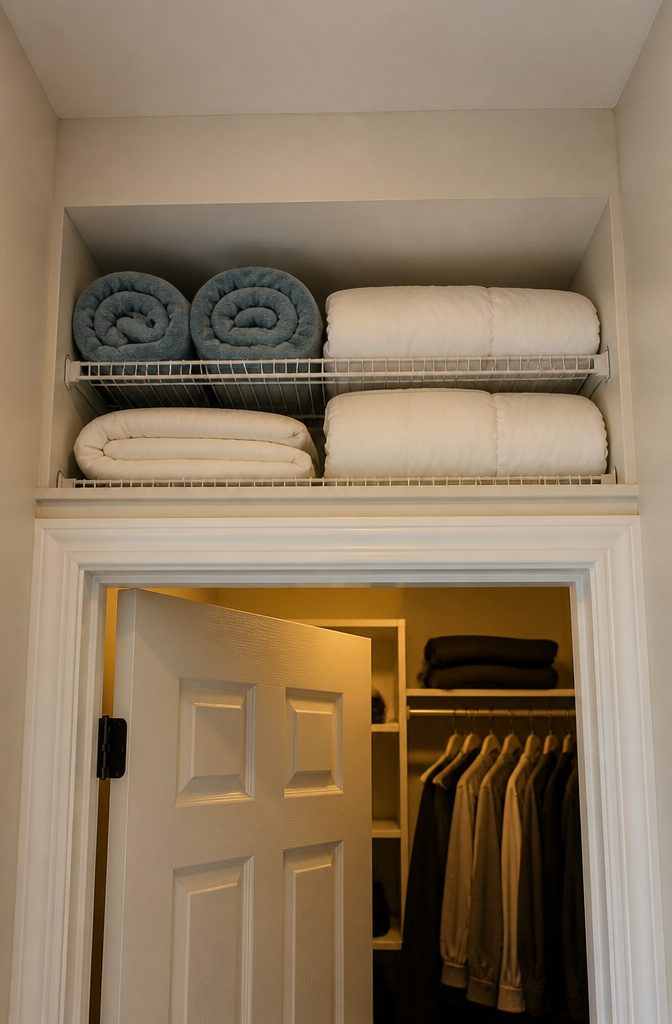
The dead space above a closet door or beside the header is usually just painted drywall that collects dust.
In my last rental, I measured the cavity above the header and found fourteen inches of usable height; wire shelving cut to fit turned it into storage for off-season bedding I rarely touched.
Subtract 3/8 inch from the actual width when you order the cut, or the shelf will bind against the framing and you will fight it all afternoon.
End mounting brackets and plastic clips are the hardware you need for each shelf; the clips lock the front edge so the whole thing does not tip when you load it.
The recessed ends of closets work the same way. Measure depth as well as width, since some nooks are shallower than the twelve-inch standard and your storage box has to match what the shelf can actually hold.
A second shelf above the existing one is the same principle applied vertically. Twelve-inch shelving runs in standard lengths at most home centers, and you cut supports to whatever height keeps the top shelf reachable.
I would go sixteen inches for the supports if you want a safe step-stool height, but the placement is your call.
Drywall anchors handle the ends if you miss the stud; middle supports keep the span from bowing once you load it with spare towels or that vacuum you use twice a year.
6. Shoe Storage Booster Stool
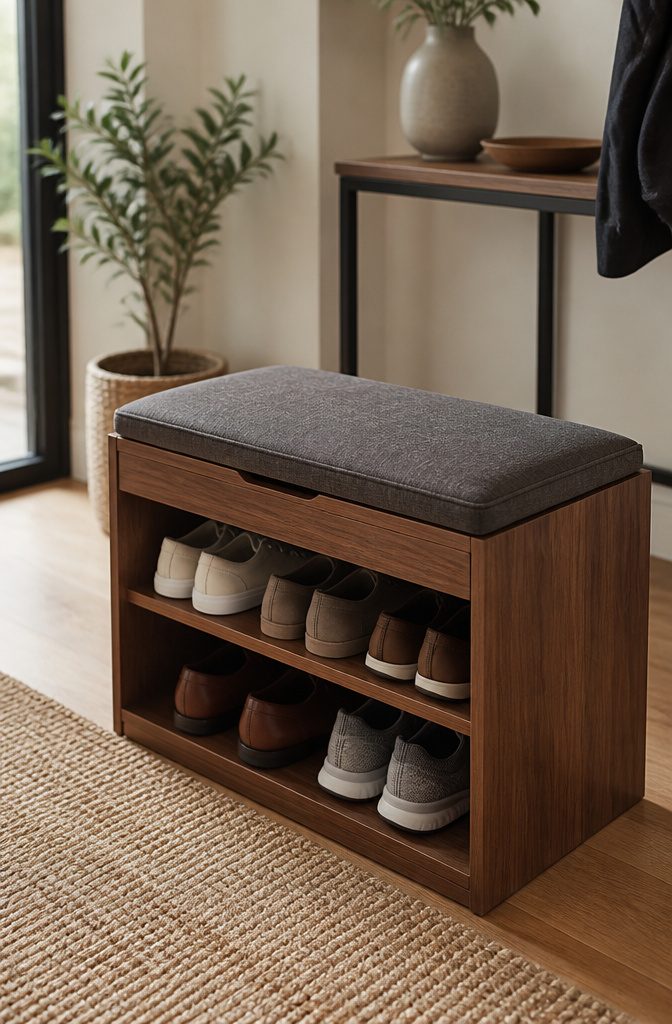
A shoe storage booster stool gives you somewhere to sit while you lace up and a place for the shoes themselves, all in a footprint that reads as one piece of furniture.
The seat sits high enough, around 18 to 20 inches, that most adults can stand from it without using their hands.
That height also leaves room below for a pull-out drawer or a tilt bin deep enough for a pair of sneakers or low boots.
The surface matters more than it looks. A cushion top invites you to stay seated longer than a hard lid, but it adds bulk and can hold moisture from damp shoes stored underneath.
A wood or laminate seat with a slight bevel at the front edge is easier to wipe clean and still comfortable for the two minutes you spend tying laces.
If the compartment opens from the front, you can access shoes without moving whatever you set on top. A top-lifting lid forces you to clear the seat every time, which gets old fast in a household with kids.
Entryways where a bench and a shoe rack fight for the same wall are the obvious spot. A pair of these stools under a slim console table gives two people seating and keeps the floor clear.
The tradeoff is capacity: one stool holds two to three pairs at most, so a family of four still needs a second tier of shelving somewhere else in the entry.
For renters, the small scale means it moves with you and fits odd nooks a built-in bench never would.
7. Stacked Recycling Tower
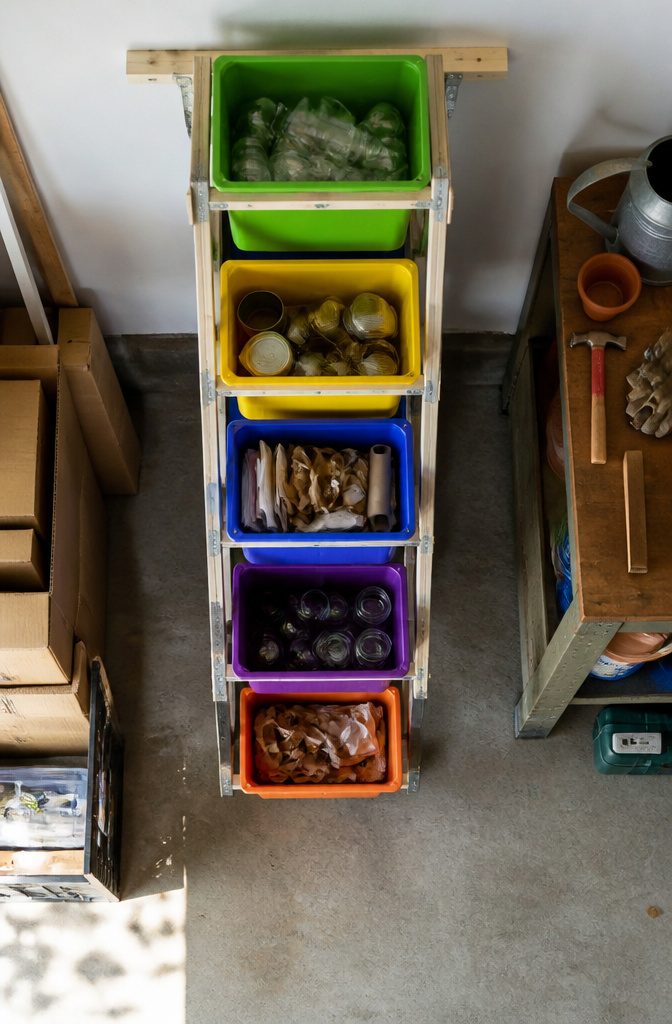
A recycling tower built from six 2x2s and five plastic bins takes up about the same footprint as a single kitchen trash can while sorting five streams vertically.
The frame is sized to containers measuring 14-1/2 inches by 10 inches across the lid and standing 15 inches tall, which lands right at standard trash can height.
You are not bending down to a low bin or spreading five containers across the floor.
Five plastic containers, six 2x2s and screws and one hour’s work are all it takes to put together this space-saving recycling storage rack. The frame fits containers that have a top that measures 14-1/2 inches x 10 inches and are 15 inches tall.
That hour assumes you have a saw and a drill on hand. The 2x2s form a simple ladder frame with rails that the bin lips rest on, so the bins slide out like drawers rather than lifting from above.
I would build the tower against a wall rather than freestanding; the narrow base makes it tippy until the lower bins are weighted.
8. Two-Story Closet Rod
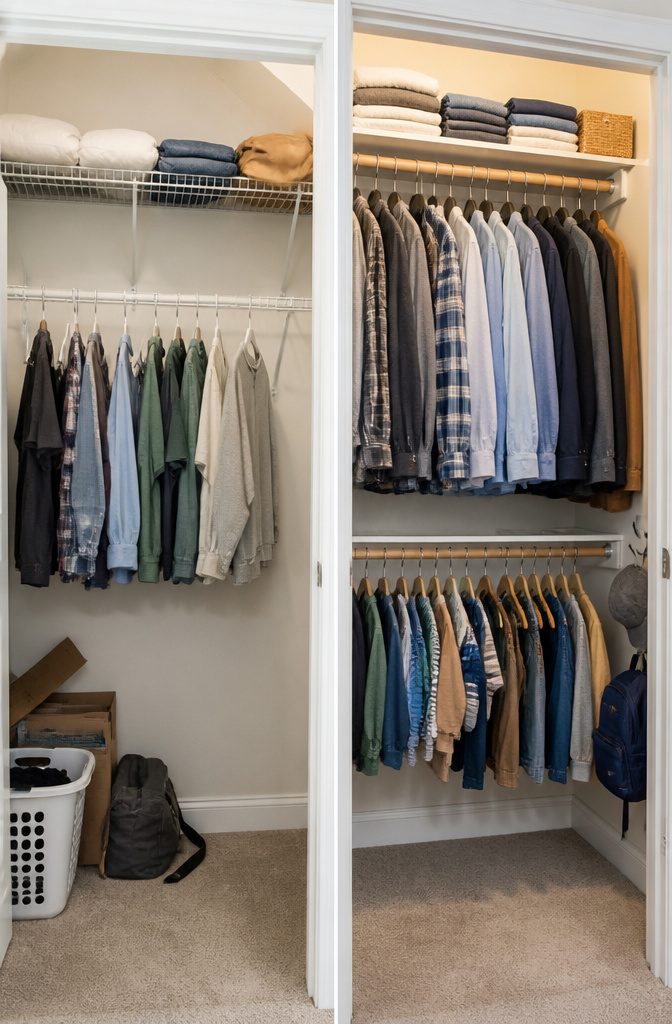
Most closets waste the top half of their wall space on a single rod and a shelf you cannot really reach. A second rod changes the math completely, and the hardware costs less than a takeout dinner.
The move works when your existing rod sits at least 66 inches off the floor.
That leaves room to mount a lower rod with its top at 35 inches, which gives you two levels of hanging space: shirts above, pants or shorter items below. Metal closet brackets and a matching rod length are all you need.
Space those brackets no more than 32 inches apart, and hit studs on the back wall if you can. A level keeps the row straight; drywall anchors fill in where the framing misses.
If you would rather keep the floor clear for shoes or a hamper, skip the lower rod and add a second shelf above the existing one instead.
Twelve-inch shelving runs at most home centers, and end supports cut to 16 inches will carry it.
Mount the new shelf high enough that you still have headroom below for hangers to swing, but low enough that you can actually reach the folded items you store up there.
The bottom shelf should sit taller than the rest if you plan to park heavy or bulky items you do not want to lift overhead.
Either way, you are using vertical space that was already yours. The closet just needed another story.
9. Back-of-Door Organizer
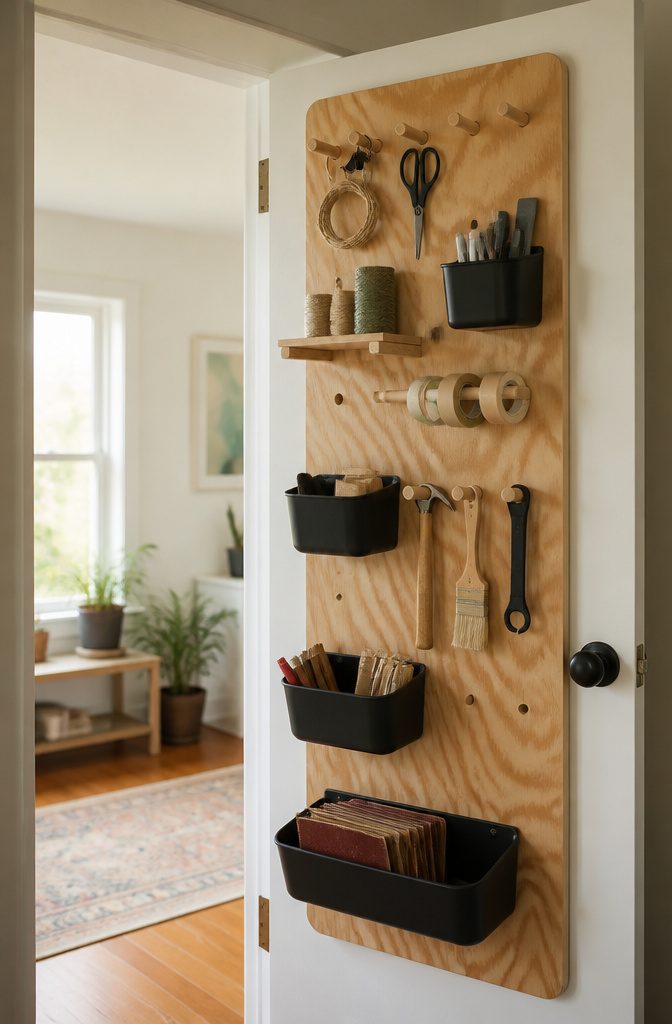
A 3/4-inch plywood panel screwed to the back of a door turns dead space into real storage, and it handles weight that over-the-door hooks cannot.
The plywood gives you a solid mounting surface for pegs, small bins, or custom cutouts sized to specific tools or supplies. Construction adhesive helps on hollow-core doors where screws alone would strip out.
Cut the panel three or four inches shy of every edge so the doorknob, hinges, and frame still clear when the door swings.
That gap is the main difference from shallow behind-the-door shelves, which sit proud of the door face and eat into the room.
The plywood mount stays flat, so it works in tight spots where a shelf would stick out too far and snag traffic.
Capacity is the other split.
A shelf holds what fits its depth. The plywood backing lets you mix hooks, magnets, and bins in whatever pattern matches your actual clutter, and you can reconfigure without patching holes in the door itself.
10. Double-Decker Closet Rod
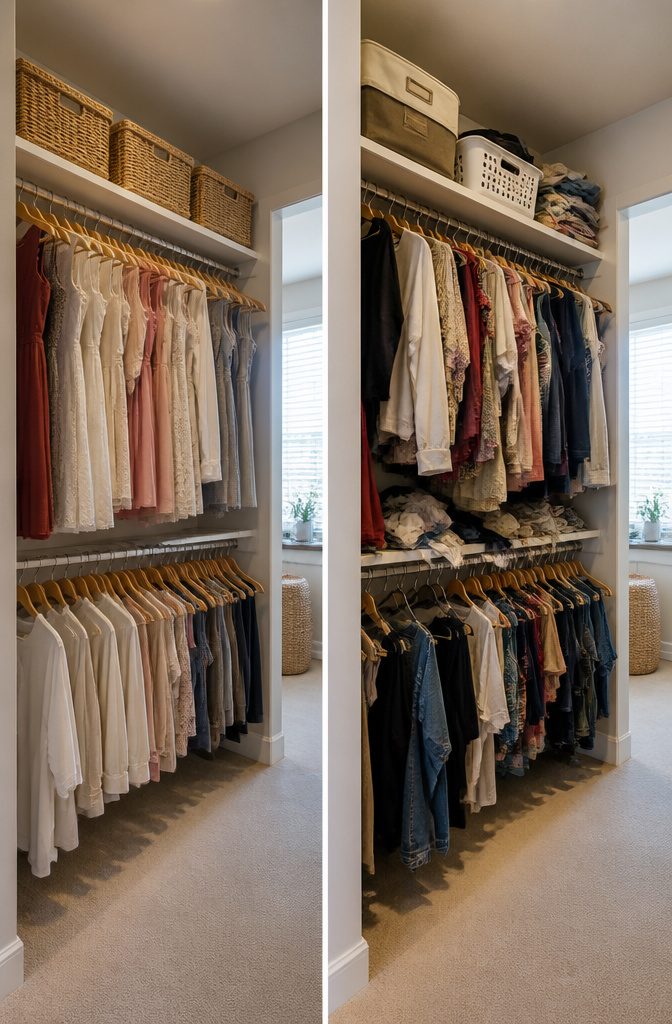
A second closet rod mounted below the first turns the same footprint into two levels of hanging space, which matters most in closets where shirts and blouses already stop well above the floor.
The existing rod needs to sit at least 66 inches from the floor to leave room underneath; the lower rod then goes about 35 inches up, a height that clears most adult shirts and leaves the upper rod for longer items or whatever still fits.
Children’s clothes run shorter, so the lower rod works almost anywhere their closets are concerned.
Blouses and folded slacks land there too. The trick is not to overload the original rod by hanging the new one from it.
Metal brackets screwed into wall studs carry the weight instead, spaced no more than 32 inches apart and leveled across the top before the rod drops in.
That keeps the first rod from bowing and gives both levels a solid frame to bear the load.
11. Glass Shower Shelf
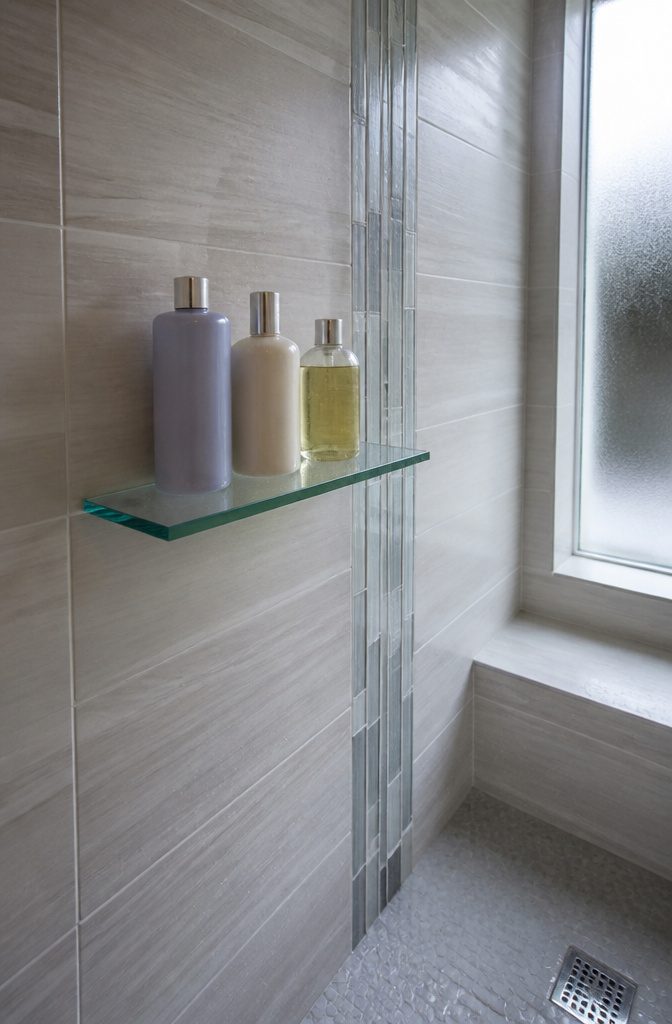
Tempered safety glass at 3/8 inches thick and 12 inches deep carries shampoo bottles without the flex that thinner acrylic shows after a few hot showers.
The tempering matters more in a wet environment than people assume: if it ever breaks, it crumbles into granules instead of the long shards that standard glass sends falling toward bare feet.
I would not hang one over a tub without that rating.
Mounting into tile or backer board means drilling slowly with a masonry bit and stopping the moment you feel the resistance change, before you punch through into the hollow behind.
The bracket uses two screws; if the stud or solid blocking sits somewhere inconvenient, toggle bolts spread the load across the wall instead of concentrating it at those two points.
The glass itself hangs on cables, so the bracket takes the torque and the shelf simply rests there.
The cable bracket system keeps the visual footprint narrow, which is the whole point in a tight shower niche. A 12-inch depth catches most bottles without the overhang that bumps elbows in a 36-inch stall.
Materials That Hold Up
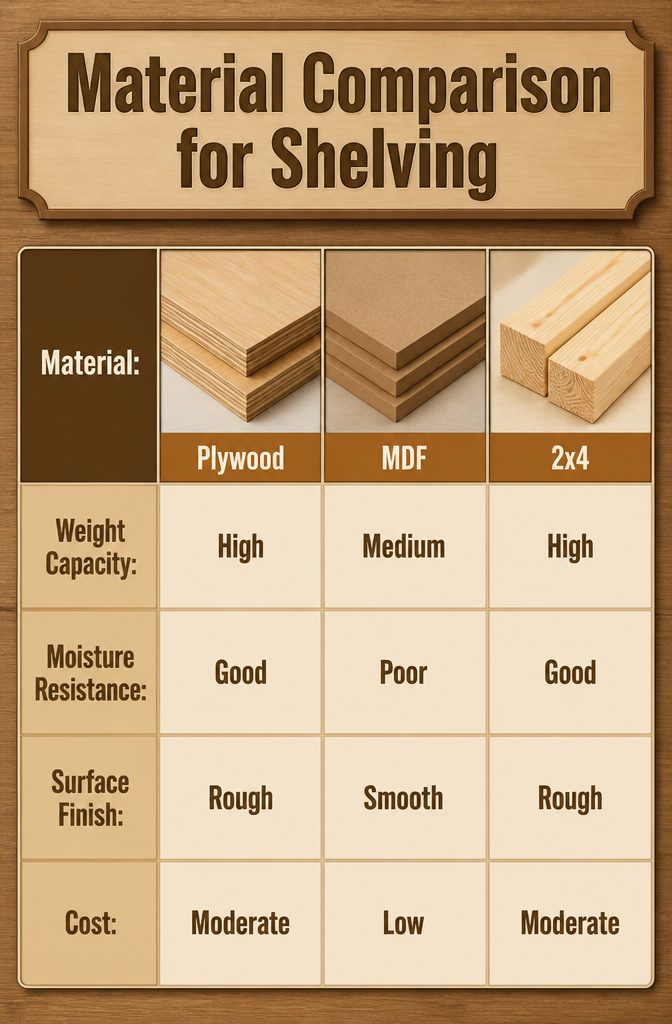
Plywood carries weight without sagging, which is why it shows up in every garage build I come across. A half-inch sheet ripped into 16-inch strips will hold paint cans and power tools across a 2×4 frame without drama.
MDF costs less and paints to a smooth, furniture-grade finish, but set it anywhere damp and it swells like a sponge; keep it for bedroom built-ins or dry closets where the look matters more than the load.
Two-by-fours are the muscle, not the surface: uprights, frames, the skeleton that takes the torque when you stack storage boxes floor to ceiling.
The grade stamp on a 2×4 tells you more than the price tag. "No. 2" or "Stud" grade is plenty for shelving frames; "No. 1" looks prettier but the strength difference is not worth the upcharge for something you will never see.
Skip anything marked "Utility" or "Economy" for load-bearing work, and check the moisture content stamp while you are at it: "KD" for kiln-dried saves you warping headaches six months later.
Finding Hidden Space
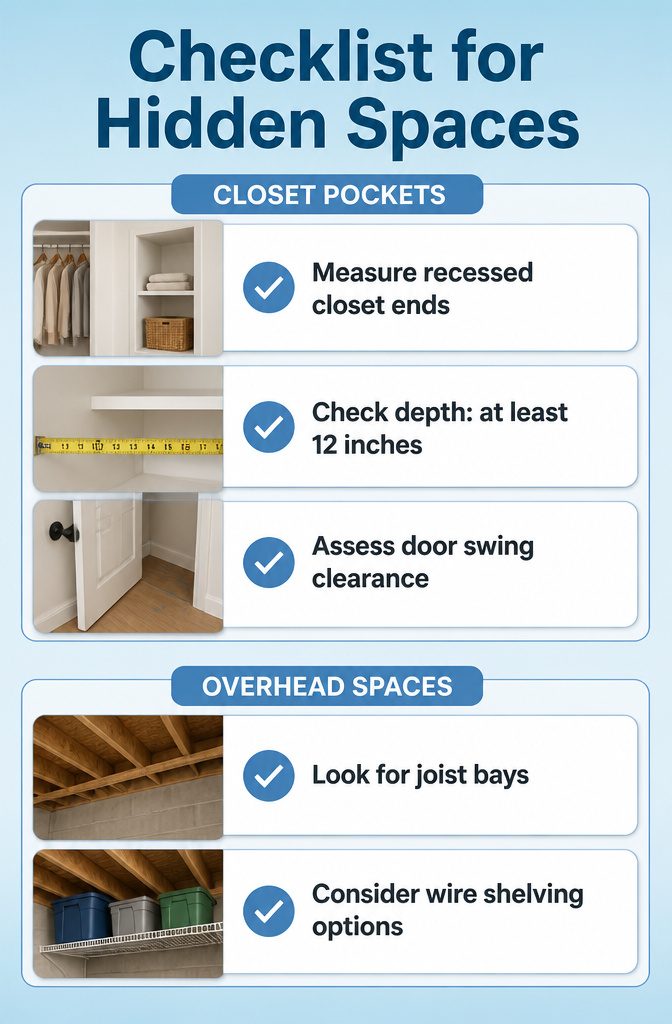
The best storage shelving ideas hide in spots you already walk past.
I started measuring every recessed end of a closet, the kind of pocket that sits behind where the hanging rod ends, and found most run about 12 to 16 inches deep.
That 12-inch mark is the minimum for useful shelf frontage; anything shallower and you’re stacking single rows of spice jars, not bins.
Depth against door swing is where technically possible splits from actually convenient.
A shelf can fit the six inches between a door frame and the corner, but if the door swings 110 degrees, you’re fishing items out with one hand while your hip holds the door.
Measure the arc, then subtract your own standing room.
Joist bays in an unfinished basement or garage ceiling work the same way.
An 8-foot length of wire shelving screwed to the underside buys you 16 inches of depth with no dust collection, but headroom matters more here than in a closet.
Ducking under a shelf is a few seconds of annoyance until it isn’t, until you’re moving a bin and the corner catches your temple.
The useful height is whatever lets you stand straight underneath; the usable depth is whatever the bay already gives you, typically that same 16 inches.
What I Got Wrong
The first shelving unit I ever hung was a simple pine board across the back wall of a rental closet.
I measured the space, bought brackets rated for fifty pounds, and loaded it with sweaters and spare bedding. Within three months the center had dropped almost two inches, pulling the drywall anchors with it.
Bracket spacing matters more than the rating printed on the package. I had set mine three feet apart to save hardware; four brackets across a six-foot span, not five, would have kept the line straight and the wall intact.
Redoing it cost another twelve dollars in brackets and an afternoon patching holes I could have avoided.
A year later I built narrow shelves into the six-inch gap beside a bathroom door, proud of finding usable space in a 1940s floor plan.
What I forgot to check was the swing arc. The shelf edge sat four inches from the jamb, which looked generous until the door opened past ninety degrees and the knob punched a crescent into the front corner.
I trimmed two inches off the depth and lost the spot for rolled hand towels. The lesson cost a replacement board and the time to match the white paint I had already thrown out.
The stud mistake came last winter, installing a rail system in the garage.
I assumed sixteen-inch centers, drilled, and hit open wall twice in a row. The house was framed at twenty-four inches on center, common in some mid-century construction, and my vertical standards landed on nothing solid.
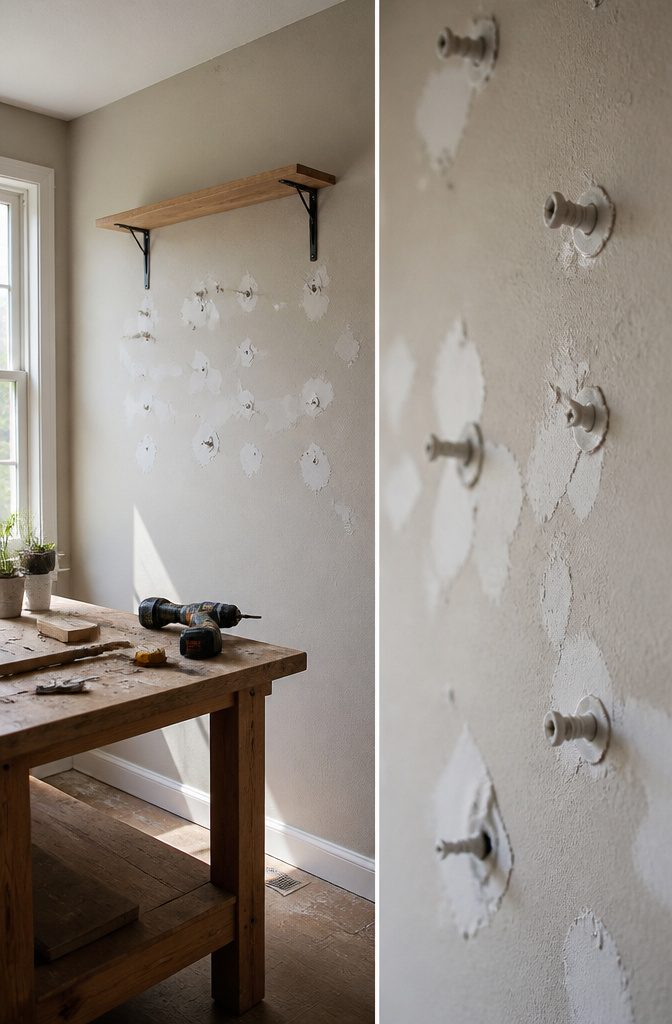
Toggle bolts held for light storage but wobbled under any real weight. I ended up moving the whole rail eight inches left to catch the next stud, leaving four patched bolt holes that still show if the light is right.
Frequently Asked Questions
What are some good storage shelving ideas?
Heavy-duty 2×4 utility shelves, narrow recessed cabinets built into wall cavities, behind-the-door shelves, joist-mounted wire shelving, closet nook shelves above headers, shoe storage booster stools, stacked recycling towers, and double-decker closet rods all make use of tight or hidden spaces.
The best choice depends on whether you need open garage storage, concealed hallway units, or vertical closet expansion.
How do I build my own storage shelves?
Start with 2×4 uprights and 2×2 horizontals screwed together with 2-1/2-inch wood screws, then lay 1/2-inch plywood strips across to tie the frames. No brackets are needed.
Anchor the finished unit to exposed studs or use heavy lag bolts if the wall is finished. Plywood resists moisture, while MDF should stay in dry spaces only.




